Moving into a newly built or renovated home feels exciting. Still, the work is not truly finished until the space is properly cleaned. Construction leaves behind dust, paint splatter, sticky residue, sawdust, cement particles, and small debris that can make the home uncomfortable and even unsafe.
| Why it matters | ||
|---|---|---|
| Remove construction debris | Clear paint cans, off‑cuts, plastic sheeting, and leftover materials so dust and grime are easier to clean. | |
| Do a dry “first pass” | Vacuum with a HEPA filter and microfiber cloths; brush ceiling corners, skirting boards, switches, and sockets. | |
| Deep‑clean surfaces | Wipe down walls, cabinets, doors, and appliances with a gentle, surface‑appropriate cleaner to remove fine dust and smears. | |
| Clean floors thoroughly | Vacuum first, then mop with a non‑abrasive, pH‑balanced cleaner; adjust method for wood, tile, or laminate. | |
| Sanitize kitchens and bathrooms | Scrub sinks, tubs, showers, counters, and tiles; use mild disinfectant on food‑prep areas and faucets. | |
| Tackle hidden dust | Vacuum vents, behind furniture, inside cupboards, and around light fixtures; clean or replace AC and air‑filter housings. | |
| Final detailing | Wipe glass, mirrors, and windows; polish handles and hardware; check for streaks and missed spots in daylight. |
Knowing how to clean a new house after construction helps homeowners move into a safe and spotless environment. It also protects your new floors, cabinets, glass, and fixtures from damage caused by leftover debris.
Essential Supplies Needed for Post-Construction Cleaning

Cleaning Equipment Checklist
Before you start, gather the right tools. Good equipment saves time and gives better results.
- HEPA vacuum for fine dust
- Microfiber cloths for gentle wiping
- Mop and bucket for floors
- Broom and dustpan for larger debris
- Extension duster for ceilings, fans, and corners
Recommended Cleaning Products
Use cleaners that match the surface. A strong cleaner is not always the best choice for a new home.
- Glass cleaner for windows and mirrors
- Disinfectant for kitchens and bathrooms
- Degreaser for sticky grime
- Mild soap solution for general cleaning
- Wood-safe cleaner for hardwood surfaces
Safety Gear
Post-construction cleaning can stir up dust, so protect yourself while you work.
- Gloves
- Dust mask
- Safety goggles
- Knee pads
Eco-Friendly Cleaning Options
If you want safer cleaning choices, simple products can help.
- Vinegar solution for light residue
- Baking soda for odor control
- Non-toxic commercial cleaners for daily use
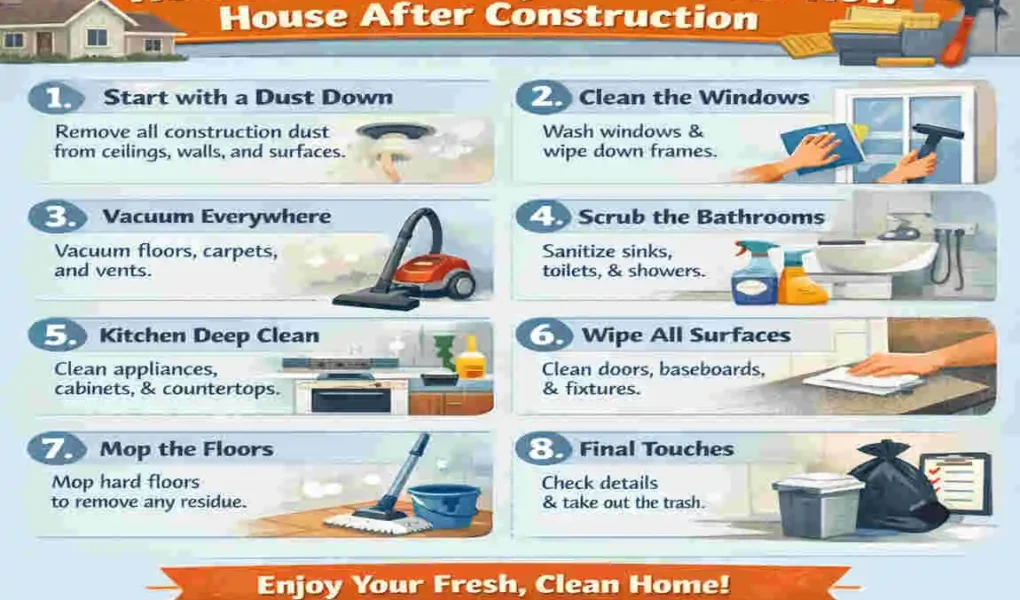
Step-by-Step Guide on How to Clean a New House After Construction
Remove Large Construction Debris
Start with the biggest mess first. Walk through each room and collect nails, wood scraps, plastic pieces, cardboard, tape, and packaging.
Place recyclable items in the correct bin and dispose of sharp objects safely. This makes the rest of the cleaning easier and safer.
Start with Dust Removal
Always clean from top to bottom. That way, dust falls onto surfaces you have not cleaned yet.
Begin with ceilings, light fixtures, vents, shelves, and corners. Then move to walls, baseboards, and window frames. Use a HEPA vacuum where possible, as it traps fine dust rather than blowing it back into the air.
This is one of the most important DIY post-construction cleaning steps because construction dust can hide in so many places.
Clean Windows and Glass Surfaces
Windows often hold adhesive residue, paint specks, and a layer of dust. Remove stickers and leftover glue carefully.
Use a glass cleaner and a microfiber cloth to polish mirrors, windows, and shower glass. Do not forget the window tracks and frames, because they often collect hidden dirt.
Deep Clean Floors
Floors need special attention because they catch dust, sand, and leftover building material.
Hardwood Floors
Use a wood-safe cleaner and a damp mop, not too much water. Too much moisture can damage fresh flooring.
Tile Floors
Sweep first, then mop. If grout haze remains, use a gentle tile cleaner. This helps your floors look bright and clean.
Carpets
Vacuum slowly and thoroughly. If the carpet still looks dusty or dull, consider steam cleaning. Carpet fibers hold onto construction dust more than hard surfaces do.
Sanitize Kitchens and Bathrooms
These rooms need deep cleaning because people use them every day.
Wipe down countertops, clean cabinets inside and out, scrub sinks, tubs, and toilets, and disinfect touch points like handles and switches. A clean kitchen and bathroom make the whole home feel ready for living.
Clean Light Fixtures and Appliances
Construction dust settles on ceiling fans, lights, vents, and appliances. Wipe them carefully with a microfiber cloth or a damp cloth with mild soap.
Also clean the inside of cabinets and drawers. Dust often hides there even when the outside looks spotless.
Replace HVAC Filters
This step is often forgotten, but it matters a lot. Construction dust can enter the air system and spread throughout the house.
Replace the HVAC filters after cleaning. This improves air quality and helps keep dust from returning to clean rooms.
Final Touches and Inspection
Finish with a room-by-room walkthrough. Look for hidden dust, leftover tape, smudges, and odors.
Open windows if possible to bring in fresh air. Do one last check under sinks, behind doors, inside closets, and around vents. This final step completes the post construction cleaning checklist.
Room-by-Room Post-Construction Cleaning Checklist
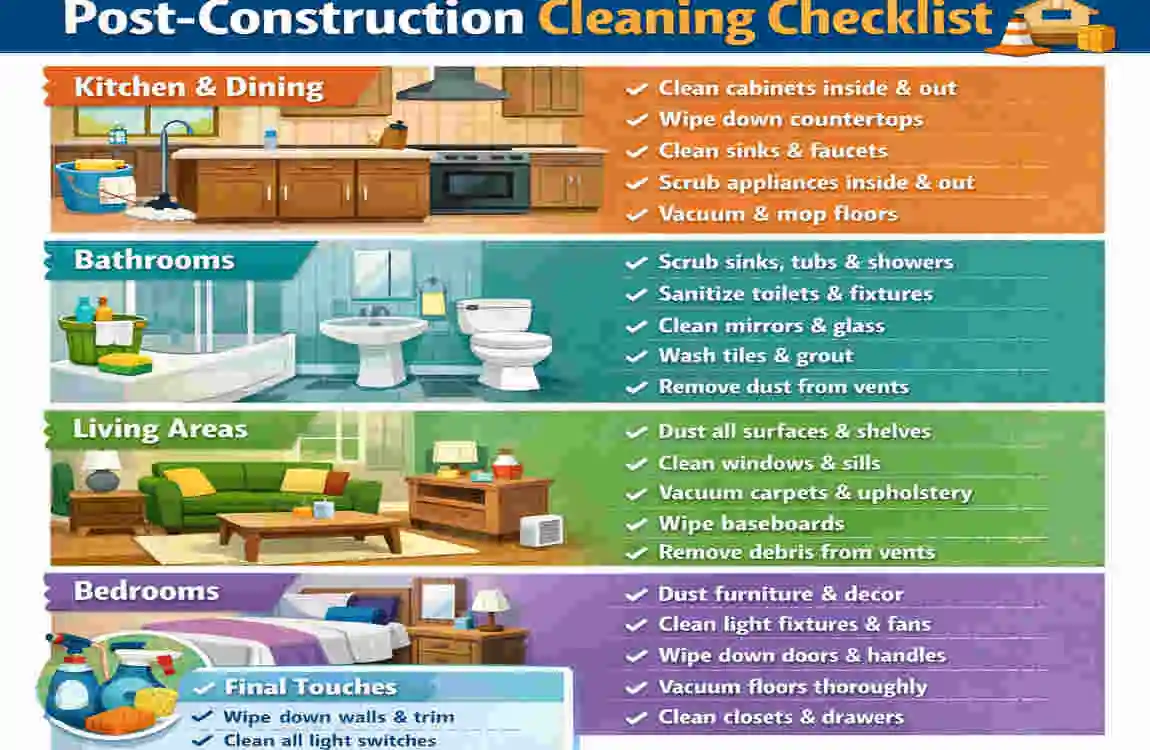
Room What to Clean
Living Room Dust furniture, vacuum upholstery, clean windows
Kitchen Sanitize countertops, clean appliances, remove cabinet dust
Bathroom Disinfect fixtures, remove grout residue, polish mirrors
Bedroom Vacuum floors, dust closets, clean ceiling fans
Garage/Basement Remove debris, sweep floors, organize tools
Common Post-Construction Cleaning Challenges and Solutions
Removing Fine Dust
Fine dust is the hardest part of cleaning a newly built house. It spreads easily and returns if you clean too quickly.
Use a HEPA vacuum, wipe surfaces more than once, and clean from top to bottom. A single pass is usually not enough.
Getting Rid of Paint Splatter
For small spots, use a plastic scraper instead of a sharp blade. That lowers the chance of scratching new surfaces.
If needed, use a mild solvent made for the surface you are cleaning. Always test a small area first.
Eliminating Construction Odors
Fresh paint, glue, and building materials can leave a strong smell. Open windows, run fans, and use air purifiers if available.
Baking soda can also help absorb odours in closed spaces, such as closets or cabinets.
Cleaning Sticky Adhesive Residue
Sticky tape marks and label glue are common after construction. Warm water and a safe adhesive remover usually work well.
Take your time. Rushing can damage the surface underneath.
DIY Cleaning vs Hiring Professional Post-Construction Cleaners
Benefits of DIY Cleaning
If you want to save money, DIY cleaning is a good option. It also gives you more control over every room.
You can clean at your own pace and focus on the areas that matter most to you.
Advantages of Professional Cleaning Services
Professional cleaners work faster and often bring specialized tools. They know how to handle heavy dust, stubborn residue, and large homes.
If you need a deeper result, professional post construction cleaning may be worth the cost.
When You Should Hire Professionals
Hiring help makes sense when:
- The house is large
- The renovation created heavy dust
- You have a tight moving deadline
- You want a faster, more detailed finish
Expert Tips to Keep Your New House Clean Longer
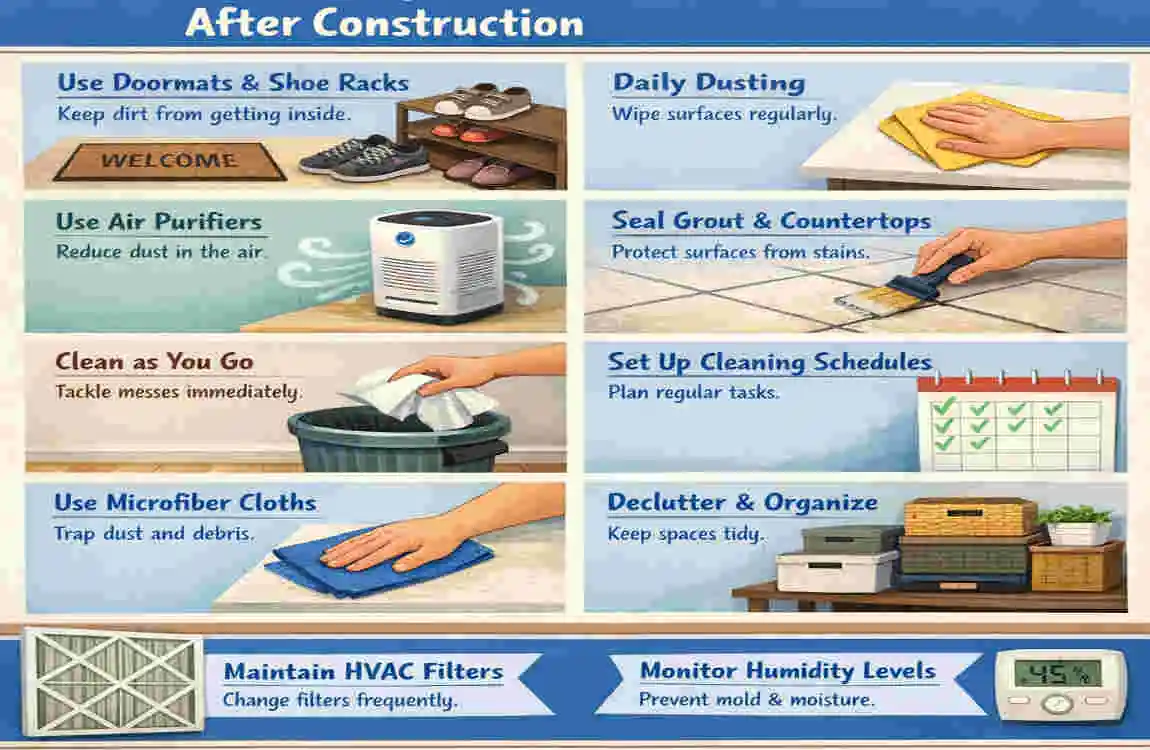
Use Entry Mats
Place mats at entry points to reduce dirt tracking. This simple step helps keep floors cleaner every day.
Maintain HVAC Systems
Change filters regularly and keep vents clear. Good airflow helps control dust buildup.
Clean in Stages During Construction
If possible, clean small messes as the work progresses. It is much easier than facing a huge cleanup at the end.
Schedule Regular Deep Cleaning
Even after move-in, a regular deep clean helps prevent dust from building up again.
Mistakes to Avoid When Cleaning a New House After Construction
Using Harsh Chemicals on New Surfaces
Strong chemicals can damage fresh finishes. Always choose cleaners that match the surface.
Skipping Air Vent Cleaning
Vents collect dust quickly and spread it throughout the house if left unchecked.
Cleaning Floors Before Dusting
This causes dust to fall back onto already cleaned floors. Always dust first.
Forgetting Hidden Areas
Do not skip:
- Baseboards
- Light fixtures
- Window tracks
These small areas often hold the most dust.
Frequently Asked Questions
How long does post-construction cleaning take?
It depends on the size of the home and the amount of dust left behind. A small home may take a day, while a larger house may take longer.
What is the best way to remove construction dust?
Use a HEPA vacuum, microfiber cloths, and a top-to-bottom cleaning order. This helps stop dust from spreading.
Can I clean a newly built house myself?
Yes, if the dust level is light to moderate. For heavy debris or large homes, professional help may be better.
How much does post-construction cleaning cost?
Costs vary by home size, the amount of debris, and whether you hire professionals. Bigger homes and heavier messes usually cost more.
Should air ducts be cleaned after construction?
If a lot of dust entered the system, duct cleaning can help improve air quality. At minimum, replace the filters.
What cleaning products are safest for new surfaces?
Use mild soap, wood-safe cleaners, glass cleaner, and non-toxic products when possible.
How soon can you move into a house that’s just been cleaned?
You can move in once all surfaces are dry, dust is removed, and the home has been checked room by room.