If you are planning a roof repair or a full roof replacement, one small choice can make a big difference: the nails you use. Many homeowners focus on shingles, metal panels, or underlayment, but the fasteners holding everything in place matter just as much.
| Factor | Recommended Choice | When This Is Best For Your Home |
|---|---|---|
| Roof covering type | Galvanized steel roofing nails | Standard asphalt shingles and roofing felt in most climates |
| Nail shank type | Ring shank (barbed) | High‑wind areas; better grip in wood decking |
| Nail material | Stainless steel or copper | Coastal / humid areas; slate, tile, or premium long‑life roofs |
| Typical nail length | About 1¼ inch (30–32 mm) | Single layer asphalt shingles over standard wood sheathing |
| Corrosion resistance | Hot‑dipped galvanized or stainless steel | Roofs exposed to heavy rain, pollution, or long service life expected |
| Budget vs durability | Galvanized = economical; stainless/copper = premium | Choose galvanized for cost, stainless/copper if matching a 40–50‑year roof |
Choosing the wrong nail can lead to loose shingles, rust, leaks, or even warranty problems. The good news is that roofing nails are easy to understand once you know the basics. Let’s break it down in simple terms.
Why Roofing Nails Matter in Roof Installation
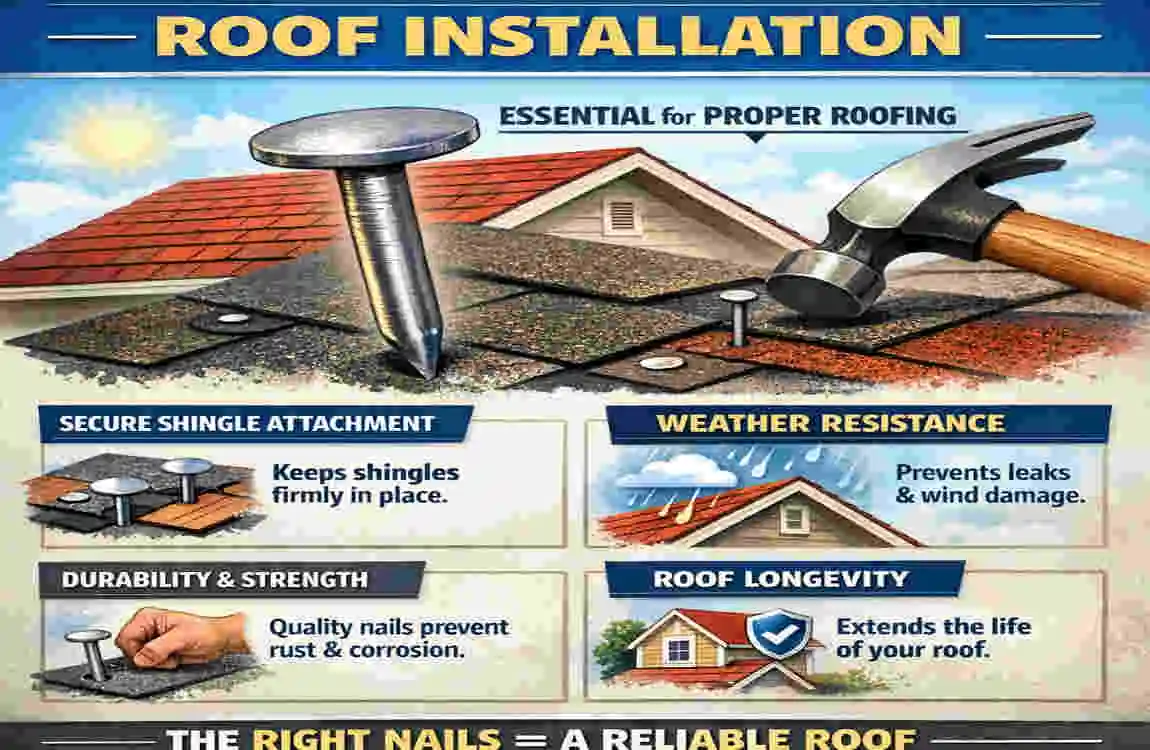
Structural Importance of Roofing Nails
Roofing nails do more than hold materials down. They help keep shingles tight against the roof deck, reducing movement in strong windswinds. That tight hold also helps stop water from slipping underneath.
A good roofing nail provides the roof with the support it needs to remain secure in heat, rain, and storms. If nails are too short or too weak, the roof can loosen over time.
Impact on Roof Lifespan
The right nail helps your roof last longer. Corrosion resistance is especially important because nails are exposed to moisture for years. If nails rust, they can stain the roof and weaken the hold.
Nail strength also matters. A strong nail that reaches deep enough into the decking gives better long-term performance.
Safety and Compliance
Most roofing jobs must meet local building codes. Roofing manufacturers also have their own rules. If you use the wrong nail type or size, you may void a warranty.
That is why roofing nails are not just a small detail. They are part of the roof’s safety system.
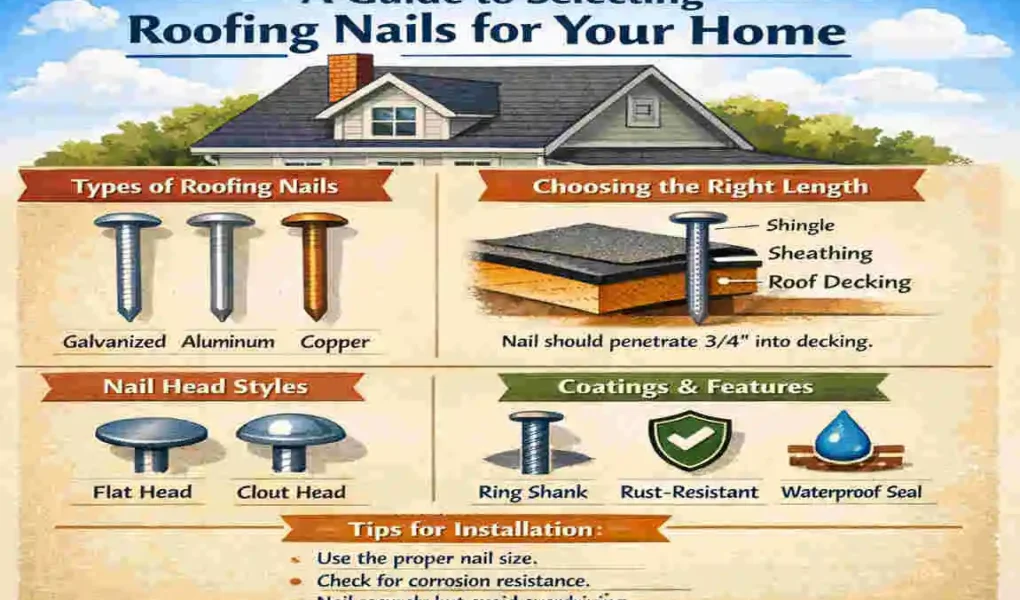
What Type of Nails Are Typically Used for Roofing?
Standard Roofing Nails
Standard roofing nails are the most common choice for asphalt shingles. They usually have:
- A wide flat head
- A short shank
- A corrosion-resistant coating
The wide head helps hold the shingle firmly without tearing it. This is the most common answer to the question, what type of nails are typically used for roofing.
Coil Roofing Nails
Coil roofing nails are loaded into a nail gun in a spiral coil. Roofers like them because they speed up installation on large jobs.
They are a practical choice when you want faster work, but they still need to be the right size and material for the roof.
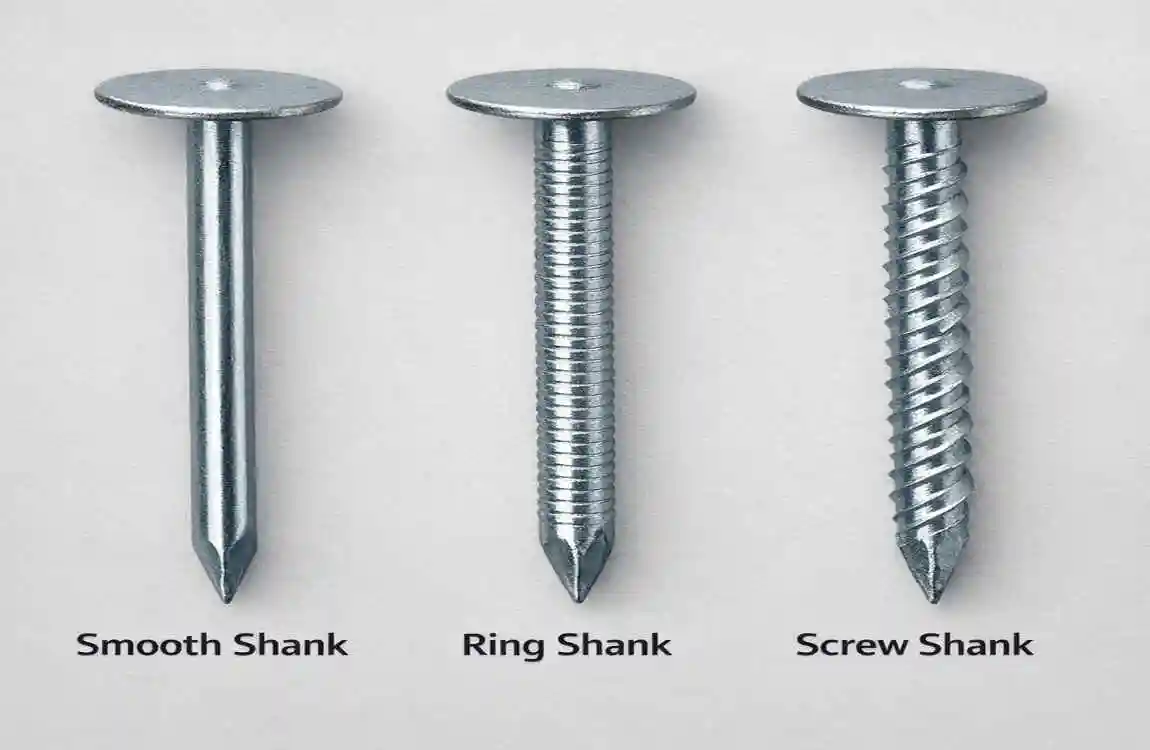
Ring Shank Roofing Nails
Ring shank nails have small rings along the shaft. These rings help the nail grip the wood better.
They are often used in high-wind areas because they resist pull-out better than smooth nails.
Smooth Shank Roofing Nails
Smooth shank nails are simple and affordable. They are common in standard roof work, especially when strong pull-out resistance is not the main concern.
Screw Shank Roofing Nails
Screw shank nails twist slightly into the wood. This gives them extra holding power.
They are usually chosen for projects that require a stronger grip, but they cost more than basic smooth-shank nails.
Quick Comparison
Nail Type Strength Cost Best Use Case
Smooth Shank Medium Low Basic roofing jobs
Ring Shank High , Medium , Windy areas, better hold
Screw Shank Very High, Higher Extra grip and stronger decking
Coil Roofing Nail Varies Medium Fast installation with nail guns
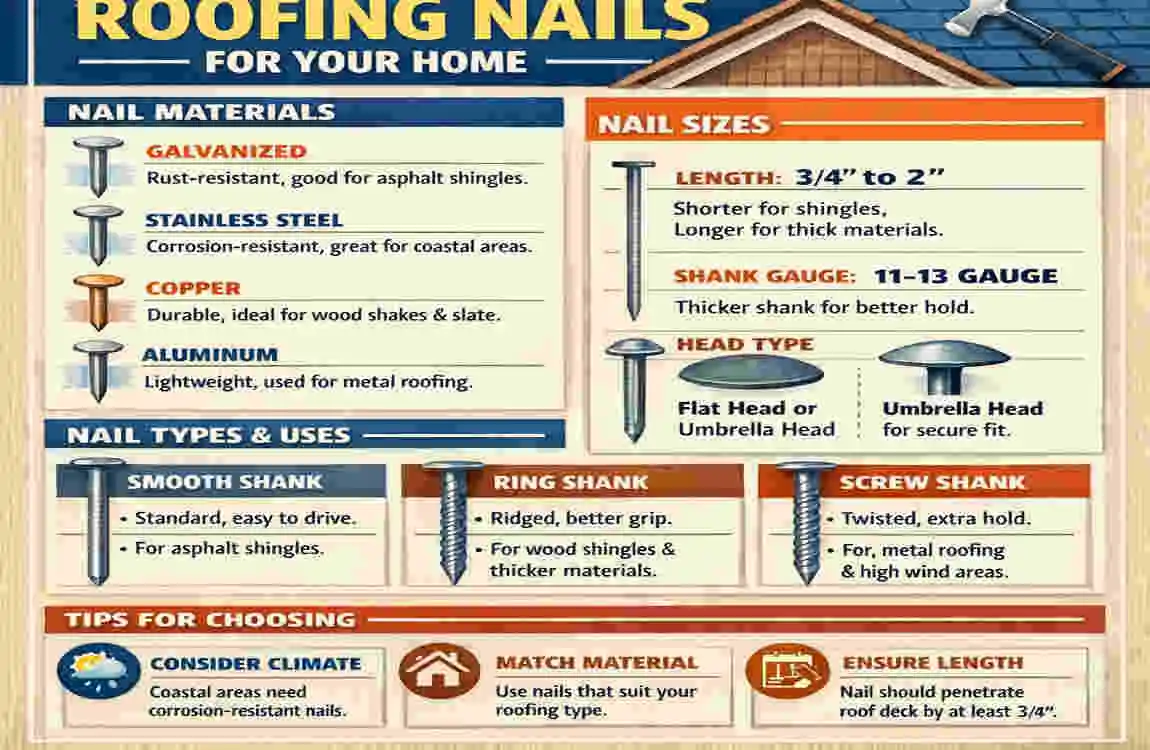
Roofing Nail Materials Explained
Galvanized Steel Roofing Nails
Galvanized roofing nails are the most popular choice. They are coated to help resist rust, which makes them a smart and affordable option for many homes.
If you are comparing galvanized vs stainless roofing nails, galvanized steel usually wins on price. In contrast, stainless steel wins on long-term corrosion resistance.
Stainless Steel Roofing Nails
Stainless steel nails are best for coastal areas, humid climates, and places with heavy moisture. They offer strong rust protection and long life.
They cost more, but they are worth it when the weather is tough.
Aluminum Roofing Nails
Aluminum nails are lightweight and corrosion-resistant. They are not as widely used as galvanized nails, but they can work for certain roofing materials.
Copper Roofing Nails
Copper nails are a Premium choice. They are often used on decorative or specialty roofs, especially when matching copper flashing or other copper roof parts.
They are durable and attractive, but they are much more expensive.
Roofing Nail Sizes and Measurements
Common Roofing Nail Lengths
Roofing nails come in several lengths, and the right one depends on the roof material.
Common sizes include:
- 3/4 inch
- 1 inch
- 1¼ inch
- 1½ inch
For most asphalt shingle jobs, the nail should penetrate the roofing material and go deep enough into the wood deck below.
Nail Head Diameter
The head of the nail should be wide enough to hold the shingle securely. A small head may pull through the material, causing problems later.
Nail Gauge
Gauge refers to the thickness of the nail. A thicker nail is usually stronger, while a thinner nail may be easier to drive in.
How to Match Nail Size to Roof Type
The roofing nail size chart is not one-size-fits-all. The right size depends on the roof type:
- Asphalt shingles: standard roofing nails, often 1 to 1¼ inch
- Wood shingles: corrosion-resistant nails with proper holding power
- Metal roofing: specialty fasteners with weather protection
- Underlayment: Smaller nails may be used, depending on the system
Best Roofing Nails for Different Roof Types
Asphalt Shingle Roofs
For asphalt shingles, galvanized roofing nails are usually the best choice. They are affordable and offer good rust resistance.
The key is proper length. The nail must go through the shingle and into the decking without being too short.
Metal Roofing
Metal roofs need corrosion-resistant fasteners with strong holding power. Stainless steel is often a good option, especially in wet or coastal areas.
Slate Roofing
Slate is heavy and delicate, so it usually needs copper or stainless steel nails. These materials help prevent staining and corrosion.
Wood Shake Roofs
Wood shake roofs should use nails that resist rust and hold securely. Stainless steel and galvanized options are common choices.
Tile Roofing
Tile roofing often needs specialty fasteners because the tiles are heavy. These fasteners must be strong enough to support the weight without damaging the roof system.
Smooth Shank vs Ring Shank vs Screw Shank Roofing Nails
Smooth Shank Nails
Pros:
- Affordable
- Easy to install
Cons:
- Less grip
- Not ideal for high-wind areas
Ring Shank Nails
Pros:
- Excellent wind resistance
- Better holding strength
Cons:
- Harder to remove
- Slightly more expensive
Screw Shank Nails
Pros:
- Maximum grip
- Strong hold in tough conditions
Cons:
- Higher cost
- Not always needed for basic roofing
Roofing Nail Coatings and Why They Matter
Hot-Dipped Galvanized Coating
This is one of the best coatings for rust protection. It creates a strong barrier that helps the nail last longer.
Electro-Galvanized Coating
This is a more budget-friendly coating. It still offers protection, but not as much as hot-dipped galvanized nails.
Vinyl-Coated Nails
Vinyl coating can improve grip during installation. It may also help the nail hold better in the wood.
Cement-Coated Nails
Cement-coated nails are designed for extra holding power. They are often used when a stronger bond is needed.
How Many Roofing Nails Do You Need Per Shingle?
Standard Nail Count
For many basic roofing jobs, 4 nails per shingle is standard.
High-Wind Zones
In areas with stronger winds, 6 nails per shingle may be required.
Manufacturer Recommendations
Always check the shingle manufacturer’s instructions and local code. These rules matter because they affect both performance and warranty protection.
Common Roofing Nail Mistakes to Avoid
Using Incorrect Nail Length
If the nail is too short, it may not reach the deck properly. That can lead to loose shingles.
Overdriving Nails
Driving nails too deeply can damage shingles and weaken the seal. This can also create spots where water may enter.
Underdriving Nails
If the nail protrudes too far, the shingle may not lie flat. That can cause lifting and leaks.
Wrong Nail Placement
Nails placed too high or too low can reduce roof strength and increase the risk of leaks.
Mixing Incompatible Metals
Different metals can react with each other over time. This may cause corrosion, especially in damp conditions.
Hand Nailing vs Nail Gun: Which Is Better?
Hand Nailing
Pros:
- More control
- Good for small repairs
Cons:
- Slower
- More labor-intensive
Nail Gun Installation
Pros:
- Much faster
- Great for large roofing jobs
Cons:
- Greater risk of overdriving nails
- Needs careful setup
If you are doing a small repair, hand nailing may be enough. For a full roof, a nail gun is usually more efficient.
How to Choose the Best Roofing Nails for Your Home
When choosing roofing nails, think about these points:
- Roof material
- Climate
- Wind exposure
- Local building codes
- Roof pitch
- Budget
- Long-term durability
Pro tip: For a longer roof life, choose corrosion-resistant nails whenever possible.
Frequently Asked Questions About Roofing Nails
Can I use regular nails for roofing?
Regular nails are usually not the best choice. Roofing nails have a wide head and better weather protection, so they perform much better.
What size roofing nails are best?
The best size depends on the roof material and decking thickness. For many asphalt shingles, 1- to 1¼-inch nails are common.
Are galvanized nails required?
In many cases, they are strongly recommended and, in some cases, required by code or manufacturer rules.
Can roofing nails rust?
Yes. Poor-quality nails or the wrong coating can rust over time, especially in wet climates.
How long should roofing nails penetrate the decking?
They should go deep enough to hold the material securely and into the roof decking. In general, proper penetration is key to strength and safety.