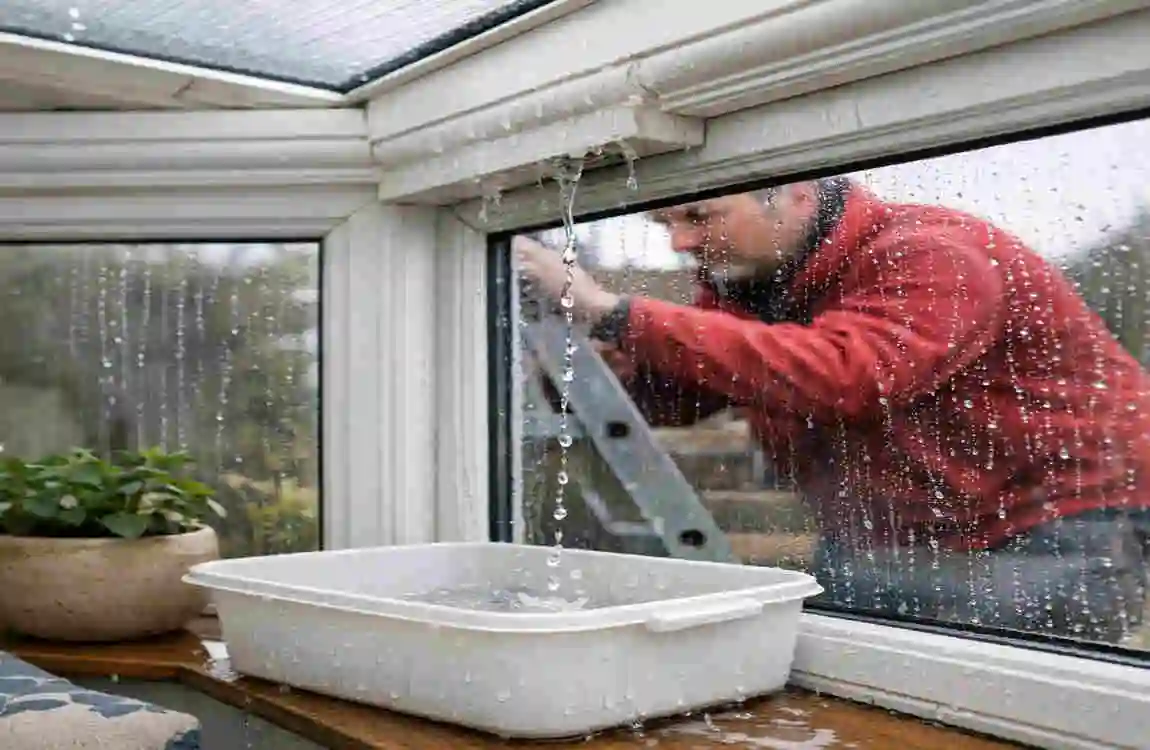
Imagine this: you’ve just settled down in your favorite armchair in the conservatory, book in hand, ready to enjoy a peaceful afternoon. Suddenly, you hear a rhythmic drip, drip, drip. You look up, and there it is—a small bead of water forming on the roof ridge, right before it splashes onto your expensive rug.
A leaking conservatory roof is more than just a nuisance; it’s a threat to your home’s structural integrity and your comfort. Whether it’s a minor trickle or a steady stream during a downpour, learning how to fix a water leak in a conservatory roof can save you thousands of pounds in professional repair costs and prevent long-term damage like mold or wood rot
Quick Reference: Common Conservatory Fixes
Before we dive into the details, here is a quick look at what you might be facing:
Common Quick Fixes: Time Required: Tools Needed
Reseal joints 1-2 hours Sealant, caulk gun
Clear gutters , 30 minutes , ladder, gloves
Reposition panels 2-3 hours , screwdriver, silicone
Common Causes of Conservatory Roof Leaks

Understanding why your roof is leaking is the first step toward a permanent fix. You can’t just slap some tape on a problem and hope it goes away; you need to address the root cause. Here are the most frequent culprits behind a leaking conservatory roof.
Slipped or Damaged Panels
One of the most common reasons for a leak is a slipped roof panel. Most conservatories use polycarbonate sheets or glass panels held in place by glazing bars. Over time, the natural cycle of heating and cooling causes these materials to expand and contract—a process known as thermal expansion.
This movement can cause the panels to slowly slide down, creating a gap at the top ridge where water can easily enter. If you notice a gap between the top of the panel and the roof’s central spine, you’ve likely found the source of your leak.
Worn Seals and Gaps
The silicone sealant used to weatherproof your conservatory isn’t invincible. Over years of exposure to harsh UV rays, the sealant can become brittle, crack, or peel away from the surface. Once the seal is broken, even a tiny hairline crack can allow water to seep through via capillary action. This is especially common around the edges of the roof and where the glazing bars meet the main frame.
Blocked Gutters and Flashing Issues
Sometimes the leak isn’t actually “in” the roof, but rather a result of poor drainage. If your gutters are clogged with leaves, moss, or debris, water can back up and overflow under the roof tiles or into the internal structure of the conservatory.
Additionally, the flashing—the metal strip (usually lead) that seals the gap where the conservatory roof meets the wall of your house—can fail. If the flashing is loose, rusted, or improperly installed, water will run down the house wall and straight into your conservatory.
Extreme Weather and Poor Installation
Sometimes, the issue is simply the result of a “perfect storm.” Heavy snow can put immense pressure on panels, while high winds can lift them just enough to break a seal. In other cases, the leak might be a legacy of poor installation. If the roof wasn’t pitched correctly or the wrong type of sealant was used during the initial build, leaks are almost inevitable.
Safety Precautions: Putting Your Well-Being First
Before you grab your ladder and head outside, we need to talk about safety. Working on a conservatory roof is inherently risky because the surfaces are often slippery, sloped, and not designed to support a person’s full weight.
Essential Safety Checklist
- Never work alone: Always have a second person nearby to hold the ladder and assist you if something goes wrong. Use the right gear: Wear non-slip shoes and, if possible, a safety harness.
- Check the weather: Only attempt repairs on a dry, calm day. Wind and rain make the roof incredibly dangerous.
- Avoid the glass/polycarbonate: Never stand directly on the conservatory roof panels. They are not load-bearing and will likely crack or shatter under your weight. Use a crawl board or a specialized roof ladder if you must reach the center of the roof.
- Electrical safety: Be mindful of any internal lights or power outlets near the leak. Turn off the electricity to the conservatory if water is dripping near electrical components.
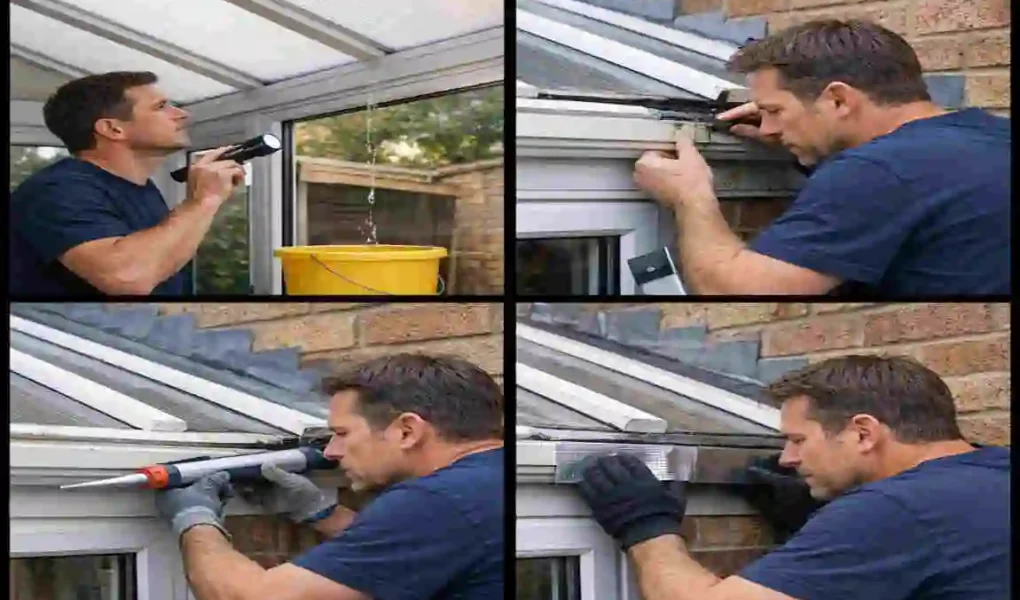
How to Diagnose the Leak
Finding the exact spot where water is entering can be surprisingly tricky. Water often travels along the internal frame before it actually drips, meaning the spot where you see the water might be several feet away from the actual hole.
The Visual Inspection
Start by looking for noticeable signs of damage on the inside and outside.
- Inside: Look for water stains, mold growth, or damp patches on the internal beams.
- Outside: Use a ladder to look for slipped panels, cracked sealant, or debris-filled gutters.
The Hose Test
If a visual inspection doesn’t reveal the culprit, it’s time for the hose test. This requires two people: one person stays inside the conservatory to watch for drips, while the other stands outside with a garden hose.
Start at the lowest point of the roof and slowly spray water over small sections, moving upward. Wait a few minutes at each section to see if water appears inside. This methodical approach helps you pinpoint the exact entry point rather than just soaking the whole roof and guessing.
Step-by-Step DIY Fixes for Your Conservatory Roof
Now that you’ve identified the problem and secured your safety gear, let’s get to work. We’ve broken down the most common repairs into manageable steps.
How to Fix Slipped Panels
If your polycarbonate or glass panels have shifted, move them back to their original position and secure them so they don’t shift again.
- Step 1: Locate the gap. Identify which panel has slipped by looking at the roof’s top ridge. Step 2: Remove the trims. Carefully unscrew or unclip the plastic glazing bar caps (the covers that run down the length of the panels).
- Step 3: Clean the area. Use a damp cloth to remove dirt and old sealant from the edges of the panel and the frame. The new sealant won’t stick to a dirty surface. Step 4: Reposition the panel. Gently slide the panel back up into its correct position. You may need a second person to help push from the bottom while you guide it from the top.
- Step 5: Apply sealant and reclip. Apply a fresh bead of high-quality silicone sealant along the edges. Replace the glazing bar caps and ensure they are firmly clipped or screwed back into place to prevent future movement.
Resealing Joints and Gaps
If the leak is caused by old, cracked sealant, the fix is to remove the old material roof and apply a fresh, weatherproof barrier.
- Step 1: Scrape away the old stuff. Use a sealant removal tool or a plastic scraper to remove the old, brittle silicone. Be careful not to scratch the frame or the panels.
- Step 2: Clean with solvent. Wipe the area with a specialized silicone remover or a little white spirit to ensure all residue is removed. Step 3: Apply the new sealant. Using a caulk gun, apply a steady, even bead of weatherproof silicone sealant designed for outdoor use.
- Step 4: Smooth it out. Use a smoothing tool or a wet finger to press the sealant into the gap, creating a neat, watertight finish. Let it cure for at least 24 hours before the next rain.
Clearing Gutters and Fixing Flashing
A leak at the point where the roof meets the house is almost always a gutter or flashing issue.
- Clear the debris: Scoop out leaves and moss from the gutters. Use a hose to flush out the downpipes and ensure water is flowing freely. Inspect the flashing: Look for gaps where the lead flashing meets the brickwork. If the mortar has crumbled, you may need to apply a flashing sealant or “lead sheet” adhesive to stick it back down.
- Check for rust: If you have metal gutters, check for small rust holes. These can often be patched with a bit of waterproof repair tape or specialized metal filler.
Replacing Damaged Panels
If a panel is cracked or severely discolored, a simple patch won’t suffice. You’ll need to order a replacement.
- Measure twice: Ensure you have the exact dimensions and thickness of the existing panel.
- Source the material: You can order polycarbonate sheets cut-to-size from many online retailers Installation: Follow the same steps as “Fixing Slipped Panels,” but replace the old sheet with the new one. Ensure you use the correct side (most polycarbonate has a UV-protected side that must face outward).
Prevention and Long-Term Maintenance
The best way to fix a leak is to prevent it from happening in the first place. A little bit of maintenance once or twice a year can extend the life of your conservatory roof by decades.
Annual Maintenance Calendar
To keep your conservatory in top shape, follow this simple schedule:
- Spring: Clean the roof panels with warm soapy water to remove winter grime. Check for any signs of slipped panels after the winter storms.
- Summer: Inspect the sealant. The high heat can cause old silicone to fail.
- Autumn: This is the most critical time to clear your gutters. Ensure all fallen leaves are removed before the heavy winter rains begin. Winter: After heavy snowfall, safely remove excess snow from the roof using a soft brush to prevent weight-related damage.
Consider an Upgrade
If your conservatory is more than 15-20 years old and you find yourself fixing leaks every few months, it might be time to consider a tiled roof replacement. While more expensive upfront, a solid tiled roof provides better insulation and is far less prone to leaks than polycarbonate or glass. When to Call the Professionals.
While many leaks are DIY-friendly, some situations require the expertise of a professional roofer or conservatory specialist.
You should call a pro if:
- The leak is coming from a structural beam or the main frame.
- The roof is very high or has a steep pitch, making DIY access dangerous.
- You’ve tried multiple DIY fixes, and the water is still getting in.
- There is significant internal damage, including rotting wood and sagging ceilings.
Professional repairs typically cost between £500 and £2,000, depending on the severity of the issue. While it’s an investment, it’s much cheaper than replacing the entire conservatory due to neglected water damage.
Frequently Asked Questions (FAQs)
How much does it cost to fix a water leak in a conservatory roof?
Minor DIY fixes, such as resealing or clearing gutters, usually cost less than £50 for materials. Professional repairs for slipped panels or flashing issues typically range from £200 to £600, while significant structural repairs can exceed £1,000. Can I fix a conservatory roof leak myself? Yes, most common leaks caused by slipped panels, blocked gutters, or worn sealant are well within the capabilities of a confident DIYer. However, always prioritize safety and never work on the roof alone.
What is the best sealant for conservatory roofs?
You should always use a high-quality, neutral-cure silicone sealant. Look for products specifically labeled as “weatherproof” or “glazing sealant,” as these are designed to withstand UV rays and the thermal expansion of polycarbonate and glass. Why does my conservatory leak only during heavy rain? This usually indicates a drainage issue. During light rain, your gutters can handle the volume, but during a downpour, they may overflow or back up, forcing water into gaps that are usually dry.
How long does conservatory roof sealant last?
On average, high-quality silicone sealant lasts between 10 and 15 years. However, if your conservatory is in a particularly sunny or exposed location, you may need to replace it sooner, as UV rays accelerate its degradation.