If you want to install rooftop solar panels at house, you are probably looking for a smart way to lower power bills and use cleaner energy. That is a great goal. More homeowners are choosing solar because it can save money, reduce reliance on the grid, and make a home feel more modern and energy-efficient.
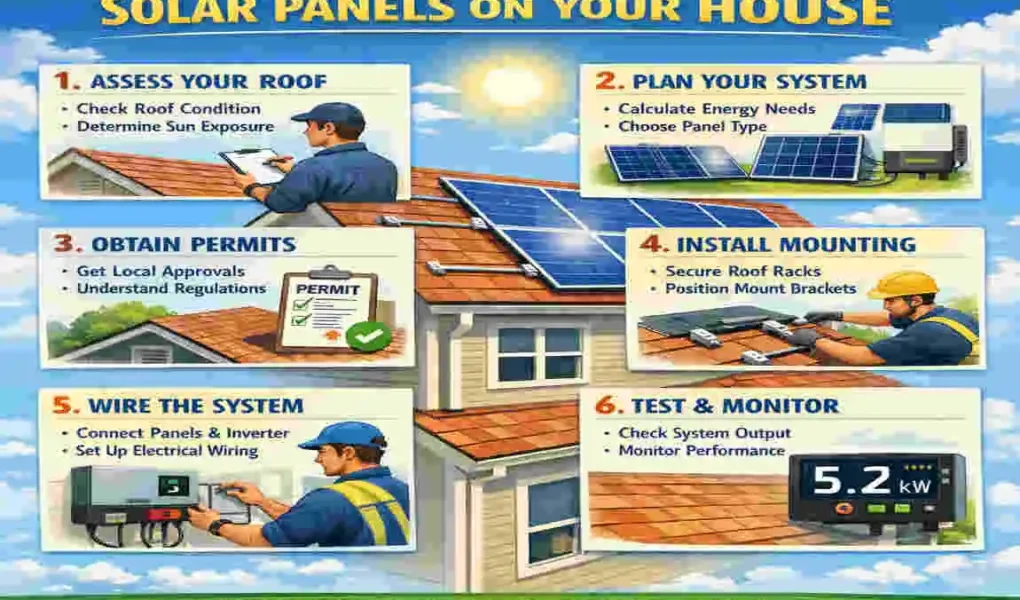
| Step | What to do | Key point |
|---|---|---|
| Assess the roof | Check roof strength, shading, and sunlight exposure | A clear, south-facing roof in the Northern Hemisphere works best |
| Plan the system | Estimate your electricity use and choose system size | Match panel count and inverter capacity to household demand |
| Install mounts | Fix the racking or mounting structure securely | Use proper flashing and sealant to avoid leaks |
| Attach panels | Place and clamp panels onto the mounts | Leave small gaps for thermal expansion |
| Wire the system | Connect panels, inverter, and other components | Follow electrical codes and correct polarity |
Still, solar installation is not something to rush. A good setup starts with careful planning, the right tools, and safe work on the roof. If you skip steps, you may end up with weak performance, water leaks, or electrical problems. That is why learning the process matters before you begin.
Why Rooftop Solar Panels Are a Smart Investment
Lower Electricity Bills
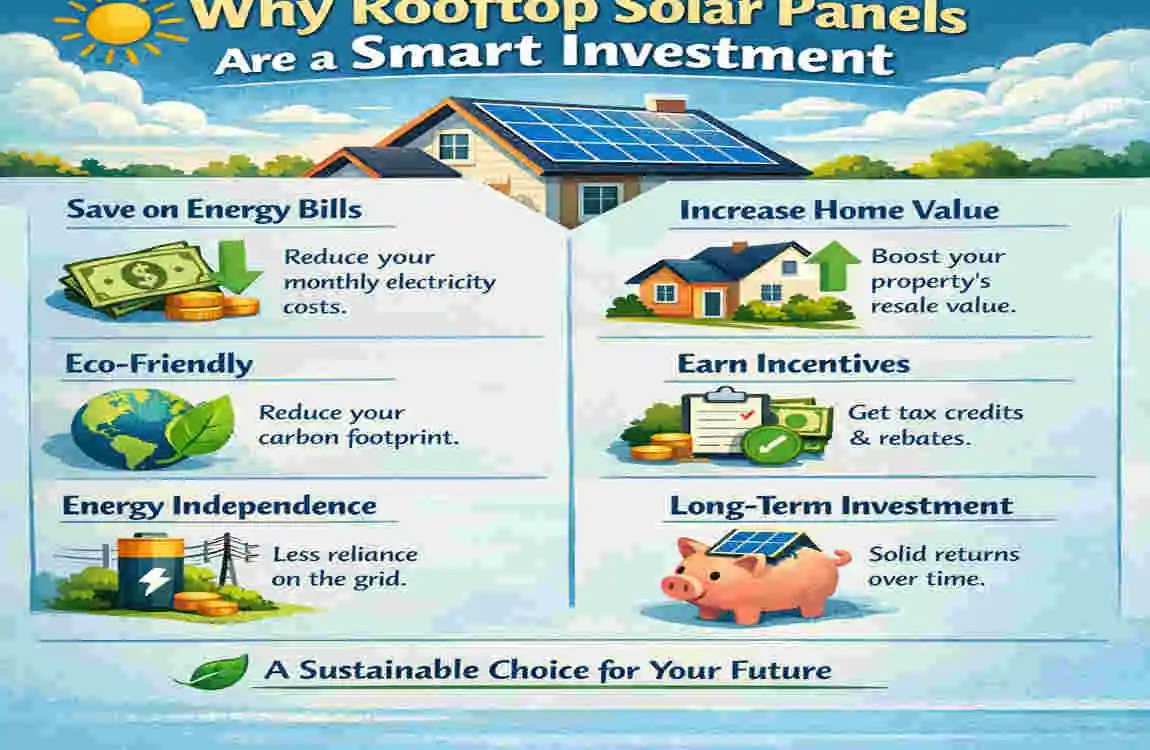
One of the biggest reasons people choose solar power for house use is simple: it can reduce monthly electricity costs. Once your rooftop solar energy system starts producing power, your home uses less electricity from the utility company. Over time, those savings can really add up.
Environmentally Friendly Energy Source
Solar power is clean energy. It does not produce smoke or direct pollution while working. That means you can reduce your carbon footprint while still powering your home reliably. For many families, that makes solar feel like a responsible choice.
Increased Property Value
A home with a solar panel installation at home often looks more attractive to buyers. People like the idea of lower energy bills and a modern energy setup. In some markets, solar can help a home sell faster or for a better price.
Government Incentives and Rebates
In many places, homeowners may qualify for tax credits, rebates, or net metering. These programs can reduce the cost of home solar installations and improve your return on investment. Because incentives differ by location, it is always smart to check what is available in your area.
Things to Consider Before You Install Rooftop Solar Panels at House
Before you start to install rooftop solar panels at house, take time to check your roof and energy needs. A little planning now can save you a lot of trouble later.
Roof Condition Assessment
Your roof should be in good shape before installation. If your roof is old, damaged, or close to needing replacement, fix it first. Removing solar panels later just to repair the roof can be costly and inconvenient.
Roof Direction and Sunlight Exposure
A roof that gets strong sunlight for most of the day is ideal. South-facing roofs often work well in many areas, but what matters most is how much direct sun your roof gets. Trees, nearby buildings, and even chimneys can create shade that reduces output.
Energy Consumption Analysis
Look at your past electricity bills. This helps you understand how much power your home uses each month. The more energy your home uses, the larger your system may need to be. This step helps you plan the right home solar power setup.
Budget Planning
Solar is an investment, so it helps to set a clear budget. Consider equipment, labor, permits, and potential battery storage. If the upfront cost feels high, financing may help spread the expense over time.
Local Building Codes and Permits
Many places require permits before roof solar installation begins. Some homeowner associations also have rules about panel placement or appearance. Check these details early to avoid delays or penalties later.
Tools and Materials Needed for Solar Panel Installation
Before you begin, gather the right equipment. This makes the job smoother and safer.
Solar Equipment
- Solar panels
- Mounting rails
- Inverters
- Batteries, if you want storage
- Charge controllers, for certain systems
Installation Tools
You may also need a drill, a wrench set, a measuring tape, a voltage tester, and wire cutters. These help you position parts correctly and connect the system safely.
Safety Equipment
Safety is crucial when working on a roof. Use a harness, gloves, helmet, safety goggles, and non-slip shoes. If you feel unsure about heights or wiring, it is better to stop and get help.
Step-by-Step Guide to Install Rooftop Solar Panels at House
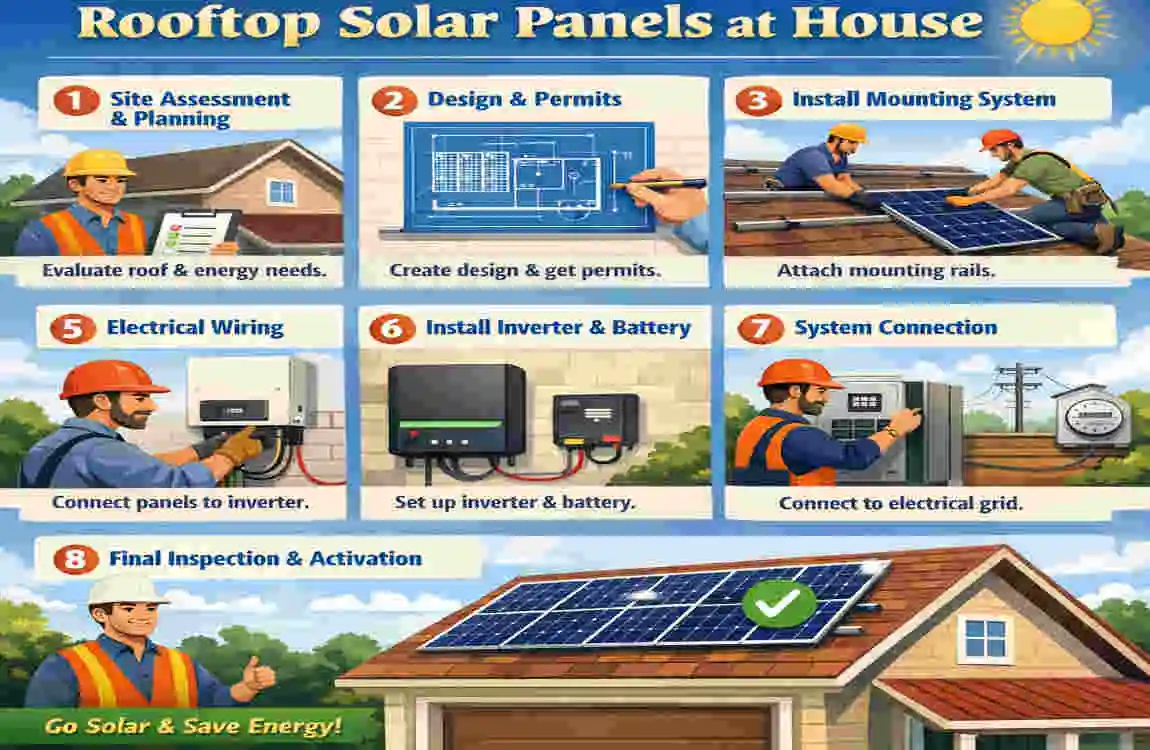
Here is a simple breakdown of the solar roof installation process.
Step What You Do Why It Matters
Inspect and measure the roof Checks space and strength
Plan the panel layout Improves sunlight use
Install mounting brackets Creates a secure base
Attach mounting rails Keeps panels aligned
Secure solar panels Holds panels safely in place
Wire the panels Sends power correctly
Install the inverter Converts solar power for home use
Connect to the electrical panel Integrates with your home system
Add batteries if needed Stores power for later use
Test the system Confirms everything works properly
Inspect and Measure Your Roof
Start by checking how much usable roof space you have. Look for weak spots, damaged shingles, or areas that may not hold weight well. You want a strong and stable base before you move forward.
Design the Solar Panel Layout
Plan where each panel will go. Try to avoid shaded spots and keep enough space between rows so the panels do not block one another. Good planning helps the system produce more energy.
Install Mounting Brackets
Mark the anchor points and secure the brackets into the roof rafters. This step must be done carefully because the brackets hold the full system. Proper sealing is also important to prevent water from leaking into the roof.
Attach Mounting Rails
Once the brackets are in place, connect the rails. Make sure they are level and straight. A clean rail setup helps the panels sit firmly and look neat.
Secure Solar Panels
Place the panels on the rails and tighten the clamps. Check that each panel is stable and properly aligned. This is one of the most important parts of the residential solar setup because loose panels can cause damage or reduce performance.
Wiring the Panels
The panels must be connected with the right wiring pattern. Some systems use series connections, while others use parallel connections. The choice affects voltage and current, so wiring should be done carefully to avoid energy loss or fire risk.
Install the Solar Inverter
The inverter changes the solar power into electricity your home can use. Place it in a cool, dry spot with good airflow. A well-placed inverter helps the system run more efficiently.
Connect to the Electrical Panel
Now connect the solar system to your home’s electrical panel. This step allows solar energy to work with the grid or your home circuits. A proper shutoff switch is also important for safety.
Battery Installation, If Needed
If you want backup power, you can add batteries. This is useful for hybrid or off-grid systems. Battery size depends on how much storage you want and how long you want power during outages.
Testing and Activation
Before turning the system on, test the voltage and inspect all connections. Once everything checks out, you may need utility approval before full activation. This final step confirms that your setup is safe and ready to use.
Common Mistakes to Avoid During Installation
A few simple mistakes can reduce the value of your solar investment.
- Ignoring roof strength can lead to structural problems.
- Poor panel placement can lower energy output.
- Incorrect wiring can create safety hazards.
- Weak waterproofing may cause roof leaks.
- Skipping safety steps can lead to falls or electric shocks.
If you want to install rooftop solar panels at house successfully, take your time and avoid rushing these details.
DIY vs Professional Solar Installation
Benefits of DIY Installation
DIY can lower labor costs and give you more control over the project. If you already have good electrical and roofing skills, it may feel rewarding to do parts of the work yourself.
Drawbacks of DIY
Solar work is technical. A small mistake can affect performance, warranties, or safety. Roof work and electrical connections are both risky if you lack experience.
Benefits of Hiring Professionals
Professionals handle permits, wiring, mounting, and testing with more confidence. They also know local rules and can often complete the job faster. In many cases, professional installation gives better peace of mind.
Which Option Is Better?
If your roof is simple and your skills are strong, DIY may work for limited tasks. But for most homeowners, professional help is the safer and smarter choice. The best option often comes down to cost vs. expertise.
Cost to Install Rooftop Solar Panels at House
The cost of a home solar installation depends on several factors, including system size, roof type, battery storage, and labor. A larger system costs more, but it may also produce more savings over time.
Average Cost Breakdown
Cost Area What It Covers
Equipment Panels, inverter, rails, wiring
Labor Mounting, wiring, testing
Permits Local approvals and inspections
Maintenance Cleaning and occasional repairs
Battery Storage Optional backup power setup
Even though the upfront cost can feel high, solar often pays back over time through lower bills. The payback period depends on your energy use, local rates, and any incentives you receive.
Maintenance Tips After Installation
Solar panels do not require much care, but they do need regular maintenance.
Regular Cleaning
Dust, leaves, and bird droppings can block sunlight. Clean the panels when needed to keep them producing well.
Inspect Wiring and Connections
Check for loose wires, rust, or wear. Small issues are easier to fix early.
Monitor Energy Production
Use your inverter display or monitoring app to track output. If production drops suddenly, something may need attention.
Annual Professional Inspection
Even if everything looks fine, a yearly check can help catch hidden problems before they grow.
How Long Do Rooftop Solar Panels Last?
Most panels last 25 to 30 years or even longer with good care. The inverter may need to be replaced after 10 to 15 years, and battery life depends on the type you use. With proper maintenance, a solar power system for your home can serve your home for a very long time.
Frequently Asked Questions
Can I install rooftop solar panels by myself?
Yes, some homeowners do part of the work themselves. But if you are not trained in roofing or electrical work, hiring a professional is often safer.
How many solar panels do I need for a house?
It depends on your electricity use, roof space, and system design. A larger home usually needs more panels.
Does roof type affect installation?
Yes. Roof shape, slope, and material all affect how the panels are mounted. Some roofs are easier to work with than others.
Will solar panels work during cloudy weather?
Yes, but they will produce less power than on sunny days. Solar still works in cloudy conditions.
How much money can solar panels save yearly?
Savings vary by location and energy use. Many homeowners save a noticeable amount each year, especially if their system is sized well.
What maintenance is required?
Mostly cleaning, visual checks, and occasional professional inspection. Solar systems are low maintenance compared to many other home upgrades.