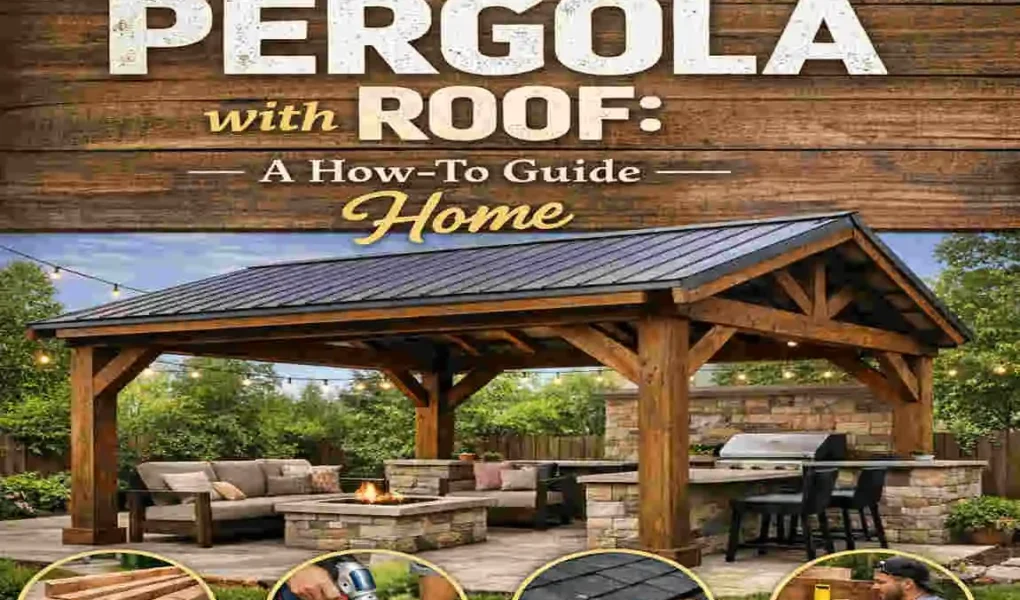
A pergola is one of the easiest ways to improve your outdoor space. It adds style, shade, and structure to a backyard, patio, or garden area. When you add a roof, the space becomes even more useful because it provides more protection from the the sun and light rain.
| Step / Topic | What to Decide / Do | Tips for Home Use in Lahore |
|---|---|---|
| 1. Planning & Size | Measure the area (length, width, height) and choose attached vs freestanding design. | Check local bylaws and keep enough clearance from boundary walls and existing structures. |
| 2. Materials | Select wood (e.g., treated pine), metal, or composite for posts, beams, and rafters. | For hot climates, choose UV‑resistant roofing like polycarbonate sheets or metal panels. |
| 3. Foundations | Mark post locations, dig footings, and use concrete or heavy anchors for stability. | Use a spirit level and string line to keep posts straight and pergola square. |
| 4. Frame Assembly | Install posts, then beams, then rafters/joists, fixing with galvanized brackets. | Pre‑drill holes and use corrosion‑resistant screws to handle weather and extend life. |
| 5. Roof Options | Choose between solid roofing (metal, tiles), polycarbonate, or fabric panels. | Slope the roof slightly for drainage and add guttering if close to the house wall. |
| 6. Finishing & Care | Sand sharp edges, apply exterior paint/stain, and seal roof penetrations. | Plan annual checks for leaks, loose screws, and timber cracking due to heat and monsoon. |
If you are wondering how to build a pergola with a roof, this guide will walk you through the basics in a simple way. You will learn what a roofed pergola is, why it is worth building, what materials you need, and the main steps to assemble it.
What Is a Pergola with a Roof?
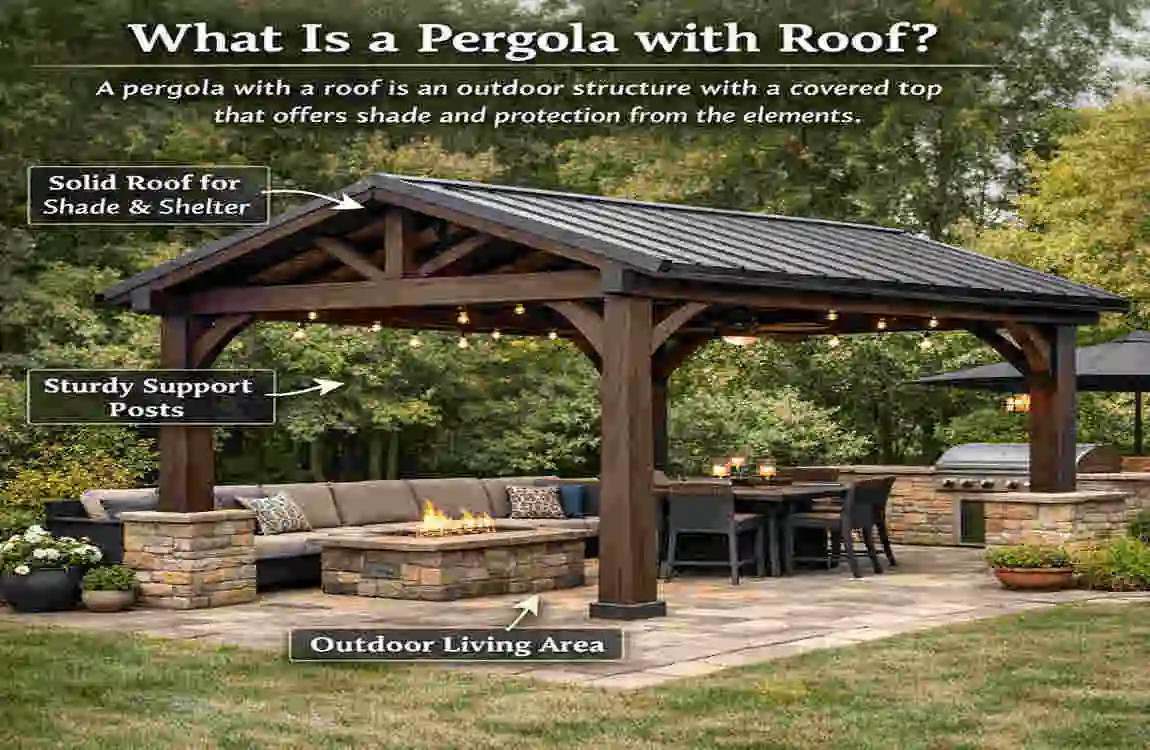
Basic Definition of a Pergola
A pergola is an open outdoor frame built with posts and beams. It usually sits in a backyard, over a patio, or near a garden. Some pergolas are made only for decoration, while others are built to create shade and structure.
Difference Between Open Pergola vs Roofed Pergola
An open pergola gives some shade, but it still leaves you exposed to the weather. A roofed pergola offers better protection from the sun and rain. It also gives more privacy and makes the space feel more like an outdoor room.
Why Homeowners Prefer Roofed Pergolas
Many homeowners choose a roofed design because it is more practical. You can use it more often, even when the weather changes. It also improves comfort and adds a polished look to the yard.
Benefits of Building Your Own Pergola with a Roof
Cost Savings Compared to Hiring Contractors
One of the biggest benefits is saving money. When you build it yourself, you cut down on labor costs. You can also choose materials that fit your budget.
Custom Design Freedom
A DIY pergola gives you full control. You can choose the size, shape, roof style, and finish. That means you can match it to your home and outdoor space.
Increased Property Value
A well-built pergola can improve curb appeal and make your backyard more attractive to future buyers. It is a simple upgrade that may add long-term value.
Better Outdoor Living Space
A roofed pergola creates a comfortable place for:
- Outdoor dining
- Relaxing with family
- Hosting friends
- Reading or working outside
Planning Before You Build a Pergola with a Roof
Determine the Purpose
Before you start, decide how you will use the space. Will it cover a patio, an outdoor kitchen, or a seating area? Your purpose will help you choose the right size and roof style.
Measure the Space
Measure your yard carefully. Make sure there is enough room for the pergola and for people to move around it easily. Good planning helps avoid mistakes later.
Check Local Building Codes
Some areas require permits for pergolas, especially if they have roofs. You should also check height rules and HOA guidelines if your neighborhood has them.
Budget Estimation
Before buying anything, estimate the full cost. Include:
- Lumber or frame material
- Roofing
- Concrete
- Screws, bolts, and fasteners
- Tools, if you do not already own them
Best Materials Needed to Build a Pergola with a Roof
Wood Options
Wood is popular because it looks natural and is easy to work with. Common choices include:
- Cedar
- Redwood
- Pressure-treated lumber
Metal Pergola Frames
Some homeowners prefer metal because it is strong and low-maintenance. Aluminum is lightweight, while steel offers extra strength.
Roofing Materials
The roof material changes the look and function of the pergola. Common options include:
- Polycarbonate panels
- Corrugated metal
- Asphalt shingles
- Fabric canopy
- Retractable roofing
Essential Tools Required
You will usually need:
- Drill
- Circular saw
- Measuring tape
- Level
- Ladder
- Concrete mixer
- Safety gear
Choosing the Right Pergola Roof Design
Flat Roof Pergola
A flat roof is simple and modern. It is easier to build, but it may not drain water as well as sloped styles.
Sloped Roof Pergola
A sloped roof helps water run off more easily. This makes it a smart choice for rainy areas.
Gable Roof Pergola
A gable roof has a classic shape and good strength. It also gives the pergola a more elegant look.
Louvered Roof Pergola
This style lets you adjust airflow and sunlight. It is a more Premium option and works well if you want flexibility.
Transparent Polycarbonate Roof
This roof lets in natural light while still protecting you from rain and UV rays. It is a popular option for bright outdoor spaces.
Step-by-Step Guide: How to Build a Pergola with a Roof
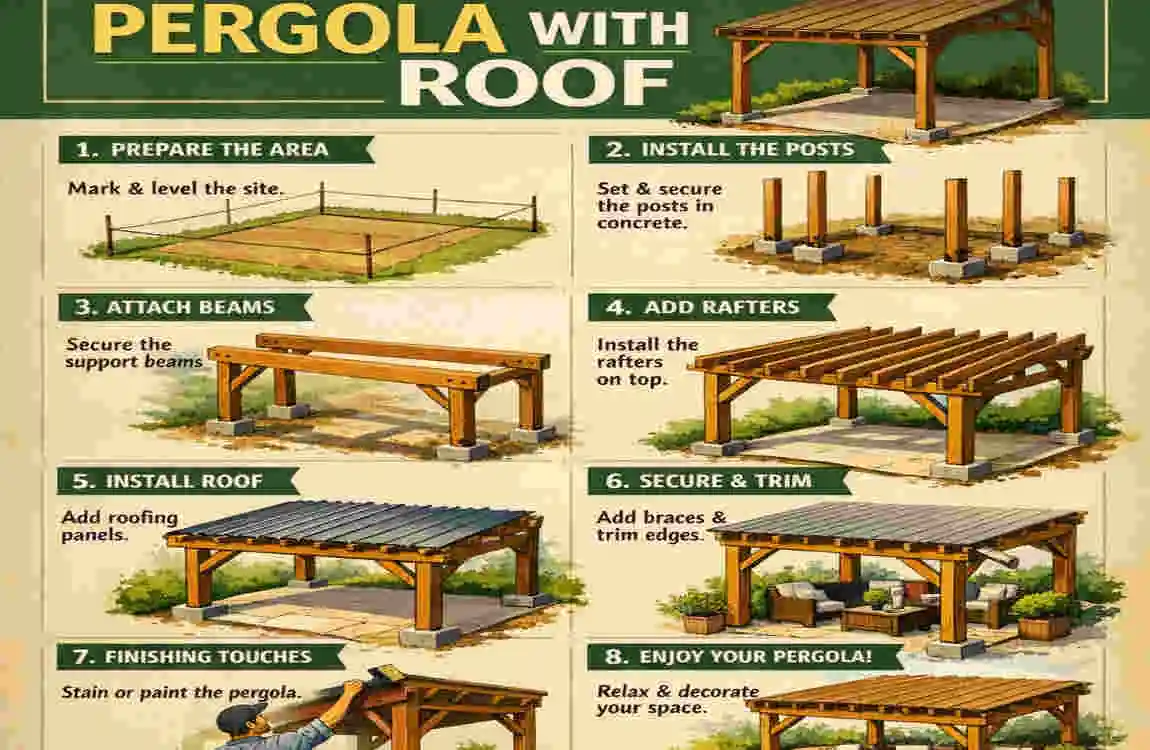
Mark the Layout
Start by measuring the area and marking the corners. Use stakes and string to show the full shape of the pergola.
Dig Post Holes
Dig holes deep enough to keep the structure stable. The depth depends on your design and local conditions, but deeper holes usually mean better support.
install Support Posts
Place the posts in the holes and pour concrete around them. Use a level to make sure each post stands straight.
Attach Beams
Once the posts are secure, attach the horizontal beams across the top. These beams hold the rest of the structure and must be fastened tightly.
Add Rafters
Rafters go across the beams and help support the roof. Keep them evenly spaced for a neat and strong frame.
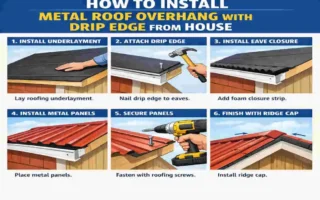
Build Roof Frame
Now add the roof frame based on the style you chose. A sloped or gable roof will need the correct angle for water drainage.
install Roofing Material
Carefully place the roofing material on top. Whether you use polycarbonate sheets, metal panels, or wooden slats, make sure everything is aligned and secured.
Waterproof and Seal
Seal all exposed parts to protect the pergola from water damage. This is especially important for wood.
Paint or Stain
Add paint or stain to improve the appearance and protect the structure. A good finish can help the pergola last longer.
Final Safety Inspection
Check the full structure before use. Look for loose screws, weak spots, and poor drainage. Make sure the pergola feels stable.
Pergola Roof Options at a Glance
Roof Type Best For Main Benefit Consideration
Flat Roof, Simple DIY, Easy to construct, Less drainage
Sloped Roof Rainy climates Better water runoff Needs careful angle planning
Gable Roof Stylish backyards Strong and attractive More complex build
Louvered Roof , Flexible use , Adjustable shade , Higher cost
Polycarbonate Roof: Bright spaces let in light. Can cost more than basic covers
Common Mistakes to Avoid
Poor Measurements
Even small measurement errors can cause the frame to sit unevenly. Measure twice before cutting.
Weak Foundation
If the posts are not set properly, the whole structure may shift over time. A strong base is essential.
Choosing the Wrong Roofing Material
Not every roofing type works in every climate. Pick a material that fits your weather conditions.
Ignoring Drainage
If water cannot drain properly, it may collect on the roof, causing damage.
Underestimating Wind Load
Wind can stress the roof and frame. Make sure the structure is built to withstand local weather conditions.
How Much Does It Cost to Build a Pergola with a Roof?
Costs depend on size, materials, and roof style. A small DIY pergola may stay on the lower end of the budget, while a larger or more decorative one can cost much more.
Cost Comparison
Type Typical Cost Range Notes
Small DIY Pergola, Lower budget range , Basic materials, and simple roof
Medium Pergola Moderate budget range Good for family patios
Luxury Pergola : Higher budget range, Premium roofing, and custom details
DIY usually costs less than professional installation, but the final amount depends on your material choices and tools.
Maintenance Tips for Long-Lasting Pergolas
Clean Roofing Panels
Remove dirt, leaves, and debris regularly to keep the roof in good shape.
Inspect Bolts and Fasteners
Check hardware from time to time to make sure everything is still tight.
Repaint or Restain Wood
Wood needs regular care to protect it from the weather and fading.
Prevent Mold and Moisture Damage
Keep the structure dry as much as possible and fix leaks quickly.
Seasonal Structural Checks
Inspect the pergola before and after heavy weather seasons.
Is Building a Pergola with a Roof Worth It?
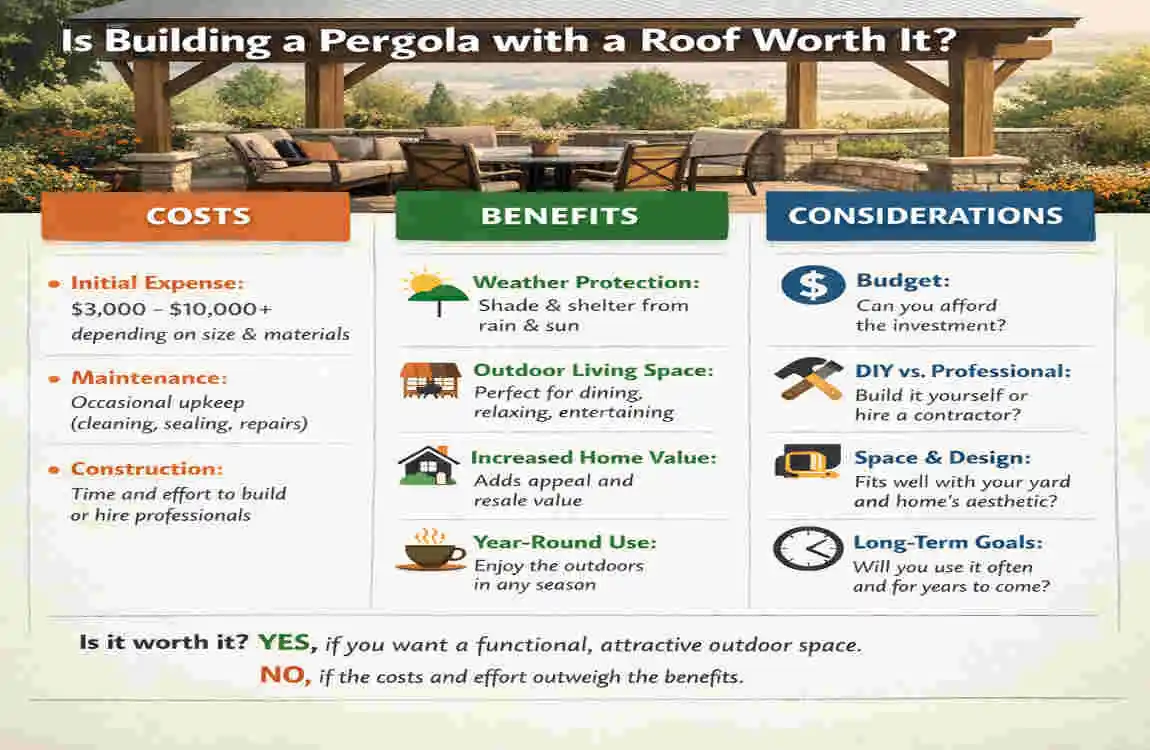
Yes, for most homeowners, it is worth it. A roofed pergola provides better shade, greater comfort, and stronger weather protection. It also adds beauty to your backyard and can increase your home’s value over time.
FAQ
Can I build a pergola with a roof without professional help?
Yes, many homeowners can build one themselves if the design is simple and they follow the steps carefully.
What is the best wood for pergola construction?
Cedar and redwood are popular because they resist the weather well. Pressure-treated lumber is also a strong choice.
How deep should pergola posts go into the ground?
It depends on the design, but deeper post holes usually provide better stability.
Which roof is best for a backyard pergola?
A sloped or polycarbonate roof is often a good choice because it handles weather well and gives useful coverage.
Does a pergola with a roof need a permit?
Sometimes yes. It depends on your location, the size of the structure, and local rules.
How long does a DIY pergola last?
With good materials and regular maintenance, it can last many years.