Are you building a new house or upgrading an old one? If so, you’ve likely asked yourself, “How much does it cost to wire a house?” Electrical wiring is one of the most critical components of any home. It powers everything—your lights, appliances, and even your tech gadgets.
Why Proper Wiring is Essential
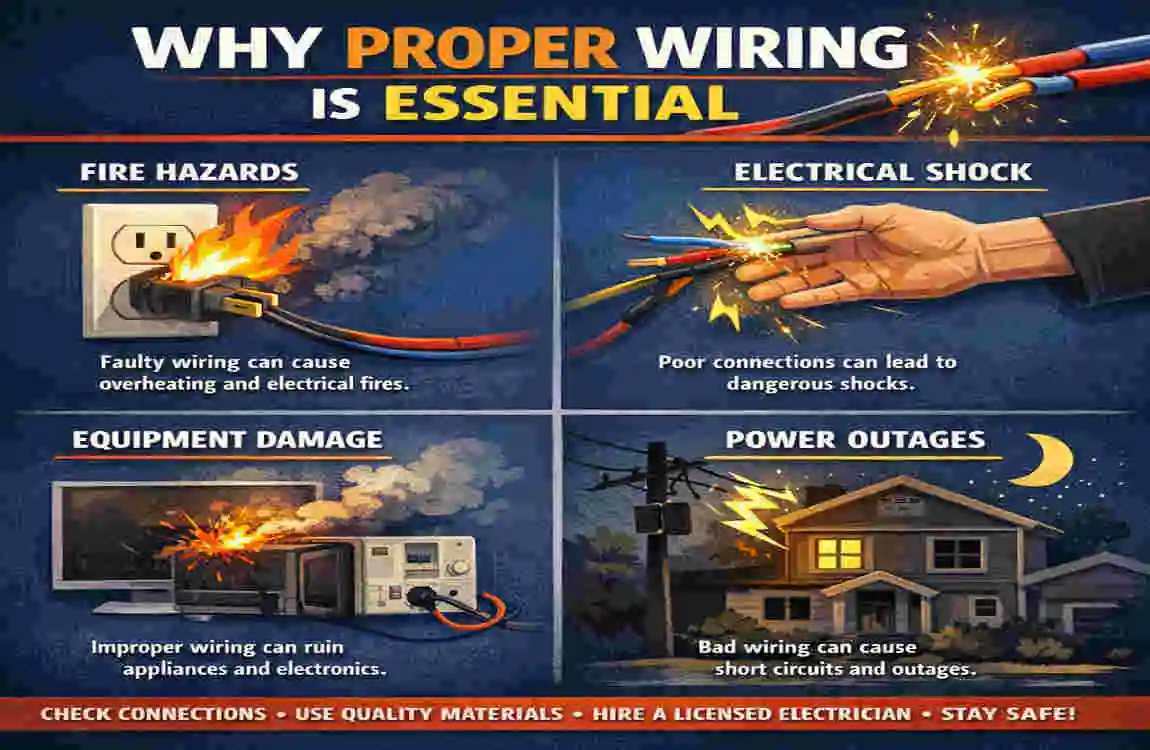
Electrical wiring isn’t just about connecting wires; it’s about ensuring the safety, efficiency, and longevity of your home. Poor or outdated wiring can lead to serious issues, including fire hazards, high energy bills, and frequent repairs.
Safety and Code Compliance
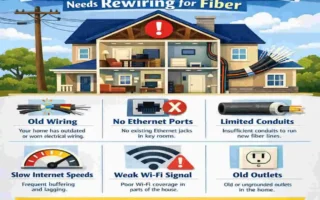
Faulty wiring is one of the leading causes of house fires. Ensuring your home’s wiring meets local building codes reduces risks and protects your family’s safety. Building codes are updated regularly to improve safety standards, so if you’re dealing with an older home, you may need to have it rewired to bring it up to code.
Energy Efficiency and Modern Technology
Modern homes are equipped with energy-efficient appliances and advanced gadgets. Proper wiring is key to supporting these technologies, reducing electricity wastage, and lowering your utility bills.
Long-Term Cost Savings
Investing in high-quality wiring upfront saves you money in the long run. Poor-quality wiring often leads to frequent maintenance and repair costs. Plus, energy-efficient systems can significantly reduce monthly expenses.
Factors That Affect the Cost of Wiring a House
Several factors influence the cost of wiring a house, and understanding these can help you budget effectively.
The Size of the House
The larger your home, the more wiring it requires. For example, wiring a 2,000-square-foot house typically costs between $4,000 and $10,000, depending on the layout’s complexity.
Type of Wiring and Materials
The materials you choose directly impact the cost. Here’s a quick comparison:
- Copper wiring: More expensive but durable and efficient.
- Aluminum wiring: Cheaper but less efficient and prone to overheating.
Additionally, the type of electrical panel, outlets, and switches you select will also affect the total cost.
Labor Costs
Hiring a licensed electrician is essential for safety and compliance. Electricians typically charge between $50 and $100 per hour. While this might seem expensive, their expertise ensures the job is done correctly.
New Construction vs. Rewiring
Wiring a brand-new house is usually more cost-effective than rewiring an older one. Rewiring involves removing old systems, which can add significant labor and material costs.
Regional Price Variations
Your location plays a big role in pricing. Urban areas with higher living costs generally come with steeper electrician fees and material prices.
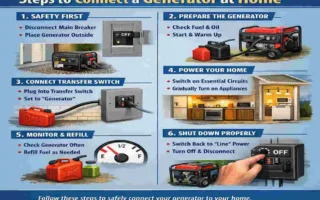
Step-By-Step Process of Wiring a House
Wiring a house involves several steps, each crucial to ensuring a safe and functional electrical system.
Planning the Electrical Layout
This step involves deciding where outlets, switches, and light fixtures will go. Work with an electrician or designer to create a layout that meets your needs and complies with local codes.
Obtaining Permits
Most areas require permits for electrical work. These ensure that your project complies with safety standards. Permit fees typically range from $100 to $500, depending on your location.
Installing Rough-In Wiring
Rough-in wiring involves running wires through walls, ceilings, and floors to connect outlets, switches, and the main electrical panel. This is a labor-intensive process that forms the backbone of your home’s electrical system.
Installing Fixtures and Outlets
After the rough-in work, electricians install light fixtures, outlets, and switches. This step brings your home’s electrical system to life.
Final Inspection and Testing
Once everything is installed, a final inspection ensures that the wiring is safe and up to code. Testing is also conducted to confirm that all circuits are functioning properly.
Cost Breakdown: What to Expect When Wiring a House
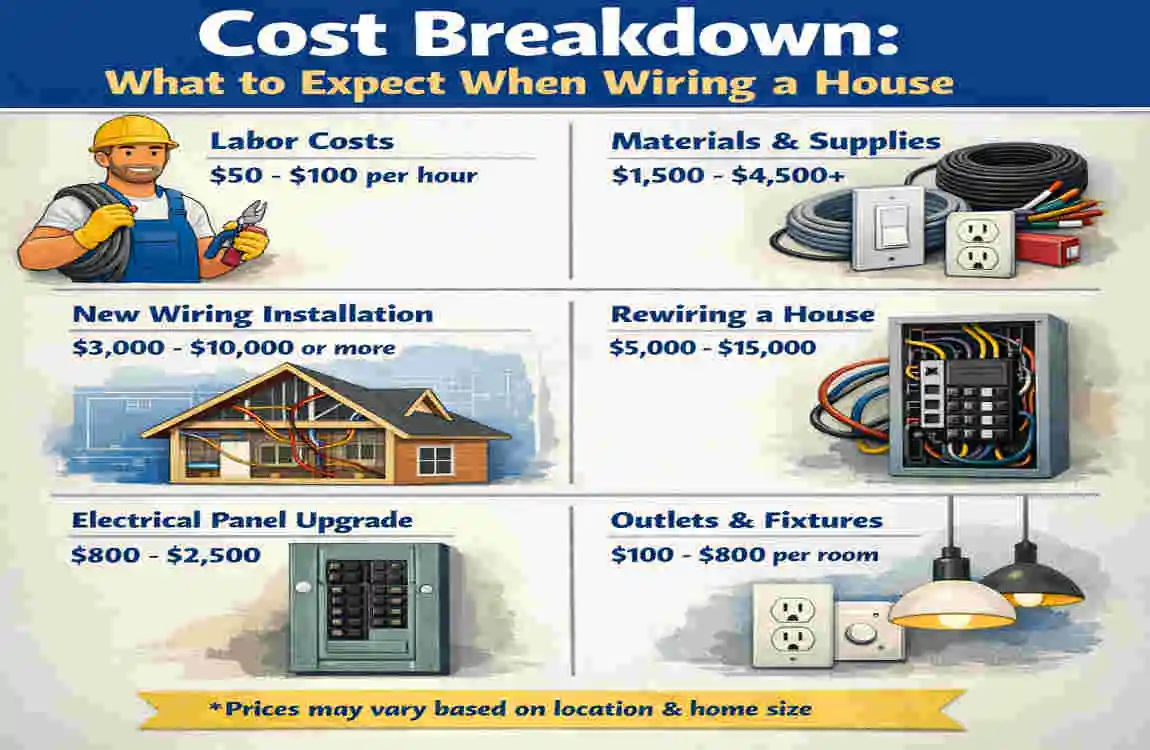
Here’s a detailed breakdown of the typical costs involved in wiring a house:
Category Cost Range
Electrical Materials $1,000 – $3,000
Labor costs $50 – $100 per hour
Additional Features $500 – $2,000
Inspection and Permits $100 – $500
Additional Costs
- Smart home systems: Adding smart features like automated lighting or thermostats can cost an extra $1,000-$3,000.
- Backup generators: Installing a generator can add $2,000-$10,000 to your budget.
DIY vs. Hiring a Professional Electrician
The Risks of DIY Wiring
While it might be tempting to save money by doing it yourself, DIY wiring comes with significant risks. Mistakes can lead to safety hazards, code violations, and expensive repairs down the line.
The Benefits of Hiring a Licensed Electrician
Professional electricians bring expertise, ensuring the job is done safely and efficiently. They also handle permits and inspections, saving you time and hassle.
When DIY Might Be an Option
For minor tasks like replacing outlets or installing light fixtures, DIY may be feasible—if you have basic knowledge and follow safety guidelines.
Tips for Saving Money on Wiring a House
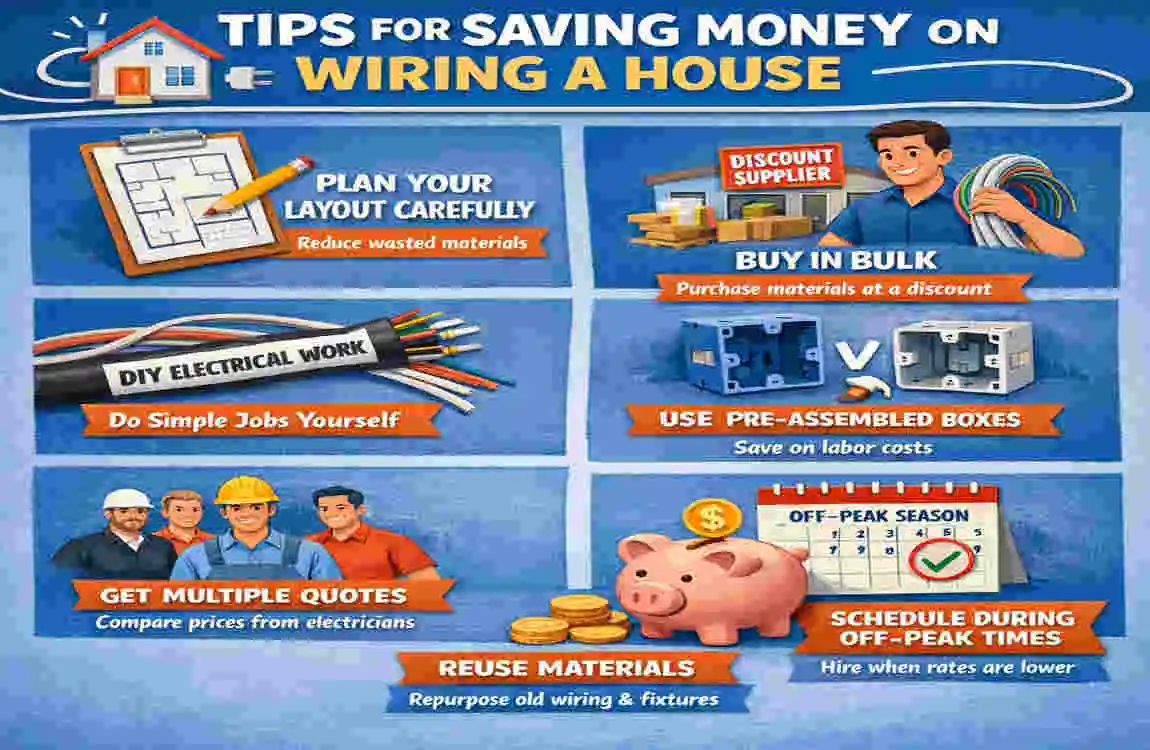
Wiring a house can be expensive, but here are some tips to keep costs under control:
Plan Your Electrical Layout Early
Make decisions about outlet and fixture placement during the design phase to avoid costly changes later.
Combine Tasks
If possible, bundle multiple electrical projects together. This reduces labor costs since electricians can complete everything in one go.
Use Energy-Efficient Solutions
Invest in LED lighting and energy-efficient appliances. While the upfront cost is higher, you’ll save money on energy bills over time.
Shop Around for Electricians
Get multiple quotes and check reviews before hiring an electrician. This helps you find the best balance between quality and cost.
Frequently Asked Questions (FAQs)
How long does it take to wire a house?
Wiring a house typically takes 1 to 3 weeks, depending on the size and complexity of the project.
Can I wire a house myself without an electrician?
DIY wiring is not recommended for major projects. It’s safer and often required by law to hire a licensed electrician.
What permits do I need to wire a house?
You’ll need an electrical permit to ensure compliance with local codes. Permit requirements vary by location.
How much does it cost to rewire an old house?
Rewiring an old house can cost between $8,000 and $15,000, depending on its size and the condition of the existing wiring.
What are the signs of faulty wiring?
Common signs include flickering lights, frequently tripped breakers, and warm outlets. If you notice these issues, it’s time to call an electrician.
| Wiring Component/Service | Estimated Cost Range (USD) | Notes |
|---|---|---|
| Basic Wiring (per square foot) | $4 – $8 | Includes wires, outlets, switches |
| Electrical Panel Installation | $1,000 – $3,000 | Depends on panel type and amperage |
| Labor Costs (per hour) | $50 – $100 | Licensed electrician rates vary by region |
| Rewiring an Existing House | $8,000 – $15,000 | More expensive due to demolition and rewiring |
| Permits and Inspection Fees | $100 – $500 | Required for code compliance |
| Additional Features (Smart Home) | $500 – $2,000 | Optional upgrades like smart lighting |