Imagine this scenario: It is the dead of winter. The temperature outside has plummeted well below freezing. You are warm and cozy in your bed, or perhaps you are miles away enjoying a tropical vacation. Suddenly, a pipe in your wall bursts. Water sprays everywhere, soaking insulation, ruining drywall, and destroying family heirlooms.
It is a homeowner’s worst nightmare, yet it happens more often than you might think. In fact, insurance data suggests that frozen pipe failures cause an average of over $5,000 in water damage per incident. That is a hefty price tag for something entirely preventable.
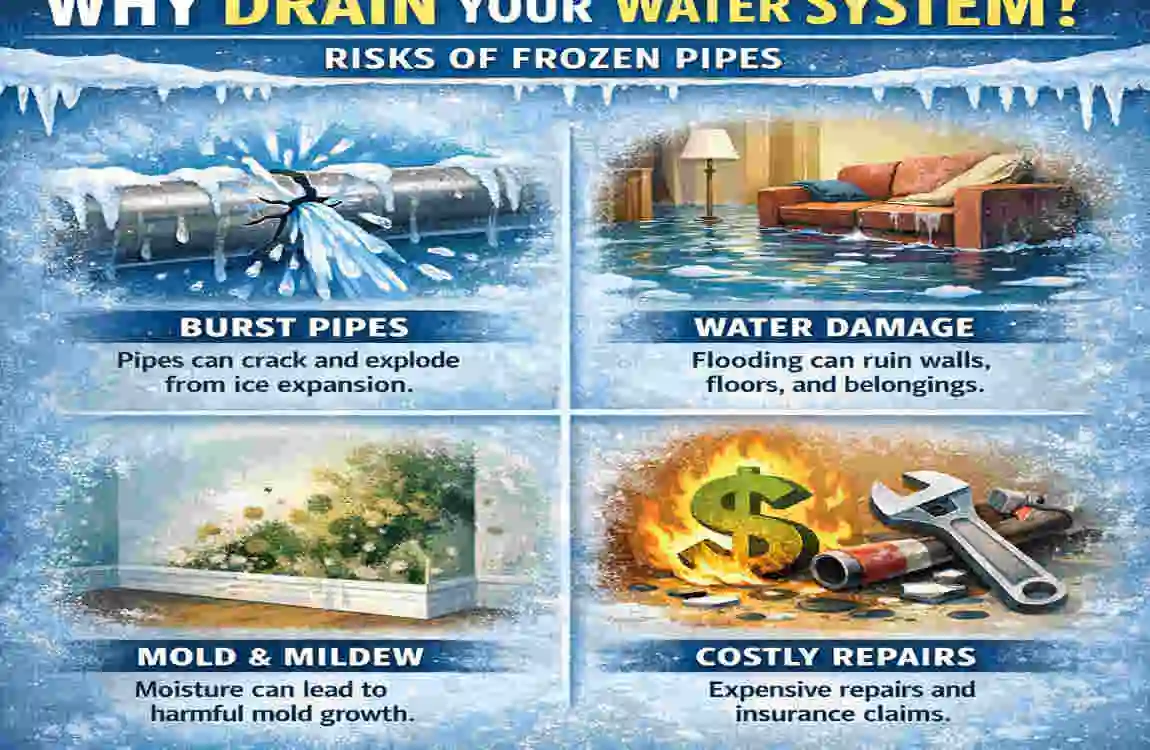
Why Drain Your Water System? Risks of Frozen Pipes
You might be wondering, “Is this really necessary? Can’t I leave the heat on low?” While leaving the thermostat set to 55 degrees helps, it is not a fail-safe guarantee, especially if the power goes out during a blizzard. Understanding the “why” is just as important as the “how.”
The Science of the Freeze
Water is one of the few substances on earth that expands when it freezes. When water turns to ice inside a copper or plastic pipe, that expansion creates immense pressure—upwards of 2,000 pounds per square inch! No residential pipe is built to withstand that kind of force. Eventually, the pipe gives way.
The real trouble begins when the ice thaws. The ice acts as a plug while it is frozen, but once it melts, the water flows freely through the crack, flooding your home.
The Financial Reality
According to industry statistics, a quarter of a million families in the US have their homes ruined by cracking pipes each severe winter. The costs aren’t just about calling a plumber to patch a leak.
- Structural Damage: Water ruins floors, rots wood framing, and destroys electrical wiring.
- Mold Remediation: Moisture in walls leads to black mold, which can cost thousands to remove safely.
- Loss of Valuables: Furniture, electronics, and sentimental items are often the first casualties.
Risk vs. Prevention
Let’s look at the risks you face if you skip this crucial step versus the peace of mind you get from doing it right.
Risk Factor, Potential Consequence, Prevention via Draining
Burst Pipes, massive flooding, mold growth, and structural rot. Full System Empty: No water left to expand and break pipes.
High Repair Bills: Costs ranging from $1,000 to over $10,000, depending on the damage. Annual Winterizing: A weekend afternoon of work saves your wallet.
Insurance Denial: Claims may be denied if the insurer deems you were “negligent” (e.g., turning off the heat without draining it). Documented Process: Shows you took all necessary precautions.
Appliance Failure: Cracked pumps in dishwashers or washing machines. Targeted Draining: Protects expensive internal components.
By learning how to drain the water system in your house, you are effectively taking out an insurance policy on your home that costs you nothing but time.
Tools and Materials Needed to Drain the Water System in the House
Before you start twisting valves, gather your gear. Having the right tools on hand will make this process smooth and frustration-free. You likely have many of these in your garage already, but a quick trip to the hardware store might be for the rest.
Here is your essential winterizing toolkit:
Adjustable Wrench and Channel Locks You will need these to loosen stiff valves or remove drain caps on your water heater. A good pair of pliers is also helpful for smaller fittings.
Five-Gallon Buckets You will be catching water from drain valves, specifically from the water heater and low-point drains. Have at least two buckets ready.
Garden Hoses . These are crucial for draining your water heater. You will attach the hose to the heater’s drain valve and run it to a floor drain or outside.
Air Compressor This is the secret weapon for a truly dry system. Gravity drains most of the water, but compressed air blows out the lingering droplets that settle in the low spots of your pipes. You don’t need an industrial-sized one; a standard pancake compressor works fine.
Air Compressor Adapter (Blowout Plug) This small brass fitting connects your air compressor hose to your water lines (usually via a laundry spigot or an outdoor hose bib).
Non-Toxic RV/Marine Antifreeze Important: Do not use automotive antifreeze (ethylene glycol), which is highly toxic. You need propylene glycol, which is usually pink and labeled for RVs or marine use. This is for your traps (drains in sinks and tubs), not your water lines.
Safety Gear
- Gloves: To protect your hands from cold water and sharp metal edges.
- Flashlight or Headlamp: You will likely be working in dark basements or crawl spaces.
- Towels: There will be spills. Be ready to mop them up.
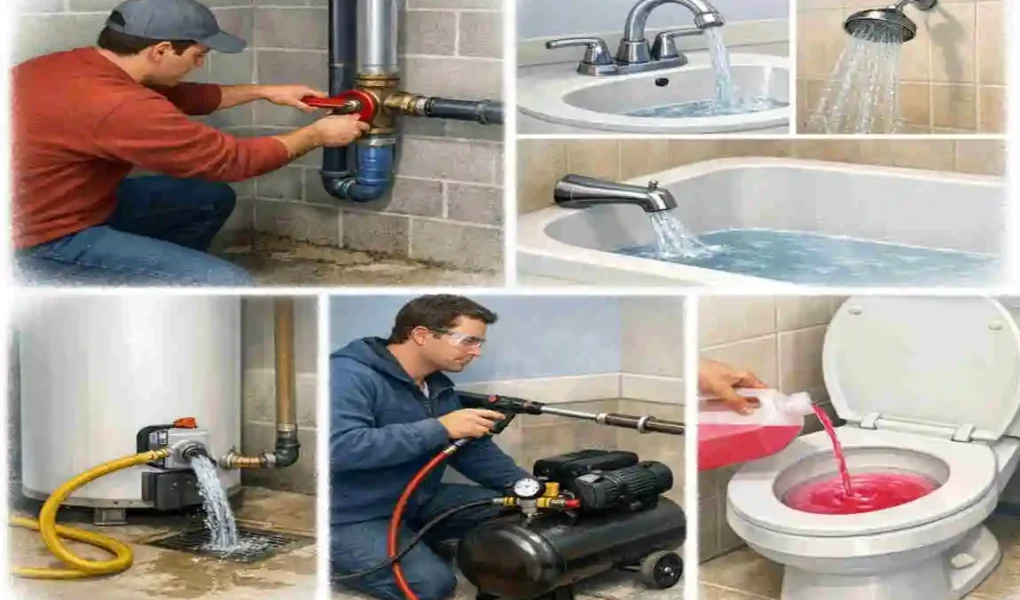
Step-by-Step: How to Drain a Water System in a House Main Guide
Now that you are prepped, let’s dive into the process. We will break this down into manageable steps. Take your time, and don’t rush.
Shut Off the Main Water Supply
Everything starts here. You need to stop new water from entering your home.
- Locate the Valve: This is usually found in the basement, a crawl space, or a utility closet near the front of the house. In warmer climates, it might be outside in a box near the street.
- Turn it Off: If it is a round “gate” valve, turn it clockwise until tight. If it is a lever “ball” valve, turn it so the handle is perpendicular to the pipe.
- The Meter: If you have a private well, switch off the breaker to the well pump. If you are on city water, the main valve is your target.
Relieve Pressure and Drain Hot/Cold Lines
Once the water is off, let the water in the pipes escape.
- Open All Faucets: Go through the house and open every single sink, shower, and tub faucet. Do this for both hot and cold handles.
- Start Top-Down: Gravity is your friend. Open the faucets on the highest floor first, then work your way down to the basement or lowest level.
- Flush Toilets: Flush every toilet to empty the tanks. Hold the handle down to get as much water out as possible.
Empty the Water Heater
This is a critical step because a water heater holding 40+ gallons of water can freeze and split open, causing a massive disaster.
- Turn Off Heat Source: If it is electric, flip the breaker off at the panel. If it is gas, turn the dial to “Pilot” or “Off.” Never drain a water heater while it is still on; you will burn out the heating elements.
- Connect the Hose: Attach your garden hose to the drain valve at the bottom of the tank.
- Open the Drain Valve: Run the other end of the hose to a floor drain or outside. Open the valve (you might need a flathead screwdriver).
- Open the Pressure Relief Valve: Flip the lever on the T&P valve (usually near the top) to let air in, which helps the water flow out faster.
Drain Appliances
Your washing machine and dishwasher hold water in their pumps and hoses even when not in use.
- Washing Machine: Turn the settings to “Warm” and start a cycle for a few seconds to pull in air, then stop. Consult your manual for specific winterizing instructions, as you may need to disconnect the hoses and tip them into a bucket.
- Dishwasher: Clean out the filter and sponge out any standing water in the bottom.
Use an air compressor to Blow Out Lines
Gravity does a good job, but air does a perfect job. This ensures no water is sitting in the “belly” of a pipe somewhere.
- Close Faucets: Go back and close all the faucets you opened in Step 2.
- Connect Compressor: Attach your compressor to a faucet (usually the laundry tub or an outdoor spigot) using the adapter.
- Set Pressure: Set the compressor regulator to no more than 30-40 PSI. Higher pressure can burst your fittings.
- Open Faucets One by One: With the air running, go to each faucet again, one at a time. Open it until only air comes out, then close it. Do this for every fixture, including the shower and toilet supply lines.
Add Antifreeze to Prevent Residual Freezing
You have cleared the supply lines, but what about the drains? The “P-traps” under your sinks are designed to hold water to block sewer gas. If that water freezes, the trap cracks.
- Pour Antifreeze: Pour about a cup of pink RV antifreeze into every sink drain, shower drain, and bathtub drain.
- Toilets: Pour a generous amount into the toilet bowl and the tank to mix with any remaining water.
How to Drain a Water System in a House: Room-by-Room Breakdown
Sometimes it helps to look at this process room by room, so you don’t miss anything. Here is a quick checklist to ensure every corner of your home is safe.
The Kitchen
The kitchen is full of hidden water lines.
- Refrigerator: If you have a water dispenser or ice maker, disconnect the water line at the back. Drain the line and discard the ice in the bin.
- Dishwasher: Ensure the drain hose (often looped under the sink) is empty.
- Sink Sprayer: Don’t forget the vegetable sprayer hose; squeeze it while the air compressor is running.
The Bathrooms
Bathrooms have the most fixtures.
- Showers: If you have a handheld showerhead, let it hang down to drain the hose.
- Toilets: Sponge out the remaining water in the tank if you want to be extra safe before adding antifreeze.
- Bidets: If you have a bidet attachment, drain its small tank and lines.
Laundry and Utility Room
- Washing Machine: Disconnect the hot and cold supply hoses and drain them into a bucket.
- Utility Sink: Pour antifreeze down the drain.
- Water Softener/Filter: If you have a whole-house water filter or softener, put it in “bypass” Mode and drain the canister.
Garage and Exterior
- Hose Bibs: Remove any garden hoses attached to the outside taps. Even with a frost-free sill cock, a connected hose can trap water and cause a burst inside the wall.
- Sprinkler System: If you have underground sprinklers, these usually require a professional “blowout” with a high-volume compressor, as a home compressor is rarely strong enough.
Special Cases: Draining Water in Vacation Homes and RVs
The principles for draining a house’s water system se apply everywhere, but vacation homes and RVs have unique needs.
Vacation Homes
If you are leaving a house unattended for months, paranoia is your friend.
- The Main Valve: After draining, leave the main water valve OFF. If the city accidentally surges pressure, you don’t want it entering your empty pipes.
- Smart Sensors: Consider installing a Wi-Fi-enabled water leak detector. If some residual water melts and leaks, you will get an alert on your phone.
- Heat: Even if drained, keep the furnace at 50-55°F to protect the structure (drywall and wood) from contraction damage.
RVs Recreational Vehicles
RVs are houses on wheels with very little insulation. They freeze much faster than a brick-and-mortar home.
- The 12V Pump: Unlike a house, you can use the RV’s internal water pump to suck antifreeze into the supply lines. Many RVers prefer this method (filling the lines with pink fluid) over just blowing them out with air, as RV plumbing is delicate.
- Hot Water Tank: Most RV water heaters have a plastic drain plug. Be careful not to cross-thread it when reinstalling.
- City Water Inlet: Don’t forget to push the little check valve on the city water connection to let water drain out of that inlet.
FeatureVacation Home StrategyRV Strategy
Water Lines Blow out with air; leave empty. Blow out OR fill with non-toxic antifreeze.
Heating: Keep furnace low (55°F). usually stored unheated; needs thorough winterizing.
Traps Pour antifreeze in drains. Pour antifreeze in the drains and toilet seal.
Monitoring: Ask a neighbor to check weekly. Cover with a tarp or store indoors if possible.
Reopening Your System in Spring: Safe Steps After Winter
Spring has sprung, and you are ready to turn the water back on. Stop! Do not just rip the main valve open. Re-pressurizing a dry system too fast can damage fittings (a phenomenon called “water hammer”).
- Close All Drains: Ensure your water heater drain valve and all faucet handles are closed.
- Remove Aerators: Unscrew the little screens (aerators) from your bathroom and kitchen faucets. Sediment might have dried in the pipes and will break loose when water flows.
- Open Faucets Halfway: Open the cold and hot taps about halfway throughout the house.
- Open Main Valve Slowly: Go to your main shutoff. Open it just a crack. You will hear hissing as air rushes out of the faucets.
- Wait for Flow: Once water flows steadily from the faucets without sputtering, you can open the main valve fully.
- Fill Water Heater: Crucial: Do not turn the power/gas back on to the water heater until you are sure the tank is full of water. Open a hot water faucet; when water runs continuously, the tank is full.
- Check for Leaks: Walk the house. Look under sinks and around the water heater.
- Reinstall Aerators: Screw the screens back onto the faucets.
Troubleshooting: What If Water Won’t Drain Fully?
You have opened the valves, but the water is just trickling or stopped completely. What is going on?
Vapor Lock: Think of putting your finger over a straw full of water. The liquid stays in. Your pipes can do the same.
- The Fix: You need to let air in so water can flow out. Make sure faucets on the highest floor are open. You may need to loosen a specific nut or coupling at a high point in the plumbing system to break the vacuum.
Sediment Blockage Over time, minerals build up in the bottom of water heaters and old galvanized pipes.
- The Fix: If the water heater drain is clogged with white chunky debris, you might need to insert a stiff wire (like a coat hanger) into the valve to break up the sediment. Be prepared for a rush of hot water!
Low Points (Bellies) If a pipe was installed incorrectly and sags, water will sit in that dip.
- The Fix: This is why the air compressor step is vital. Gravity can’t empty a sagging pipe, but air can push the water out.
Pro Tips and Maintenance for Year-Round Plumbing Health
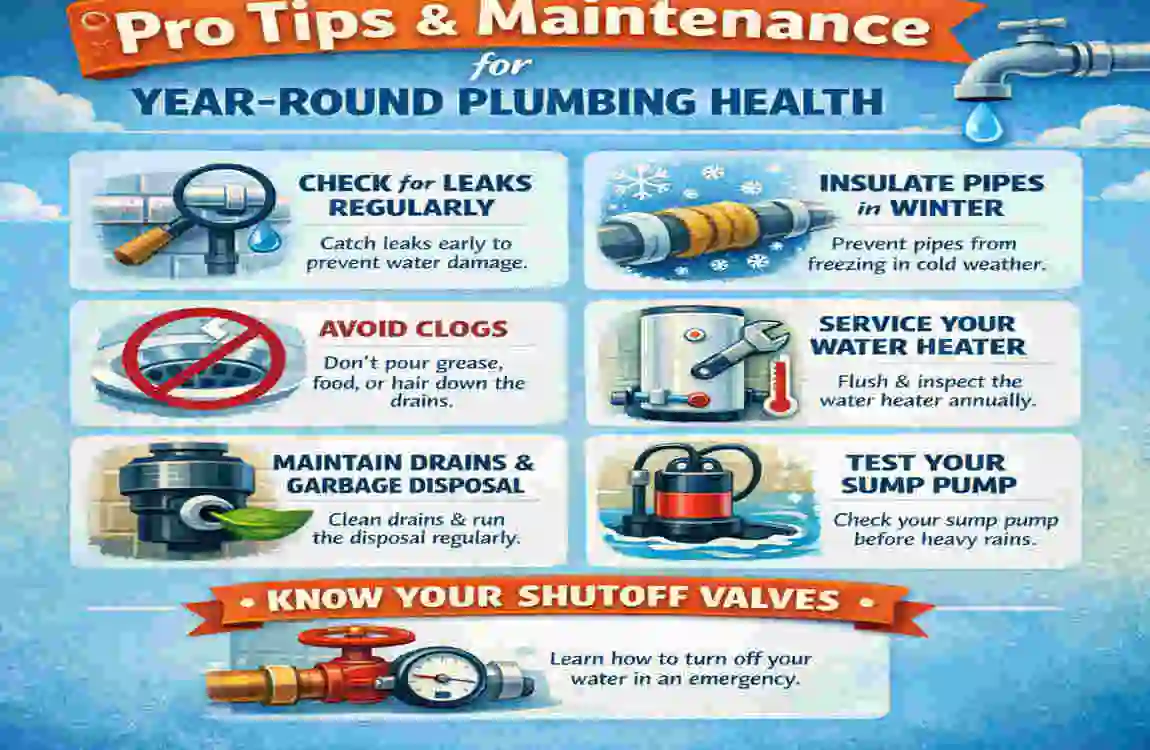
Mastering how to drain a water system in a house is a great skill, but preventative maintenance is even better.
- Pipe Insulation: Go to the hardware store and buy foam pipe insulation (pool noodles). Wrap any water pipe that runs through an unheated area, like a crawl space or garage.
- Seal Cracks: Look for daylight showing through your foundation or rim joists. A can of expanding foam sealant can block the cold draft that targets your pipes.
- Heat Tape: For notoriously problematic pipes, install electric heat tape. You plug it in during winter, and it gently warms the pipe to prevent freezing.
- Know Your Home: Take a picture of your main shutoff valve and tag it. In an emergency, you don’t want to be searching for it.
FAQ: How to Drain a Water System in a House
How long does it take to drain the house’s water system? For a standard family home, the process typically takes about 1 to 2 hours. Using an air compressor adds a little time but ensures a better result.
Do I really need to drain the water heater? Yes. If the power goes out and the house freezes, a full water heater can burst, causing catastrophic damage. It is also good maintenance to flush out sediment.
Is pink antifreeze safe for my house drains? Yes, provided it is RV/Marine antifreeze (propylene glycol). It is non-toxic and safe for septic systems. Never use automotive antifreeze.
Can I drain the house without an air compressor? You can, and it will remove about 90% of the water via gravity. However, for complete peace of mind—especially in very cold climates—blowing out the lines is highly recommended to remove water trapped in low spots.
What do I do with the ice maker in my fridge? Disconnect the water line from the back of the fridge and drain it into a bucket. Run the ice maker cycle until it produces no more ice to clear the internal mechanism.