You are sitting outside on a lazy Sunday afternoon, a fresh cup of coffee in hand, surrounded by the lush greenery of your backyard. Suddenly, the sky darkens, and unpredictable weather rolls in. A sudden rainstorm threatens to ruin your peaceful moment. But instead of rushing inside, you lean back and smile. You stay perfectly dry and comfortable as you relax in your beautifully designed house seating area in the garden with a roof.
This is the exact magic of covered outdoor spaces. A well-designed house seating area in garden with roof combines comfort, style, and functionality in a way that completely transforms how you use your home. You no longer have to let a glaring afternoon sun or an unexpected drizzle dictate when you can enjoy fresh air.
Building a roofed outdoor lounge does more than extend your living space into nature. It actively protects your outdoor furniture from harsh weather, so you spend less time cleaning and more time relaxing. Plus, it is a incredibly smart financial move. According to recent landscaping studies, adding a permanent, covered outdoor structure can boost your property value by 10% to 15%.
Why Choose a House Seating Area in Garden with Roof?
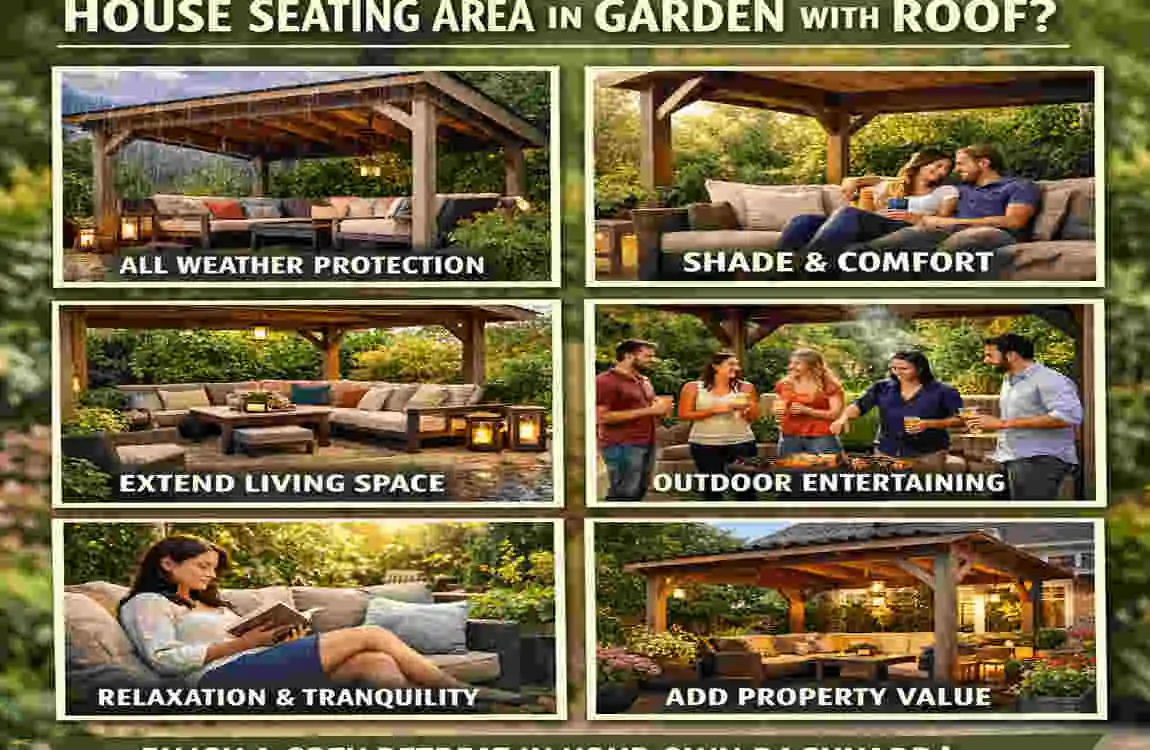
You might be wondering if adding a roof to your outdoor space is truly worth the effort. The short answer is an absolute yes! Let us break down exactly why a roofed garden seating area for homes is a game-changer for your lifestyle.
Beyond the practical benefits, these structures add massive aesthetic appeal and a deep sense of privacy. A roof creates a visual boundary. It turns a massive, open lawn into an intimate, cozy room. It also blocks nosy neighbors’ view from second-story windows!
Finally, let us talk about the return on investment (ROI). Real estate data consistently shows that modern homebuyers actively look for homes with established, protected outdoor living areas. It significantly increases your home’s resale value.
Open vs. Roofed Garden Seating Comparison
To help you decide, let us look at a direct comparison between keeping your patio open versus adding a roof.
FeatureOpen Garden SeatingRoofed Garden Seating Area
Cost Lower upfront cost. Higher initial investment, but better long-term ROI.
Durability Furniture fades and degrades faster due to sun/rain. Furniture and decking last years longer due to protection.
Maintenance High. Requires constant cleaning of leaves, dirt, and water. Low. The roof keeps most debris and water out.
Usability Limited strictly to mild, sunny (but not hot) days. Usable year-round, rain or shine, day or night.
Key Materials and Features for Your Garden Seating Area with Roof
Choosing the right materials is the secret to building a long-lasting house seating area in garden with roof. You want something that looks beautiful but can also handle mother nature’s mood swings.
The Best Building Materials to Consider
- Wood (Teak, Cedar, Pine): Wood brings a warm, natural, and classic feel to any garden. Cedar and teak are naturally resistant to bugs and rot.
- Pros: Gorgeous aesthetic, highly customizable.
- Cons: Requires regular staining or sealing.
- Cost: Roughly $50 to $100 per square foot depending on the wood grade.
- Metal (Aluminum, Steel, Wrought Iron): Metal is perfect for modern pergolas and sturdy gazebos. Always opt for powder-coated or rust-proof options.
- Pros: Incredibly strong, fire-resistant, very low maintenance.
- Cons: Can get hot to the touch in direct summer sun.
- Fabric and PVC (Retractable Roofs): Heavy-duty outdoor fabrics are fantastic for creating a flexible space.
- Pros: Allows you to open or close the roof based on your daily mood.
- Cons: Fabric needs to be replaced every 5 to 10 years and must be retracted during heavy snow or extreme winds.
- Polycarbonate Panels: These are tough, clear, or tinted plastic panels that sit atop a wood or metal frame.
- Pros: Extremely affordable, lets natural light in while blocking harmful UV rays.
- Cons: Can be noisy during heavy rain.
Must-Have Features to Elevate Your Space
To make your garden lounge truly special, you need to add the right features. Solar LED lighting is an absolute must for evening ambiance. Installing outdoor ceiling fans will keep the air moving and naturally deter mosquitoes. Add modular furniture that you can rearrange easily, and surround the edges with lush, oversized planters to blend the structure into the garden.
If you love the environment, look into eco-friendly sustainability angles. You can easily find recycled composite lumber or use reclaimed wood for your posts!
Material Cost and Lifespan Breakdown
Material ChoiceAvg. Cost per 100 sq ftExpected Lifespan
Natural Wood (Cedar) $1,500 – $3,000 15 – 20+ years (with care)
Powder-Coated Aluminum $2,000 – $4,500 20 – 30+ years
Polycarbonate Panels $500 – $1,200 10 – 15 years
Heavy-Duty Fabric/Canvas $800 – $2,000 5 – 10 years
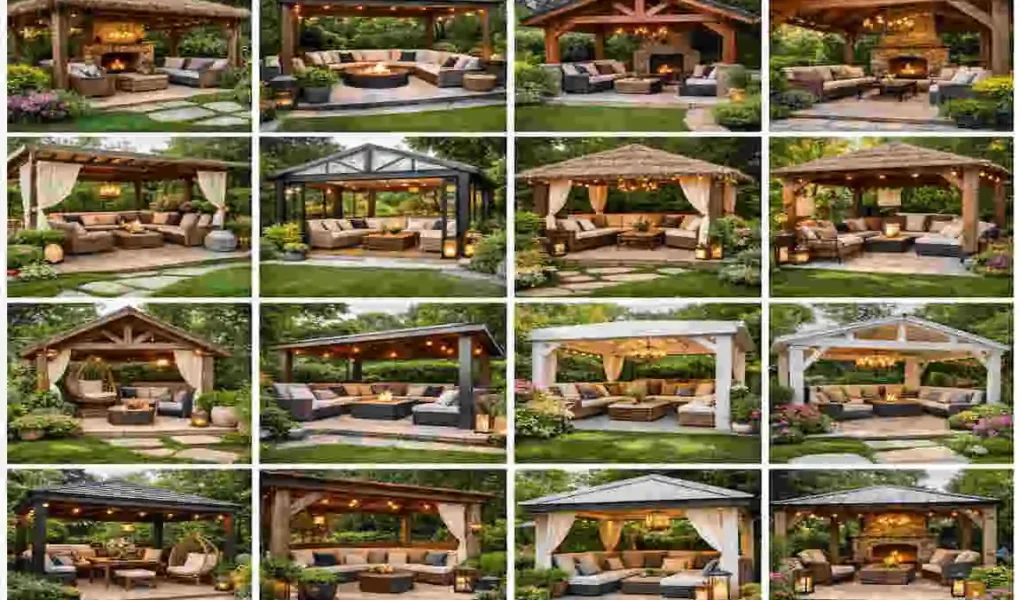
15 Stunning House Seating Area in Garden with Roof Ideas
Let us dive right into the inspiration! Below are 15 distinct house seating area in garden with roof ideas. Whether you want a simple, budget-friendly DIY project or a high-end luxury pavilion, you will find exactly what you need here.
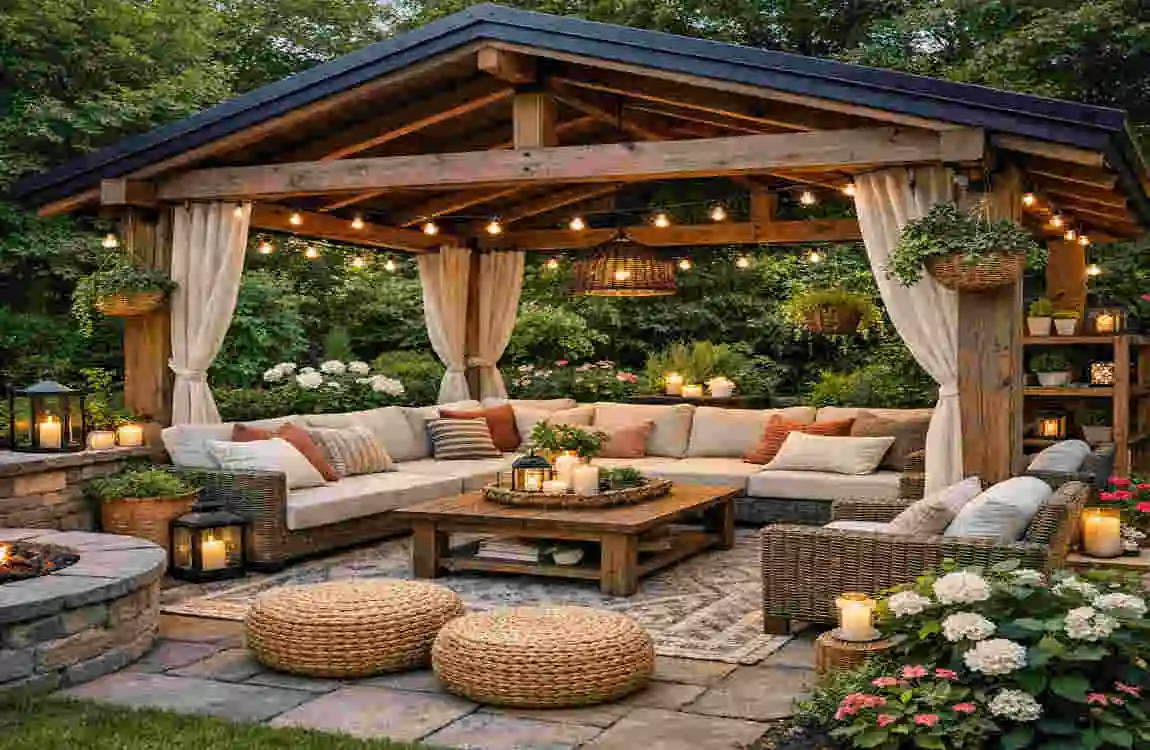
Classic Wooden Pergola Lounge
Imagine stepping out into your backyard and relaxing under a sturdy, beautifully stained wooden pergola. This classic design features arched beams and open sides, making it feel incredibly spacious. It is the perfect structure to support climbing vines like wisteria or jasmine, which eventually create a “living roof” effect over time.
You can soften the look of the heavy wood by adding sheer, flowing outdoor curtains to the corners. This adds a layer of romantic privacy and catches the evening breeze beautifully.
- Pros: Timeless look, great for climbing plants, highly customizable.
- Cons: Requires annual sealing to prevent rot.
- Estimated Cost: $2,000 to $5,000.
- 3-Step Build Sketch:Secure heavy wooden anchor posts into concrete footings.
- Attach the main support beams horizontally across the posts.
- Lay the top rafters evenly to create the slotted roof effect.
Modern Retractable Roof Patio
If you love modern technology, a retractable roof patio is your best friend. This setup uses a sleek metal or composite frame paired with a motorized fabric canopy. With the simple push of a button on your smartphone or a remote, the roof smoothly glides open or closed.
This gives you the ultimate control. You can soak up the morning sun, and then slide the roof closed to block out the harsh midday glare. Many of these systems seamlessly integrate with smart home tech, allowing you to set schedules!
- Pros: Ultimate weather flexibility, smart-home compatible, sleek modern look.
- Cons: Higher price point, motors may eventually need maintenance.
- Estimated Cost: $3,000 to $7,000.
- 3-Step Build Sketch:install the perimeter aluminum framework securely to your deck or patio.
- Mount the motorized track system along the top inner edges.
- Feed the heavy-duty UV canvas into the tracks and wire the motor to a safe outdoor power source.
Rustic Gazebo with Built-in Benches
A rustic, octagonal gazebo is a charming addition that instantly makes your garden feel like a public park. Building it on a slightly raised stone base keeps the wood safe from ground moisture and gives you a great view of your lawn.
To save space and maximize seating, you can build permanent wooden benches directly into the gazebo’s inner railings. Throw down some colorful outdoor cushions, and you have the perfect, cozy spot for afternoon tea gatherings or reading a good book.
- Pros: Very sturdy, offers excellent rain protection, built-in seating saves money on furniture.
- Cons: Takes up a distinct, permanent footprint in your yard.
- Estimated Cost: $1,500 to $4,000.
- 3-Step Build Sketch:Lay an octagonal foundation using paving stones or a wooden deck.
- Erect the eight corner pillars and connect them with middle railing bars.
- Build the pitched, umbrella-style roof using wooden shingles or asphalt tiles.
Minimalist Metal Frame Canopy
Sometimes, less is more. A minimalist metal-frame canopy uses sleek, thin aluminum lines painted in neutral tones, such as matte black or crisp white. It does not distract the eye; instead, it frames your garden perfectly.
Because the structure is so strong, it is the perfect place to hang comfortable hammock chairs or a suspended porch swing. Pair this roof with simple, low-profile concrete furniture to maintain that ultra-modern, clean aesthetic.
- Pros: Very quick to assemble, zero rust issues, highly durable.
- Cons: Can look a bit too “cold” or industrial without the right styling.
- Estimated Cost: $1,000 to $3,000.
- 3-Step Build Sketch:Bolt the metal base plates into an existing concrete patio.
- Assemble the lightweight aluminum uprights and top frame using heavy-duty bolts.
- Snap the solid metal or composite roof panels into place along the top ridges.
Tropical Thatched Roof Hut
Bring the beach resort to your backyard! A tropical thatched-roof hut uses natural materials such as dried palm leaves, water reed, or bamboo. This style is not just for looks; it is incredibly functional.
- Pros: Eco-friendly, naturally cooling, creates a fun vacation vibe.
- Cons: Thatch needs to be replaced every few years and can attract birds looking for nesting materials.
- Estimated Cost: $2,500 to $6,000.
- 3-Step Build Sketch:Sink thick, natural wooden poles into the ground for the main frame.
- Build a highly sloped, conical roof frame out of bamboo.
- Layer and tie the dried palm thatch tightly, starting from the bottom edge and working up to the peak.
Glass-Enclosed Conservatory Seat
If you want to feel totally immersed in your garden during a rainstorm without getting a single drop of water on you, a glass-enclosed conservatory is the answer. Using transparent glass or high-quality acrylic panels for the roof and partial walls keeps your view of the sky completely unobstructed.
This creates a mini-greenhouse feel. It stays remarkably warm in the winter months, allowing you to enjoy your house seating area in garden with roof even when it is snowing outside.
- Pros: Unbeatable views, 100% waterproof, allows all natural light to enter.
- Cons: Can get very hot in the summer without proper ventilation or sunshades.
- Estimated Cost: $4,000 to $10,000.
- 3-Step Build Sketch: Construct a heavy-duty timber or steel frame capable of supporting heavy glass.
- Install the tempered, double-glazed glass panels using waterproof rubber seals.
- Add sliding screen windows on the sides to allow for cross-breeze airflow.
Sail Shade Outdoor Dining Nook
For a breezy, modern, and highly affordable option, look no further than sail shades. These are large, triangular or rectangular pieces of high-density polyethylene (HDPE) fabric stretched tightly between anchor points.
They look like the sails of a ship floating over your patio. You can overlap multiple sails of different colors to create a unique, dynamic shadow pattern. They are incredibly low-maintenance and can be taken down in minutes if a severe storm is approaching.
- Pros: Very budget-friendly, easy DIY installation, visually unique.
- Cons: Does not provide 100% rain protection (water can drip through the tension gaps).
- Estimated Cost: $800 to $2,500.
- 3-Step Build Sketch:install tall, heavy steel posts deeply into the ground at varying heights.
- Attach heavy-duty D-rings and turnbuckles to the corners of the sail fabric.
- Hook the fabric to the posts and crank the turnbuckles until the sail is tight and wrinkle-free.
Luxury Louvered Roof Pavilion
This is the absolute peak of outdoor luxury. A louvered roof pavilion features horizontal roof slats that rotate. Using a remote control or a smartphone app, you can tilt the slats open to let the sun in, angle them to create partial shade, or close them completely flat to form a solid, waterproof roof.
Many of these systems come with built-in, hidden rain gutters. When it rains, the water flows neatly down the inside of the support posts and away from your seating area. It is the absolute master of shade control.
- Pros: 100% customizable shade, fully waterproof when closed, adds massive home value.
- Cons: The most expensive option on the list, requires professional installation.
- Estimated Cost: $5,000 to $12,000.
- 3-Step Build Sketch:Professionals pour concrete footings and erect the heavy aluminum corner pillars.
- The outer framing and hidden internal gutter system are connected.
- The individual rotating louvers are slotted in and connected to the central motor system.
Cozy Fire Pit Arbor
Extend your outdoor season deep into the autumn and winter with a cozy fire pit arbor. This design features a sloped roof to ensure proper smoke ventilation, covering a deeply sunken seating area focused entirely around a central fire pit.
Whether you use a natural wood-burning pit or a clean gas-powered fire table, this setup provides a massive boost to evening ambiance. It is the perfect place to roast marshmallows with the kids or share a glass of wine with friends under the stars.
- Pros: Provides immense warmth, creates a natural social gathering focal point.
- Cons: Requires careful planning for fire safety and smoke ventilation.
- Estimated Cost: $3,500 to $8,000.
- 3-Step Build Sketch:Construct a solid, fireproof stone or brick patio floor.
- Build the fire pit in the direct center, running gas lines underground if necessary.
- Build a high, open-gabled roof overhead to allow smoke to escape upward easily.
Bohemian Teepee-Style Canopy
If you want a relaxed, festival-inspired vibe, a bohemian teepee canopy is a fun and creative choice. This involves draping weather-resistant canvas over tall, center-gathered poles.
To complete the look, layer the floor beneath it with multiple outdoor rugs, oversized floor cushions, and low wooden pallet tables. Hang some battery-operated fairy lights inside the peak. It is a fantastic, informal spot for relaxing, meditating, or letting the kids have an outdoor sleepover.
- Pros: Very affordable, unique aesthetic, easy to pack away for the winter.
- Cons: Not meant for extreme weather or heavy snow.
- Estimated Cost: $1,200 to $3,500.
- 3-Step Build Sketch: Secure 4 to 6 tall wooden poles into the ground in a wide circle, tying them securely at the top.
- Wrap and secure the heavy-duty canvas tightly around the frame, leaving an entrance flap.
- Lay down a waterproof tarp on the ground before layering your decorative rugs.
Contemporary Cantilever Umbrella Extension
If you have a very small garden or a tight patio, a permanent roof might feel too heavy or block too much light. A contemporary cantilever umbrella is the perfect space-saver.
Unlike a traditional umbrella that has a pole directly in the middle of your table, a cantilever umbrella features an offset arm. The heavy base sits off to the side, and the massive roof canopy hangs over your seating area. It provides the feeling of a roof without the permanent footprint.
- Pros: Excellent for small spaces, easily adjustable, no building permits required.
- Cons: Can tip over in very high winds if the base is not properly weighted.
- Estimated Cost: $500 to $2,000.
- 3-Step Build Sketch: Fill the massive base unit with wet sand or water to make it immovable.
- Insert the main vertical mast into the base and secure the locking pins.
- Crank the handle to extend the offset arm and open the massive canopy over your chairs.
Victorian Wrought-Iron Veranda
For lovers of timeless elegance, a Victorian-style wrought-iron veranda is unmatched. These structures feature beautifully ornate, swirling metal details along the edges and pillars.
You can paint the iron a crisp white for a garden-party feel, or keep it classic black. They look spectacular when paired with traditional garden elements like climbing red roses or blooming bougainvillea wrapping around the metal poles.
- Pros: Extremely elegant, long-lasting, highly decorative.
- Cons: Heavy materials require a very solid foundation.
- Estimated Cost: $2,000 to $5,500.
- 3-Step Build Sketch:Bolt the heavy iron base plates deeply into a concrete or stone patio.
- Connect the ornate, pre-cast iron pillars to the top railing frame.
- Attach a sloped metal or glass roof to the top to direct rain away from the house.
Eco-Friendly Green Roof Terrace
Why build a roof when you can build a garden on top of your roof? A green roof terrace involves planting living vegetation, such as hardy sedum plants or moss, directly on a specially designed flat roof over your seating area.
This living roof naturally insulates the space below, keeping it delightfully cool in the summer. It also absorbs rainwater, which reduces patio flooding. You can even add a living plant wall on one side to completely enclose yourself in nature.
- Pros: Highly eco-friendly, excellent natural insulation, blends perfectly into the garden.
- Cons: Requires a heavy-duty reinforced frame to support the massive weight of wet soil.
- Estimated Cost: $4,500 to $9,000.
- 3-Step Build Sketch:Build a heavily reinforced structural frame with a slight slope for drainage.
- Lay down a thick, heavy-duty waterproof membrane, followed by a root-barrier layer.
- Add lightweight growing medium (soil) and plant drought-tolerant sedum plugs across the surface.
Modular Sectional Under Polycarbonate
If you are a weekend warrior looking for a rewarding project, a modular polycarbonate roof kit is DIY-friendly and highly functional. These kits come with lightweight aluminum frames and tinted polycarbonate panels that literally snap together.
Because the materials are light, you do not need heavy machinery to lift them. The tinted panels let beautiful, diffused sunlight into the space while blocking 99% of harmful UV rays. Slide a comfortable outdoor sectional sofa underneath, and you have an instant outdoor living room.
- Pros: Very DIY-friendly, lets in natural light, highly affordable.
- Cons: Polycarbonate can scratch easily if hit by heavy falling tree branches.
- Estimated Cost: $1,800 to $4,500.
- 3-Step Build Sketch:Assemble the lightweight aluminum frame using the provided bracket kit.
- Slide the polycarbonate panels into the frame channels.
- Snap the locking caps over the seams to create a watertight seal.
Amphitheater-Style Tiered Seating Arbor
For large families or people who love hosting neighborhood parties, an amphitheater-style arbor is a showstopper. Instead of traditional chairs, this design uses multi-level, tiered wooden benches built into a hillside or a raised deck.
A curved, sweeping roof covers the entire tiered section. This creates an incredibly fun, stadium-like seating area. It is perfect for outdoor movie nights! Just set up a projector screen on the lawn, and everyone gets a perfect, rain-protected view.
- Pros: Holds a massive number of guests, highly unique design, perfect for sloped gardens.
- Cons: Complex to build; likely requires professional carpentry skills.
- Estimated Cost: $3,000 to $7,500.
- 3-Step Build Sketch:Excavate or build up the ground to create three distinct, stepped levels.
- Build sturdy, wide wooden retaining walls that double as deep bench seats.
- Construct a wide, arching canopy roof overhead to protect the entire tiered section.
Design and Customization Tips for Success
Now that you have chosen your dream house seating area in garden with roof, it is time to plan the execution. Rushing into construction without a plan is a recipe for stress. Let us walk through the essential step-by-step planning process to customize your space perfectly.
Step-by-Step Planning
- Measure Your Space and Assess Sunlight: Do not just guess the size. Get a tape measure and mark the exact footprint on your grass with spray paint. Spend a day watching how the sun hits that spot. Does it get blazing afternoon sun? You will definitely want a solid roof or louvered panels.
- Allocate Your Budget Wisely: A good rule of thumb is to spend 40% on high-quality materials, 30% on professional labor (if hiring), and save the remaining 30% for the fun stuff: comfortable furniture, lighting, and decor.
- Coordinate Lighting and Furniture: Think about how you will use the space at night. Run electrical wires before you finish the roof so you can hang stylish pendant lights seamlessly. Pair heavy, dark wood roofs with light, bright furniture cushions to keep the space from feeling cave-like.
Common Mistakes to Avoid
The biggest mistake homeowners make is ignoring wind loads. If you live in a windy area, your roof needs to be anchored deeply into concrete footings. A strong gust of wind can easily rip a poorly secured canopy right out of the soil.
Another major error is poor drainage. Always ensure your solid roof has a slight slope (at least a 2% grade). If the roof is perfectly flat, water will pool in the center, eventually leading to leaks or collapsing.
Climate-Specific Customization (Humid Areas)
Always opt for heat-resistant materials. Metal roofs must have insulation panels underneath, otherwise, they will radiate heat downwards like an oven. Furthermore, heavy mosquito netting is an absolute necessity. You can install sheer bug screens on hidden tracks that pull down easily as the sun sets, keeping the pests out without ruining the aesthetic.
Budget Tiers for Customization
Budget Tier Investment Range Example Customization Ideas
Low Under $2,000 Sail shades, DIY modular kits, string fairy lights, pallet furniture.
Mid $2,000 – $6,000 Wooden pergolas, polycarbonate panels, built-in wooden benches, outdoor rugs.
High $6,000+ Motorized louvered roofs, glass conservatories, integrated fire pits, smart lighting.
Cost Breakdown and DIY vs. Professional
Money is a major factor in any home improvement project. The total cost of a roofed garden seating area can range widely, from a modest $500 to $15,000, depending entirely on the size (typically 100 to 300 square feet) and the luxury of the materials.
Should you build it yourself or hire a professional? Let us look at the numbers.
Expense CategoryDIY Cost EstimateProfessional Cost EstimateTop Savings Tip
Foundation/Decking $300 – $800 $1,000 – $2,500 Use simple concrete footers instead of a full poured slab.
Framing Materials $800 – $1,500 $1,500 – $3,000 Buy lumber during off-season winter sales.
Roofing Materials $400 – $1,000 $1,200 – $4,000 Corrugated polycarbonate is significantly cheaper than shingles.
Labor Fees $0 (Just your sweat!) $1,500 – $4,500 Do the demolition and site prep yourself before the pros arrive.
The DIY Checklist
If you are going the DIY route, make sure you are fully prepared. You will need a solid set of tools: a power drill, a circular saw, a high-quality level, measuring tapes, and a sturdy A-frame ladder.
Most importantly, do not forget about permits! Check your local city or county regulations. Many municipalities require a building permit for any permanent structure with a roof that exceeds a certain square footage. Skipping this step can lead to hefty fines later.
Tips for Hiring a Professional
If you decide to hire a contractor, be smart about it. Always ask for pictures of their past garden structures. Ask them specifically how they handle drainage and foundation anchoring. A good contractor will happily explain their process for ensuring the structure will not sink or blow away over time.
Maintenance and Upkeep for Longevity
You have invested time and money into building this beautiful space, so you want it to last! Maintaining roofed garden seating areas is surprisingly easy if you stay on top of a seasonal schedule.
Your Seasonal Care List
- Spring Cleaning: Grab a ladder and clear the roof of fallen leaves, twigs, and debris. If you have gutters, flush them out with a hose.
- Summer Inspections: Check your fabric canopies for small tears and patch them immediately. Inspect the metal joints for any signs of early rust and touch them up with rust-inhibiting spray paint.
- Autumn Sealing: If you have a wooden structure, apply a fresh coat of waterproof sealant or wood stain before the harsh winter weather arrives.
Pro Maintenance Tips
Always use a high-quality UV protectant spray on your outdoor fabrics and canvas roofs. The sun is the biggest enemy of fabric, and a simple spray can double its lifespan. If you live in an area with extreme winter snow, consider removing your fabric canvases or polycarbonate panels entirely and storing them in winter so they do not collapse under the weight of ice.
Frequently Asked Questions (FAQs)
What is the average cost of a house seating area in garden with roof? The overall cost varies significantly based on your chosen materials and the size of the structure. A simple, DIY fabric sail shade or polycarbonate kit can cost between $500 and $1,500. However, larger permanent wooden or metal structures built by professionals typically average between $3,000 and $7,000.
Can I successfully DIY a garden seating area with roof? Yes, absolutely! If you are handy with basic tools, you can easily tackle this project. Opt for modular, snap-together kits, pre-cut wooden pergola sets, or sail shades, as these are highly DIY-friendly. Just remember always to use a level, recruit a friend to help lift heavy beams, and secure the anchor posts deeply into the ground.
How can I easily make my covered garden seating area mosquito-proof? The most effective method is to install high-quality, fine-mesh outdoor curtains on tracks around the perimeter of your roofed structure. For a less intrusive option, install powerful outdoor ceiling fans; mosquitoes are weak flyers and cannot navigate strong downward air currents—finally, plant natural repellents like citronella, lavender, and marigolds around the seating border.