There are many times when you may need to cap off sink plumbing. Maybe you are removing an old sink, updating a bathroom, or changing a kitchen layout. In some cases, the plumbing stays in place for a while before a new fixture is installed. In other cases, the old lines will not be used again.
| Section | Key Focus | What You Learn |
|---|---|---|
| Introduction | Why capping sink plumbing matters | Common reasons for removing or shutting off sink lines |
| Tools & Materials | Essential plumbing equipment | Caps, wrenches, pipe types, safety gear |
| Pipe Types | Understanding plumbing systems | PVC, copper, PEX, and galvanized pipes |
| Step-by-Step Process | How to cap off sink plumbing | Shut water, disconnect lines, install caps, test leaks |
| Common Mistakes | DIY errors to avoid | Wrong cap size, over-tightening, skipping leak tests |
| Temporary vs Permanent | Choosing the right solution | When to use short-term or long-term capping |
| Safety & Codes | Plumbing compliance | Local regulations and safe installation practices |
This is where proper capping matters. If you leave open water lines or drain pipes exposed, you can end up with leaks, smells, moisture problems, or even water damage. The good news is that this is often a simple DIY sink plumbing job when you use the right tools and take your time.
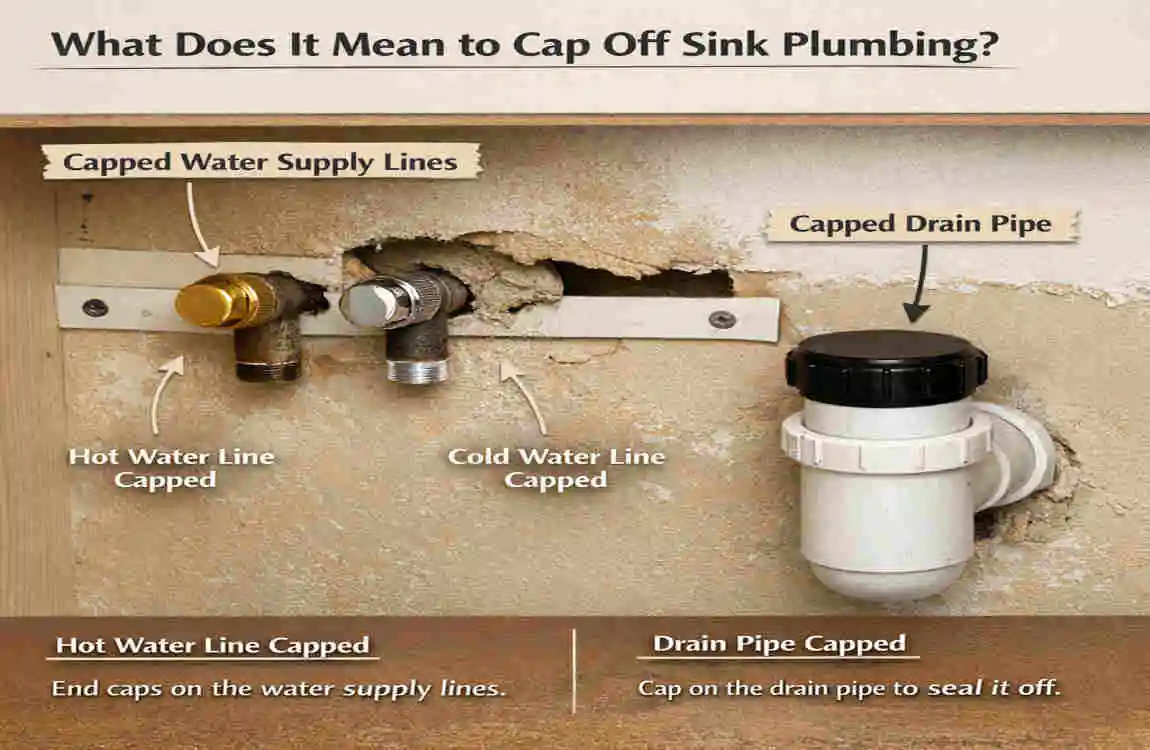
What Does It Mean to Cap Off Sink Plumbing?
Definition of Plumbing Caps
A plumbing cap is a fitting that closes the end of a pipe. It stops water from moving through the line and helps seal the opening. Some caps are made for temporary use, while others are built for long-term closure.
Why Sink Plumbing Needs to Be Capped
You may need to cap unused water lines during a remodel, after a sink removal project, or when replacing old fixtures. It keeps the system safe and helps prevent unwanted leaks.
Benefits of Properly Capping Plumbing
A good seal helps prevent plumbing leaks, protects nearby surfaces, and keeps the area safer while work continues. It also helps keep your plumbing neat and ready for future use.
Situations When You Need to Cap Off Sink Plumbing
During Bathroom Renovations
When a vanity or sink comes out, the old lines often need to be capped right away. This is common in bathroom remodeling plumbing jobs.
Kitchen Remodeling Projects
If you are moving a sink or changing cabinets, you may need to cap sink water lines until the new setup is ready.
Converting Rooms
Some homeowners turn a laundry room or basement into a different kind of space. In that case, old plumbing may no longer be needed and should be sealed.
Temporary Plumbing Shutdowns
Sometimes the line is only paused for future work. In that case, a temporary cap can keep the system safe until the next phase begins.
Tools and Materials Required to Cap Off Sink Plumbing
Essential Tools
- Adjustable wrench
- Pipe wrench
- Channel-lock pliers
- Pipe cutter
- Bucket and towels
Necessary Materials
You may need plumbing pipe caps, a sink drain cap, pipe tape, and pipe sealant. The exact part depends on the pipe type and whether you are sealing a water line or a drain.
Safety Equipment
Use gloves, safety glasses, and a flashlight. These simple items make the job easier and safer.
Choosing the Right Cap for Your Pipe Type
Pipe Type Common Cap Choice Notes
PVC PVC cap Simple to install and common in drain lines
Copper Threaded or compression cap needs careful fitting
PEX Push-fit or crimp-style cap Depends on the system
Galvanized steel Threaded cap Older lines may need extra care
Understanding Different Types of Sink Plumbing Pipes
PVC Pipes
PVC is lightweight, affordable, and commonly used for drain pipe sealing. It is easy to work with and is often used in modern homes.
Copper Pipes
Copper is strong and long-lasting. It is often found in water supply lines, but it must be capped with the correct fitting.
PEX Plumbing Systems
PEX is flexible and popular in newer homes. It is easier to route and often quicker to cap during plumbing renovation tips projects.
Galvanized Pipes
These older pipes can be tricky because corrosion is common. If the pipe is damaged, you may need extra repair work before capping.
Identifying Your Pipe Material
Look at the color, texture, and shape of the pipe. If you are not sure, take a close look before buying a cap to ensure the fit is correct.
Step-by-Step Guide on How to Cap Off Sink Plumbing
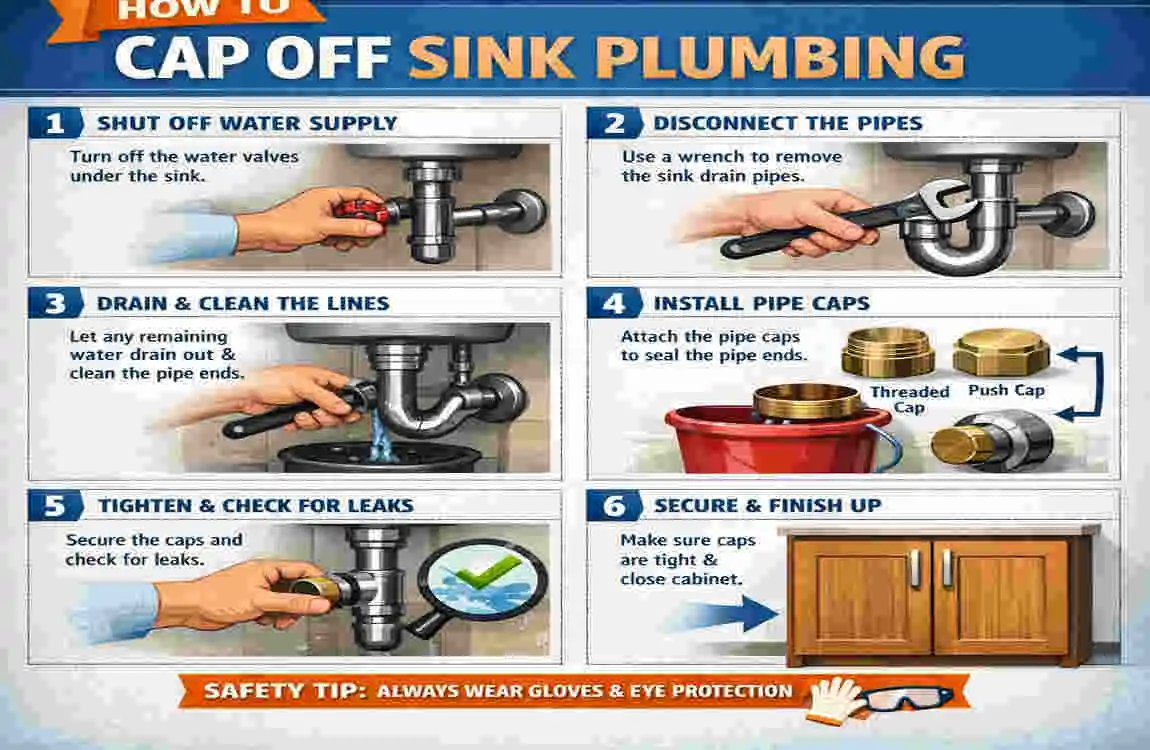
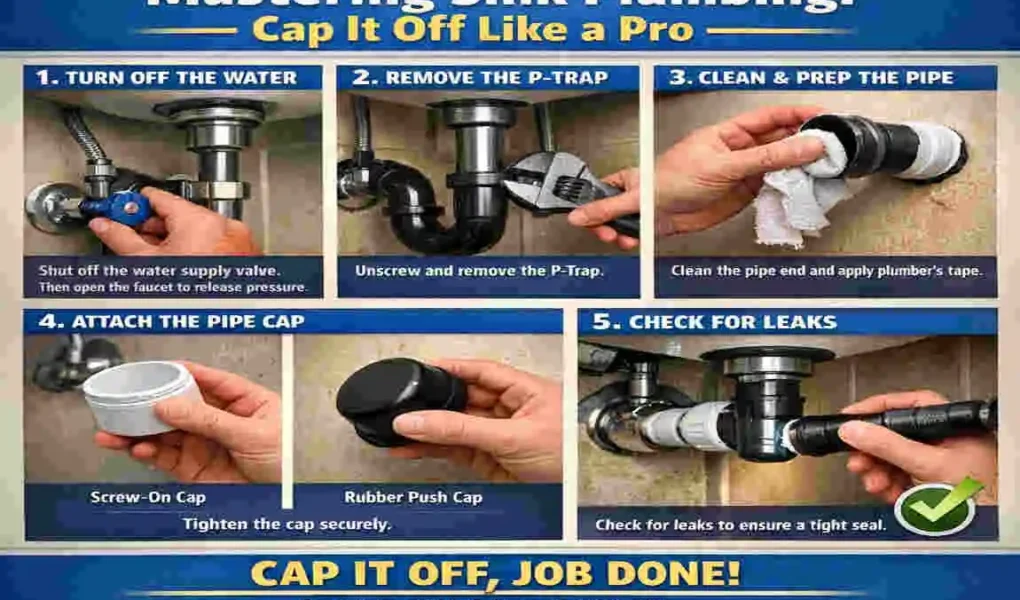
Turn Off the Water Supply
Start by finding the shut-off valves under the sink. If those do not work or are missing, turn off the main water supply. This is one of the most important plumbing safety tips.
Drain Remaining Water
Open the faucet to release leftover water from the lines. Keep a bucket and towel nearby to catch drips.
Disconnect the Sink Plumbing
Remove the supply lines and drain parts carefully. If you are working on a sink removal project, take your time so you do not damage the pipe ends.
Clean and Inspect Pipe Ends
Wipe away dirt, old tape, and debris. Check for rust, cracks, or wear. A clean pipe end helps the cap seal better.
install the Appropriate Pipe Cap
Use the correct cap for the pipe. A threaded cap should fit snugly, a compression cap should sit evenly, and a PVC cap should match the pipe size exactly. This is the heart of how to cap plumbing pipes correctly.
Secure the Cap Properly
Tighten the fitting firmly, but do not force it. Over-tightening can damage the pipe or the cap. The goal is a snug, even seal.
Restore Water and Test for Leaks
Turn the water back on slowly. Watch the capped area closely for drips or moisture. If you see a leak, shut the water off and adjust the fitting.
Monitor the Area
Check the capped line again after a while. A small leak may not show right away, so it is smart to inspect it more than once.
Common Mistakes to Avoid When Capping Sink Plumbing
Using the Wrong Cap Size
A cap that is too loose or too tight will not seal well. Always measure the pipe before buying the fitting.
Forgetting to Turn Off Water
This mistake can cause a mess fast. Always shut off the water first.
Over-Tightening Fittings
Too much force can crack the cap or damage the pipe. Tight is good, but forced is not.
Ignoring Small Leaks
Even a tiny drip can grow into a bigger problem. Fix it early to avoid water damage.
Skipping Leak Testing
Never assume the job is done without checking. A final test is a must for water line capping.
Temporary vs. Permanent Plumbing Caps
Temporary Caps
These work well during remodeling or short pauses in work. They are easy to remove later, which makes them useful for planned upgrades.
Permanent Caps
If a line will not be used again, a permanent seal is the better choice. It gives long-term protection and helps keep the system closed.
Which Option Is Best for Your Project?
If you plan to reconnect the line later, use a temporary cap. If the line is abandoned for good, choose a permanent one.
Plumbing Code Considerations and Safety Tips
Local Plumbing Regulations
Rules can vary by area, so it is smart to follow local codes. This is especially important in bathroom sink plumbing repair and renovation work.
Vent and Drain Requirements
Do not forget that plumbing systems need proper airflow and drainage. Sealing one part of the system should not cause problems elsewhere.
Preventing Mold and Water Damage
A good seal helps keep moisture out of walls, cabinets, and floors. That is one of the biggest benefits of careful plumbing maintenance.
Knowing When to Hire a Professional
If the pipes are old, badly corroded, or part of a larger remodel, a plumber can save you time and stress.
Troubleshooting Common Problems After Capping Off Sink Plumbing
Cap Leaks After Installation
This usually means the fitting is loose, dirty, or the wrong size. Remove it, clean the pipe, and try again.
Water Pressure Issues
If the line is still connected to a larger system, pressure changes may happen. Check that the cap and surrounding lines are secure.
Drain Odors
A bad seal around a drain opening can let odors come through. A proper sink drain cap helps stop that.
Corroded Pipe Ends
If the pipe end is damaged, it may need to be repaired before capping. A cap will not seal well over rough metal.
Expert Maintenance Tips for Capped Plumbing Lines
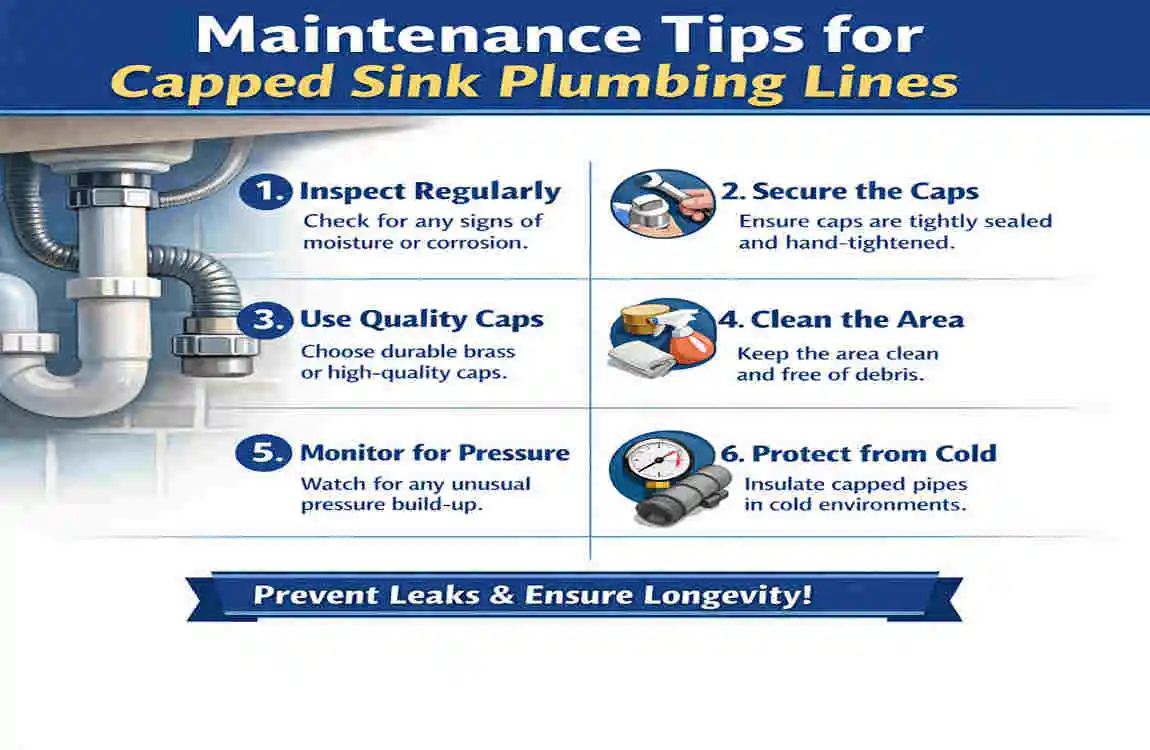
Regular Inspections
Take a quick look at capped lines from time to time. Early checks help you catch problems before they spread.
Monitor Moisture Levels
If the area feels damp or looks stained, inspect it right away. Hidden leaks can happen slowly.
Label Capped Lines
If you may reuse the line later, label it clearly. That makes future work much easier.
Keep Documentation
Write down what was capped and when. Good records help during future plumbing maintenance or remodeling work.
Frequently Asked Questions About How to Cap Off Sink Plumbing
Can I cap off the sink plumbing without removing the sink?
Yes, in some cases, you can cap the supply lines and leave the sink in place for a while. It depends on the project.
What type of cap should I use for PVC pipes?
Use a PVC cap that matches the pipe size. A proper fit is key for a solid seal.
Is capping sink plumbing a DIY-friendly project?
Yes, many homeowners can do it with basic tools. Just work slowly and check for leaks.
How do I know if the cap is sealed properly?
If there is no dripping, no moisture, and no smell after testing, the seal is likely good.
Can capped plumbing lines be reused later?
Yes, if they were capped correctly and not damaged. That is one reason people use temporary caps.
Do I need a permit to cap off sink plumbing?
Sometimes, yes. Rules vary by location, so check local requirements before starting.
How long does the process take?
A simple job can be done fairly quickly, but the time depends on the pipe type and the line’s condition.