If you are replacing a sink, remodeling a room, or removing old plumbing, you may need to cap off sink plumbing. This means sealing the open pipe to prevent water from leaking out.
It is a useful DIY job for many homeowners. You do not always need a plumber if the job is simple and the pipes are easy to reach. Still, you must work carefully. A loose cap or the wrong fitting can cause leaks, water damage, and extra repair costs.
What Does It Mean to Cap Off Sink Plumbing?
Definition of capping a plumbing line
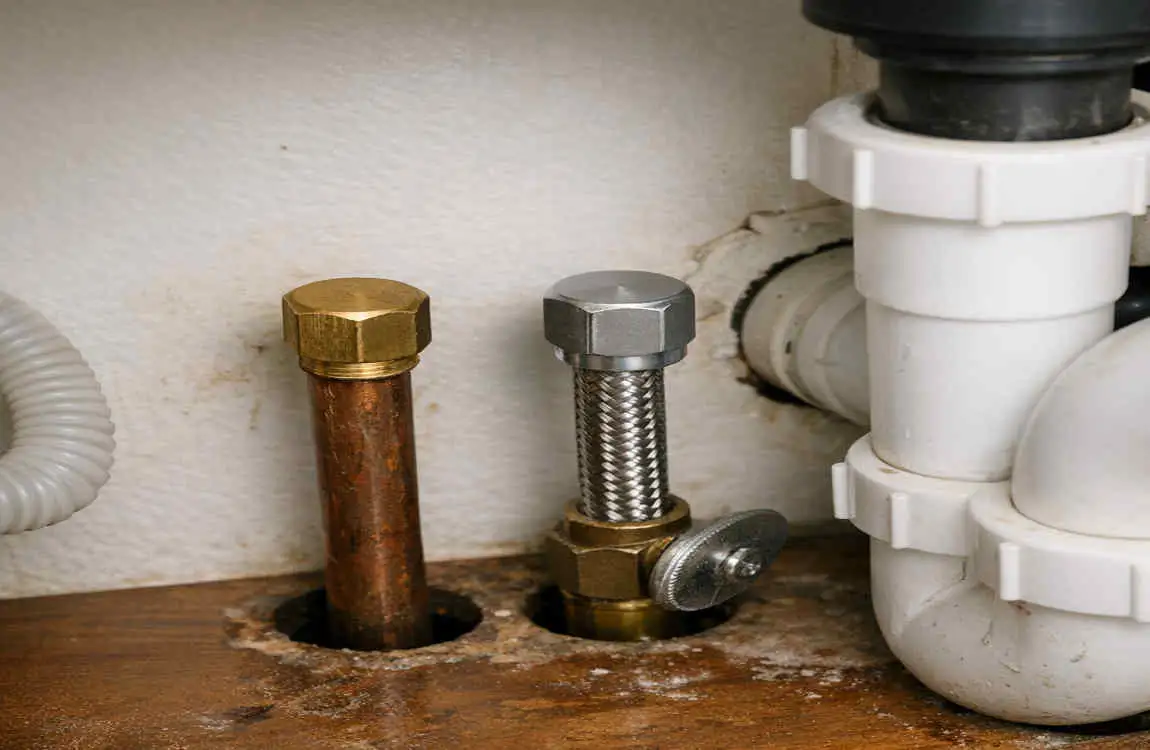
Capping a plumbing line means closing the open end of a pipe with a fitting called a pipe cap. The cap blocks water from flowing out of the line.
This is important when a sink is removed or a pipe is left unused. Without a cap, the pipe can leak, spray water, or cause moisture problems behind walls and under cabinets.
Situations where capping is needed
You may need to cap off plumbing in several common situations:
- Removing a sink
- Kitchen or bathroom remodeling
- Installing a new vanity
- Temporary plumbing closure
If you are not using the pipe for a while, capping it keeps the plumbing safe and clean.
Tools and Materials You’ll Need
Essential tools
Before you begin, gather your basic tools. Having everything ready makes the job easier and cleaner.
- Adjustable wrench
- Pipe cutter if needed
- Bucket
- Towels
- Plumber’s tape
A bucket and towels are especially helpful because some water usually stays inside the line.
Plumbing materials
The type of cap you need depends on the pipe material and size. Common options include:
- Pipe caps
- Compression caps
- Push-fit caps
- PVC end caps
- Copper pipe caps
Tool/MaterialPurpose
Adjustable Wrench Loosen plumbing fittings
Pipe Cap Seal the pipe
Bucket Catch remaining water
Plumber’s Tape Prevent leaks
Towels Clean water spills
How to Cap Off Sink Plumbing Step by Step
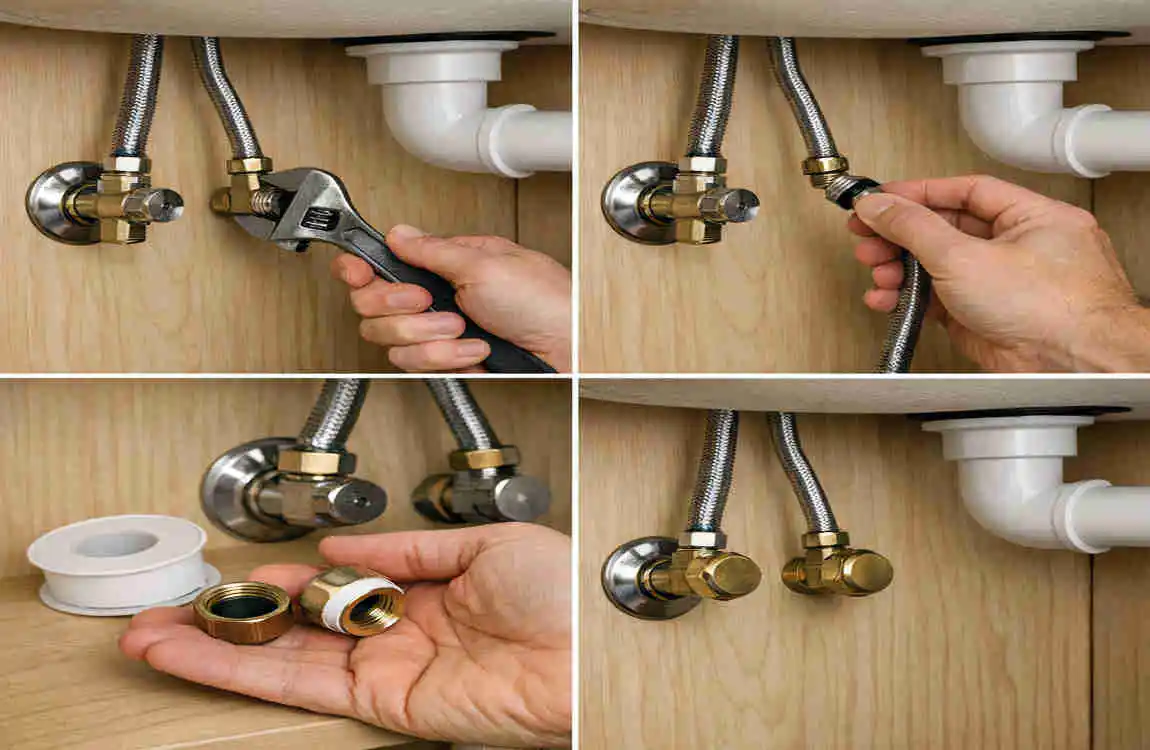
Turn Off the Water Supply
Start by shutting off the water valves under the sink. Turn both the hot and cold supply valves clockwise until they stop.
If the sink does not have local shutoff valves, turn off the home’s main water supply.
Drain Remaining Water
Open the faucet and let the remaining water drain out. This lowers pressure in the line and helps prevent spills.
Place a bucket under the pipes to catch any leftover water from the supply line or drain area.
Disconnect the Sink Plumbing
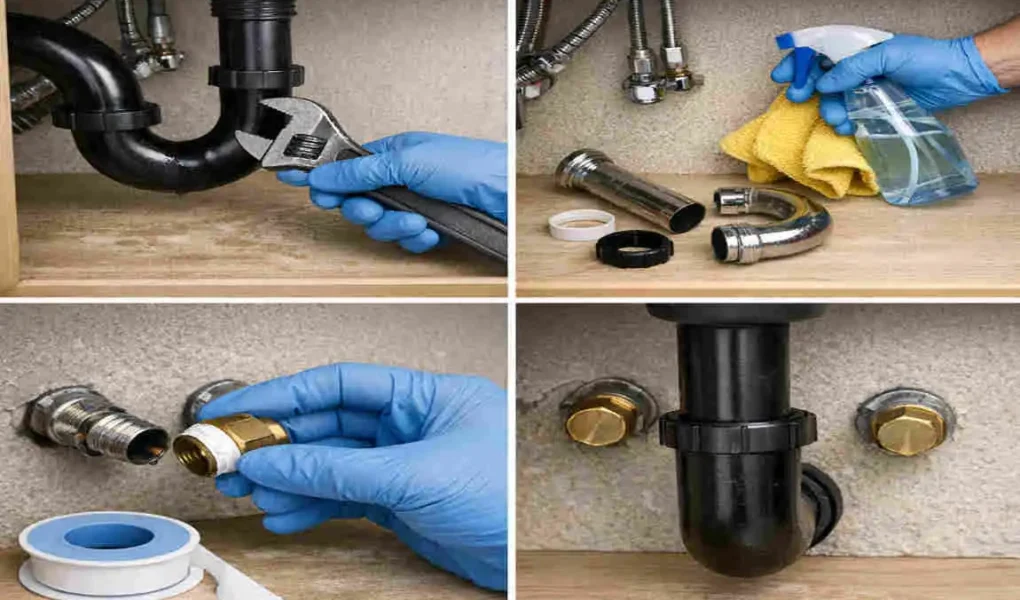
Use your wrench to disconnect the supply lines or remove the old sink parts if needed. If you are only capping the line, you may not need to remove the entire pipe system.
Work slowly so you do not damage nearby fittings.
Clean the Pipe Ends
Before installing the cap, wipe the pipe end clean. Dirt, rust, or old tape can stop the cap from sealing properly.
A clean pipe gives you a better fit and lowers the chance of leaks later.
Install the Correct Pipe Cap
Now attach the cap that matches your pipe type.
- For threaded pipes, wrap plumber’s tape around the threads first.
- For push-fit caps, press the cap onto the pipe until it locks.
- For PVC pipes, use the right glue cap if the pipe is being permanently closed.
- For copper pipes, use a copper cap or soldered fitting if required.
Tighten Securely
Tighten the cap enough to create a firm seal, but do not force it.
Overtightening can crack fittings or damage threads. A snug fit is usually enough for a safe seal.
Simple reminder
Never leave a capped pipe unchecked. Even a small leak can cause hidden damage over time.
Different Types of Pipe Caps
Compression Caps
Compression caps work well for many supply lines. They seal the pipe by tightening a ring around it.
These are popular because they are easy to install and do not require soldering.
Push-to-Connect Caps
These are one of the easiest options for DIY work. You push the cap onto the pipe, and it locks in place.
They are fast, clean, and useful when you want a simple solution without special tools.
Threaded Caps
Threaded caps screw onto threaded pipes. They are common in metal plumbing systems.
Use plumber’s tape on the threads to help ensure a watertight seal.
PVC Glue Caps
PVC glue caps are made for plastic drain or supply pipes. They are glued in place and create a strong, permanent seal.
These are best when you know the pipe will not be reused.
Solder Caps for Copper Pipes
Copper pipes sometimes need soldered caps for a permanent closure. This method takes more skill and heat tools.
If you are not comfortable soldering, it may be better to use a push-fit or compression option instead.
Safety Tips Before You Begin
Shut off water completely
Do not start work until you know the water is fully off. A surprise flow of water can make the job messy and dangerous.
Wear gloves and safety glasses.
Gloves help protect your hands from sharp pipe edges. Safety glasses protect your eyes from water spray or debris.
Keep the work area dry.
A dry work area helps you see leaks faster and prevents slipping.
Use the correct cap size.
A cap that is too loose will leak. A cap that is too tight may damage the pipe. Always check the size before installing.
Common Mistakes to Avoid
Here are a few mistakes that often cause trouble:
- Forgetting to turn off the water
- Using the wrong cap size
- Overtightening fittings
- Skipping leak testing
- Leaving open drain pipes
If you avoid these mistakes, the project becomes much easier and safer.
When You Should Call a Professional Plumber
Hidden pipe leaks
If water is leaking inside a wall or under a floor, the problem may be bigger than it looks. A plumber can inspect it safely.
Damaged plumbing lines
Cracked, broken, or badly worn pipes should be replaced, not just capped.
Corroded pipes
Old pipes with rust or corrosion may not hold a cap well. In that case, a plumber may need to cut and replace part of the line.
Complex plumbing systems
If your home has a complicated setup, multiple branches, or unfamiliar pipe materials, professional help is the safer choice.
Benefits of Properly Capping Sink Plumbing

When done correctly, capping sink plumbing gives you several benefits:
- Prevents leaks
- Stops water damage
- Keeps pests and odors out
- Makes future renovations easier
- Improves plumbing safety
A good cap protects your home even when the sink is removed for an extended period.
Maintenance Tips After Capping
Inspect periodically
Check the capped pipe now and then, especially during the first few days after installation.
Check for moisture
Look for damp spots, water stains, or a musty smell. These can be early signs of a leak.
Replace damaged caps
If the cap cracks, loosens, or rusts, replace it right away.
Monitor water pressure after future plumbing work.
If you later reconnect the system or add new fixtures, make sure everything still works properly.
Frequently Asked Questions
How do I cap off sink plumbing safely?
Turn off the water supply, disconnect the plumbing, install the correct pipe cap, and test for leaks.
Can I cap off sink plumbing without removing the pipes?
Yes. Many push-fit and compression caps let you seal the existing pipe without removing it.
What type of cap should I use?
Choose a cap that matches your pipe material and diameter, such as PVC, copper, or threaded metal caps.
Is capping sink plumbing permanent?
It can be temporary or permanent depending on the type of cap and your renovation plans.
Do I need plumber’s tape?
Plumber’s tape is recommended for threaded fittings to help create a watertight seal.
How long does it take to cap off sink plumbing?
Most homeowners can finish the job in 30 to 60 minutes.
| Topic | Details |
|---|---|
| Purpose | Cap off sink plumbing to safely seal unused water supply lines or drain pipes during renovations or after removing a sink. |
| Difficulty Level | Easy to Moderate (DIY-friendly) |
| Estimated Time | 30–60 minutes |
| Tools Needed | Adjustable wrench, pipe cutter (if needed), pliers, Teflon (PTFE) tape, bucket, towels |
| Materials Required | Pipe caps, compression caps or threaded caps, PVC end cap (for drains), pipe cement (if using PVC) |
| Turn Off Water | Shut off the main water supply or the sink’s shutoff valves before starting. |
| Cap Water Supply Lines | Remove the faucet connections and install the correct-sized cap on both hot and cold water supply lines. |
| Cap the Drain Pipe | Attach a PVC or ABS end cap to the drain pipe using the appropriate cement or a mechanical test cap. |