Home plumbing keeps your sinks, toilets, tubs, and drains working smoothly every day. But when a clog occurs deep in the system, it can quickly turn into a messy, expensive problem. That is where a plumbing cleanout becomes important.
For homeowners, this is a small part of the plumbing system that can make a big difference. A cleanout can help prevent backups, protect your home from water damage, and save time during repairs.
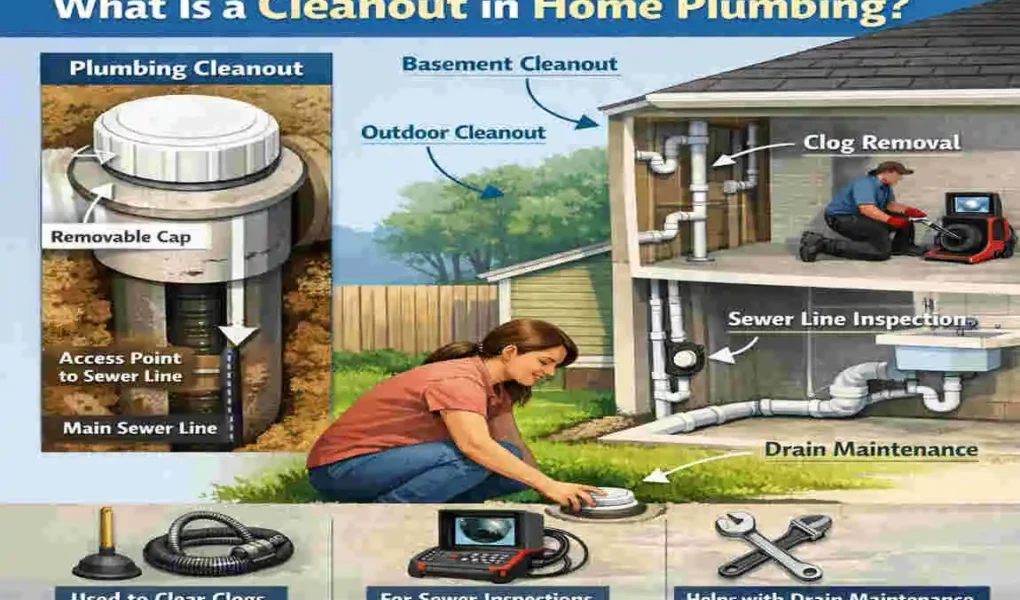
What Is a Cleanout in Plumbing?
A plumbing cleanout is an opening in a drain or sewer line that allows easy access for cleaning and inspection. It usually has a cap or plug on top so the line stays sealed when not in use.
The main purpose of a cleanout pipe is simple: it gives plumbers a direct path to remove clogs and check for deeper issues in the plumbing system. Instead of guessing where a blockage is, they can go straight to the problem area.
A cleanout is different from a regular drain pipe. A drain pipe carries wastewater away from fixtures. A cleanout does not carry water during normal use. It exists mainly for sewer line access and maintenance.
Why plumbers use it
- To clear stubborn clogs
- To inspect the line with tools or cameras
- To reduce the need for cutting into walls or floors
- To reach the main drain cleanout quickly
In simple terms, a cleanout is the service access point for your plumbing system.
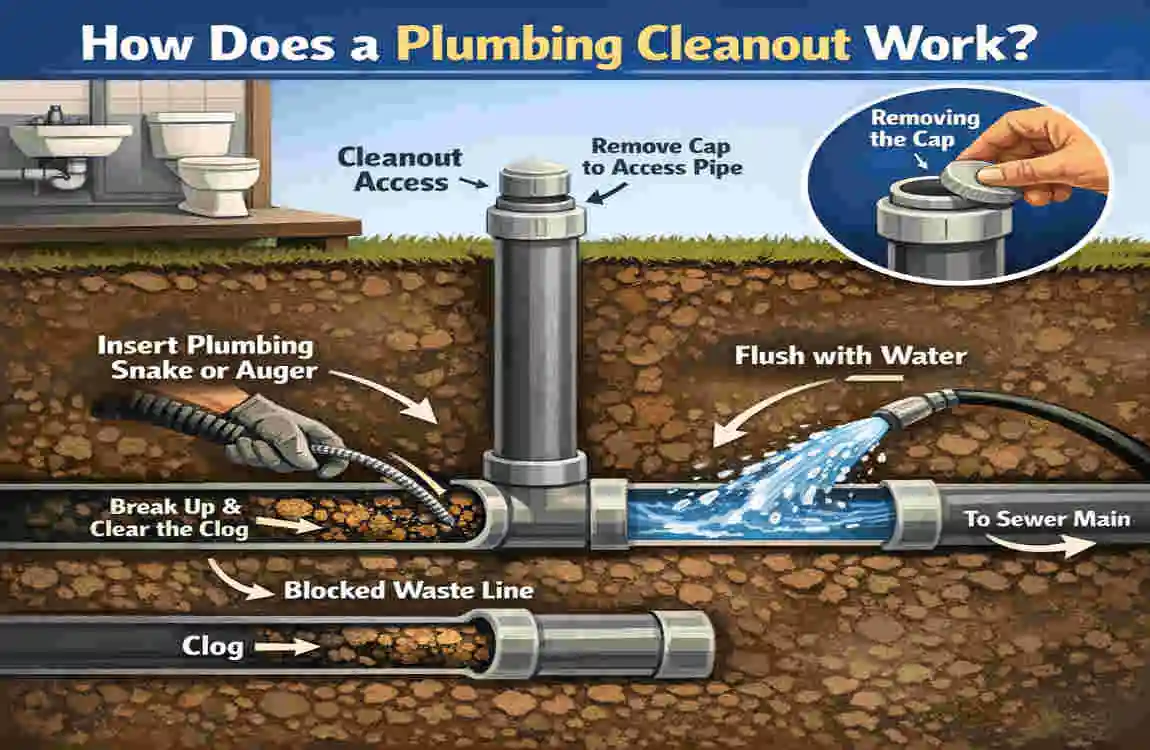
How Does a Plumbing Cleanout Work?
A plumbing cleanout provides direct access to the inside of the drain line. When a plumber removes the cap, they can insert tools to locate and clear the blockage.
Direct Access to Drain Lines
Plumbers often use a drain snake, inspection camera, or hydro jetting equipment through the cleanout. This helps them reach farther into the line than they could through a sink or toilet.
That direct access is useful because clogs are not always near the fixture. Sometimes the real issue sits deeper in the pipe, close to the main sewer line.
Pressure Release and Inspection
A cleanout can also help release built-up pressure in the line. If wastewater and air are trapped, opening the cleanout can help reveal whether there is a serious blockage.
It also makes inspection easier. A plumber can inspect the pipe and determine whether the issue is a simple clog, a tree root intrusion, or a damaged pipe.
Why Cleanouts Save Time and Money
A cleanout often reduces repair costs by making the work faster and less invasive. Instead of breaking drywall or digging up flooring, the plumber starts at the cleanout.
That means:
- Faster clog removal
- Less damage to your home
- Lower labor costs
- Easier maintenance over time
Where Is the Cleanout Located in a Home?
If you are asking where the plumbing cleanout is located, the answer depends on the home’s layout and age. Some cleanouts are easy to spot, while others are hidden or buried.
Common Indoor Locations
Indoor cleanouts are often found in:
- Basements
- Garage areas
- Utility rooms
- Near bathrooms or laundry spaces
These are usually placed where the main drain line runs through the home.
Common Outdoor Locations
Outdoor cleanouts are often found:
- In the yard
- Near the foundation walls
- Along sidewalks
- Near exterior walls
They may sit close to where the main sewer line leaves the house.
What a Cleanout Looks Like
A cleanout usually looks like a capped pipe or plug. It may be:
- PVC with a plastic cap
- Brass with a threaded cap
- A floor-level access point
- A small pipe sticking up from the ground
Quick location guide
Location, Common Appearance, Purpose
Basement PVC pipe with cap , Main drain access
Yard Ground-level capped pipe Sewer maintenance
Bathroom Floor cleanout cover , Drain clearing
Garage Threaded pipe cap Emergency access
If you are not sure what you are looking at, a plumber can help identify it fast.
Why Is a Plumbing Cleanout Important?
A plumbing cleanout may seem small, but it plays a major role in plumbing maintenance and in preventing sewer backups.
Prevents Major Sewer Backups
When a clog grows too large, wastewater can back up into sinks, tubs, or toilets. A cleanout gives plumbers a way to remove the clog before it causes a bigger mess.
Helps With Routine Maintenance
Cleanouts make it easier to schedule regular drain cleaning. This is helpful for homes with older pipes, large families, or repeated drain issues.
Required by Plumbing Codes
In many places, plumbing codes require cleanouts in certain parts of the system. This helps make future repairs easier and safer.
Protects Your Home
A working cleanout can help prevent:
- Water damage
- Sewer odors
- Overflowing toilets
- Costly emergency repairs
In short, a cleanout helps protect both your plumbing and your home.
Types of Plumbing Cleanouts
There are several kinds of cleanouts, and each one serves a slightly different purpose.
Main Sewer Line Cleanout
This is the main access point for the home’s sewer line. It connects to the line that carries wastewater to the city sewer or septic system.
Indoor Drain Cleanout
This type is usually found near a fixture, appliance, or branch drain. It helps with localized clogs.
Outdoor Sewer Cleanout
This cleanout is installed outside the house and gives easy access from the yard or foundation area.
Two-Way Cleanouts
A two-way cleanout allows access in both directions of the pipe. This can be helpful when plumbers need to work upstream and downstream.
Cleanout type comparison
TypeLocationMain Purpose
Main Sewer Cleanout Outside/Foundation Access main sewer line
Indoor Cleanout Basement/Utility area Clear indoor clogs
Outdoor Cleanout Yard Exterior sewer maintenance
Two-Way Cleanout , Main line intersections , Dual-direction cleaning
Signs Your Plumbing Cleanout May Be Needed
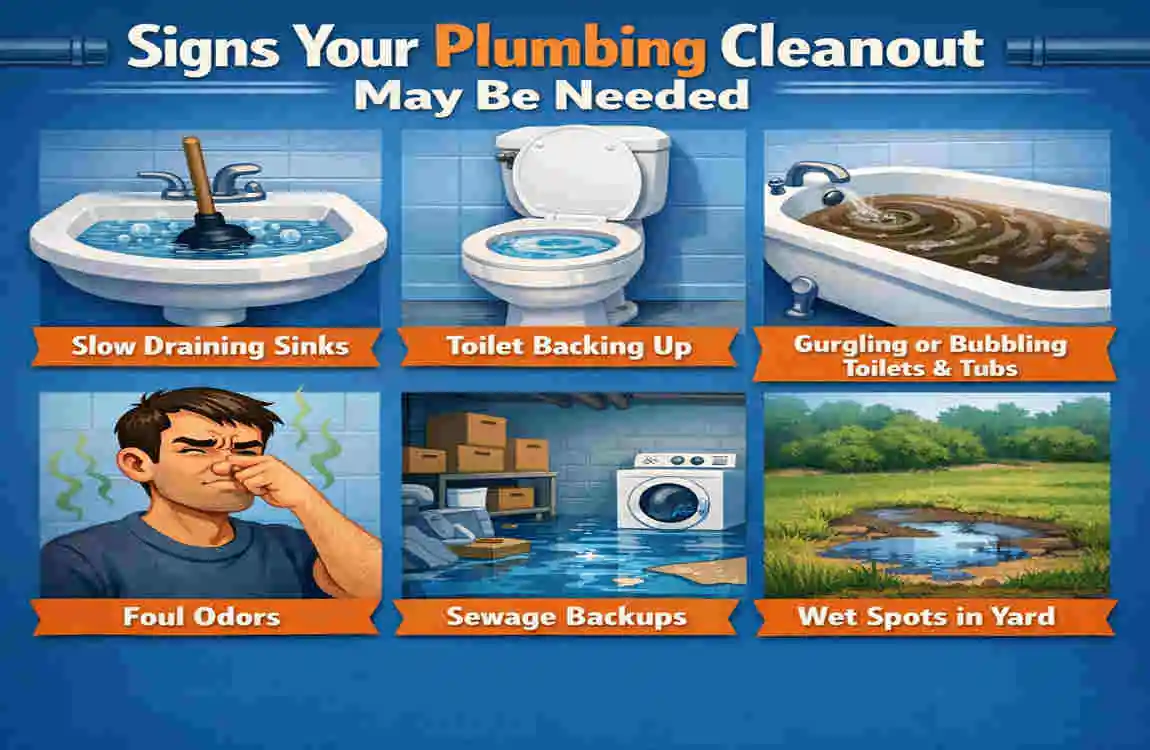
A cleanout is usually not something you think about until a problem appears. Here are some common signs that the cleanout or sewer line may need attention.
Slow Drains Throughout the House
If more than one drain is slow at the same time, the problem may be deeper in the system.
Gurgling Noises
Strange sounds from drains or toilets often indicate that air is trapped in the pipes.
Sewer Smells
Bad smells coming from drains, the basement, or the yard can point to a sewer line issue.
Frequent Toilet Backups
If the toilet keeps clogging even after normal use, the blockage may be further down the line.
Standing Water in the Yard
Wet spots or pooling water can signal a broken or blocked sewer line.
How to Find Your Home’s Plumbing Cleanout
Finding the cleanout can take a little patience, especially in older homes.
Check Exterior Walls
Look near bathrooms, kitchens, or laundry areas along outside walls.
Look Near the Foundation
This is one of the most common places for a main drain cleanout.
Inspect Basement or Crawl Spaces
Older homes often have cleanouts in basements or crawl spaces.
Review Home Inspection Reports
If you bought the home recently, your inspection report may show access points for the plumbing.
Ask a Licensed Plumber
If you cannot find it, a plumber can locate it quickly with experience and the right tools.
How to Open a Plumbing Cleanout Safely
Opening a cleanout should be done carefully because pressure can build inside the line.
Tools You May Need
- Pipe wrench
- Gloves
- Safety glasses
- Bucket
Basic Steps
- Locate the cleanout
- Loosen the cap slowly
- Let the pressure release first
- Remove debris carefully
- Replace the cap tightly
Important Safety Warnings
- Sewer gas may escape
- Wastewater may spill out
- Pressure can force water upward
- Do not force open a stuck cap if you are unsure
If the blockage seems severe, stop and call a professional.
Can You Clear a Clog Through the Cleanout Yourself?
Sometimes, yes. But it depends on how serious the clog is.
DIY Methods
- Drain snake
- Basic auger
- Hot water flushing for minor buildup
When DIY Is Safe
- One slow drain
- Small, recent clogs
- No sewage backup
When to Call a Professional
- Tree root intrusion
- Repeated clogs
- Sewage is backing up into the home
- Suspected broken sewer line
A professional plumber can clear the clog more safely and check whether the line has more serious damage.
Common Problems With Plumbing Cleanouts
Even a cleanout can develop problems over time.
Broken or Missing Caps
If the cap is missing or broken, dirt and debris can enter the line.
Buried Cleanouts
Landscaping, soil, or concrete can cover a cleanout, making it hard to reach.
Cracked Pipes Around the Cleanout
Older plumbing can crack near the access point, especially if the pipe is worn.
Stuck Cleanout Caps
Rust, corrosion, or overtightening can make the cap hard to remove.
Plumbing Cleanout Maintenance Tips
A little care goes a long way when it comes to cleanouts.
Keep the Area Accessible
Do not cover the cleanout with heavy soil, concrete, or objects.
Schedule Routine Drain Cleaning
Regular plumbing inspection can help catch problems early.
Watch What Goes Down Drains
Avoid grease, wipes, paper towels, and debris.
Inspect After Heavy Rain
Storms and flooding can affect sewer systems and reveal hidden issues.
Plumbing Cleanout vs Drain Cleanout: Is There a Difference?
People often use these terms as if they mean the same thing, but there can be a small difference.
A plumbing cleanout usually refers to access for the main sewer line or larger system. A drain cleanout may refer to a smaller access point for a specific fixture or branch drain.
Quick comparison
Feature Plumbing Cleanout Drain Cleanout
Access Area , Main sewer line , Individual drain
Usage : Whole-home maintenance , Fixture-specific repairs
Location Outside/Foundation Near sinks or tubs
How Much Does It Cost to Repair or install a Plumbing Cleanout?
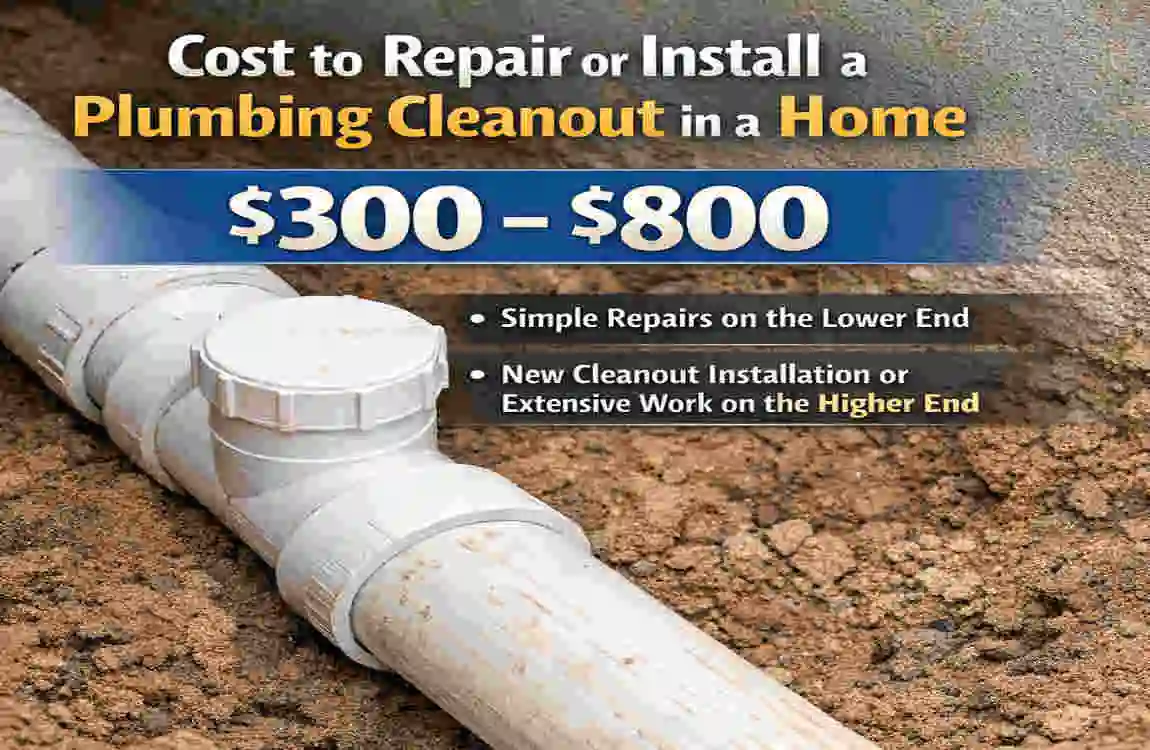
Costs can vary depending on access, pipe material, and labor.
Typical price ranges
Service Estimated Cost
Cleanout Cap Replacement $50–$200
New Cleanout Installation $300–$1,000+
Sewer Line Cleaning $150–$600
Camera Inspection $100–$500
A simple cap replacement is usually affordable. Installing a new cleanout costs more because it may involve cutting into the line or digging.
Do Older Homes Have Plumbing Cleanouts?
Not always. Many older homes were built before today’s plumbing standards.
Older Home Plumbing Challenges
- Missing cleanouts
- Outdated sewer systems
- More frequent clogs
- Corroded pipes
Retrofitting a Cleanout
A plumber can often add a cleanout to an older home. This improves access and makes future repairs much easier.
Warning Signs in Older Homes
- Slow drains
- Recurring backups
- Pipe corrosion
- Sewer odors
Frequently Asked Questions About Plumbing Cleanouts
What’s a cleanout in home plumbing used for?
It gives plumbers access to drain and sewer lines so they can clear clogs and inspect the system.
Is every house required to have a plumbing cleanout?
Not every older house has one, but many modern plumbing codes require cleanouts in certain locations.
Can I open a plumbing cleanout myself?
Yes, if the blockage is minor and you feel safe doing it. If there is sewage, strong pressure, or a stuck cap, call a plumber.
How often should a cleanout be inspected?
A yearly check is a good idea, especially in older homes or homes with frequent drain issues.
What happens if a cleanout is clogged?
The clog may block access and make it harder to clear the sewer line. A plumber may need to remove the blockage first.
How do plumbers clear sewer blockages?
They may use a snake, auger, camera, or hydro jetting through the cleanout.
Does homeowners’ insurance cover plumbing cleanouts?
Sometimes damage related to sudden plumbing failure may be covered, but routine wear and maintenance usually are not.