If you are planning a kitchen update, learning how to remove a kitchen backsplash safely can save you time, money, and a lot of stress. Many homeowners want to remove an old backsplash because it looks outdated, has water damage, or no longer matches the kitchen’s style. The good news is that, with the right tools and a slow, careful approach, you can remove most backsplashes without ruining the wall behind them.
Kitchen backsplashes can be made from ceramic tile, glass tile, peel-and-stick sheets, stone, or metal panels. Some come off fairly easily, while others are glued down tightly and need more patience.
Why You May Need to Remove a Kitchen Backsplash
Remodeling Your Kitchen
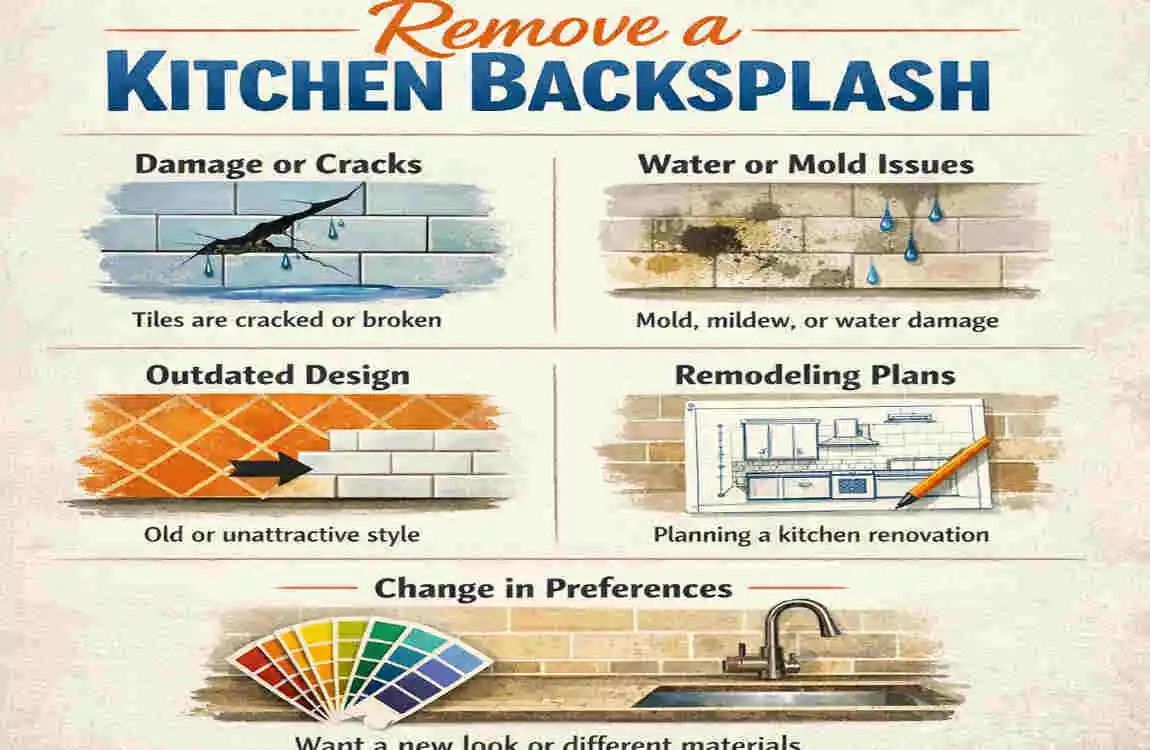
Sometimes the old backsplash does not fit your new kitchen design. You may be changing cabinet colors, countertops, or wall paint, and the backsplash no longer works with the rest of the room. Removing it gives you a clean surface for a fresh new look.
Repairing Water Damage
If water has seeped behind the backsplash, you may notice mold, loose tiles, or cracked grout. In that case, removing the backsplash is often the best way to inspect the wall and repair the damage before it worsens.
Replacing Outdated Materials
Older kitchens may have worn laminate, faded tile, or outdated styles. Replacing these materials can improve both the look of the kitchen and its resale value.
Tools and Materials You’ll Need
Essential Tools
Before you start, gather the basic tools:
- Putty knife
- Utility knife
- Pry bar
- Hammer
- Oscillating multi-tool
- Heat gun for stubborn adhesive
Safety Equipment
Do not skip safety gear. It makes the job safer and cleaner.
- Safety glasses
- Gloves
- Dust mask
- Drop cloth
How to Remove Backsplash From Kitchen Step by Step
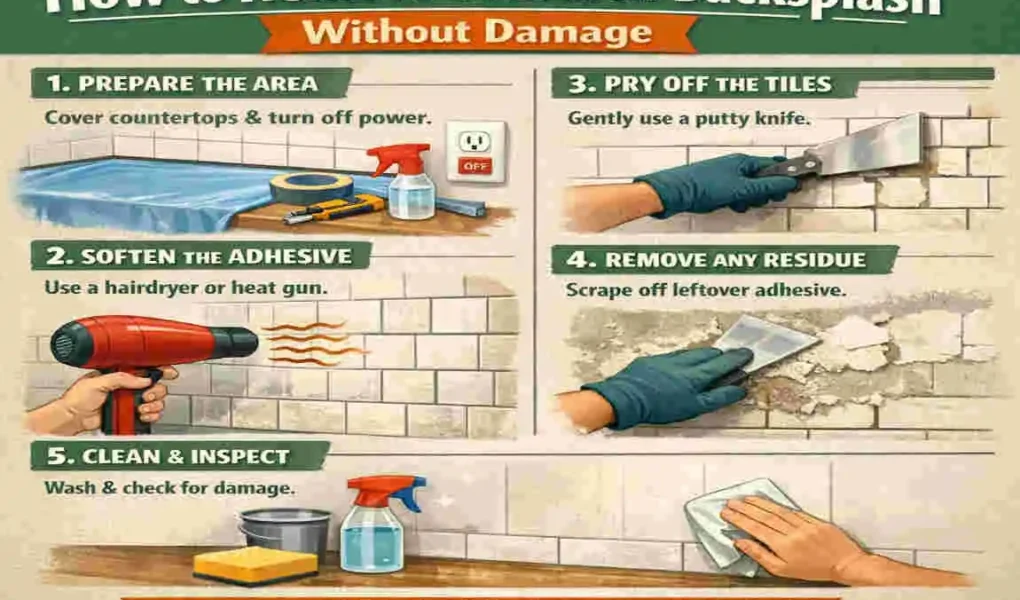
Turn Off Power
If the backsplash is near outlets or switches, turn off the electricity first. Remove outlet covers so they do not get damaged during removal.
Protect Countertops
Cover your counters with a drop cloth or thick sheet. Tape the edges of cabinets and nearby surfaces so debris does not scratch them.
Cut the Caulk
Use a utility knife to score the caulk line around the backsplash. This helps separate the backsplash from the wall and lowers the chance of tearing drywall.
Remove the First Tile
Start at an edge or a spot where a tile is already loose. Slide a putty knife behind it and gently lift. Do not rush this step.
Continue Removing Tiles
Work one tile at a time. If a tile resists, use a pry bar carefully and keep the angle low. The goal is to remove the backsplash while leaving as much drywall intact as possible.
Remove Adhesive
Once the tiles are off, scrape away leftover mortar or glue. If the adhesive is hard, a heat gun can soften it, making scraping easier.
Repair the Wall
Fill any small holes, sand the surface to a smooth finish, and prime the wall before installing a new backsplash. A clean, even surface will give you much better results.
How to Remove Different Types of Kitchen Backsplashes
Ceramic Tile
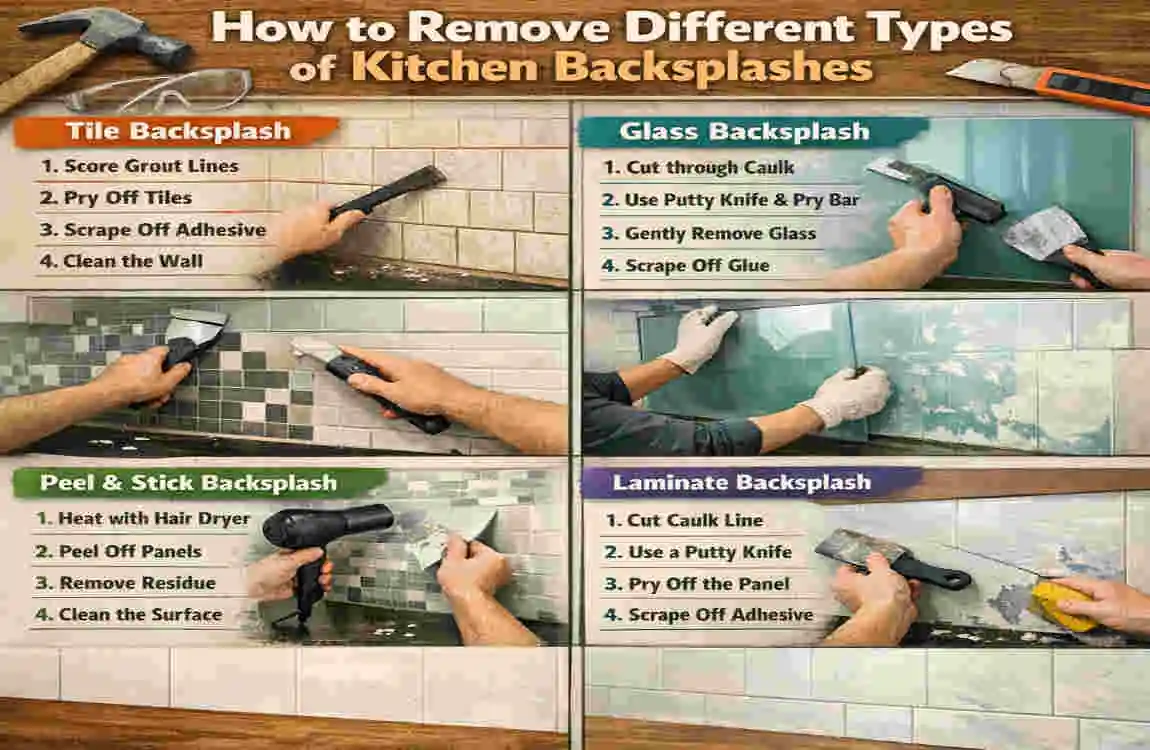
Ceramic tile is common and usually needs careful scraping and prying. It may break during removal, so work slowly and expect some debris.
Glass Tile
Glass tile can crack suddenly, so wear eye protection and use extra caution. A putty knife and steady pressure usually work better than force.
Peel-and-Stick Backsplash
This is usually the easiest type to remove. Warm it with a heat gun and peel it back slowly. Most of the time, it comes off with minimal damage.
Stone Backsplash
Stone is heavier and often attached more strongly. You may need more patience and stronger tools, but avoid striking too hard because that can damage the wall.
Metal Panels
Metal backsplashes may be screwed or glued in place. Check for fasteners first, then remove them before prying the panel away.
Common Mistakes to Avoid
Using Too Much Force
Strong pressure can tear drywall and make the repair bigger than the job itself. Slow and steady is always better.
Forgetting to Cut Caulk
If you skip this step, the backsplash may pull away chunks of wall along with it.
Damaging Drywall
Keep tools at a low angle and avoid digging too deep behind the tile.
Ignoring Electrical Safety
Always turn off the power at the outlets and switches before you start.
Rushing the Process
A rushed job usually creates more repair work later. Take your time and remove each section carefully.
How to Protect Your Drywall During Removal
The best way to protect drywall is to work slowly and remove one tile at a time. Keep your tools flat against the wall instead of pushing them inward. If you notice a small tear or hole, stop and patch it right away before it spreads.
What to Do After Removing the Backsplash
Once the backsplash is gone, clean the wall well. Scrape off leftover adhesive, patch damaged spots, and sand the surface smooth. After that, apply primer so the wall is ready for paint or a new backsplash. This step matters because a clean wall gives your next project a much better finish.
DIY vs Hiring a Professional
DIY Removal Professional Removal
Lower cost Faster completion
Good for small projects Less wall damage
Requires tools Expert repairs included
Takes more time Higher overall cost
Estimated Cost of Removing a Kitchen Backsplash
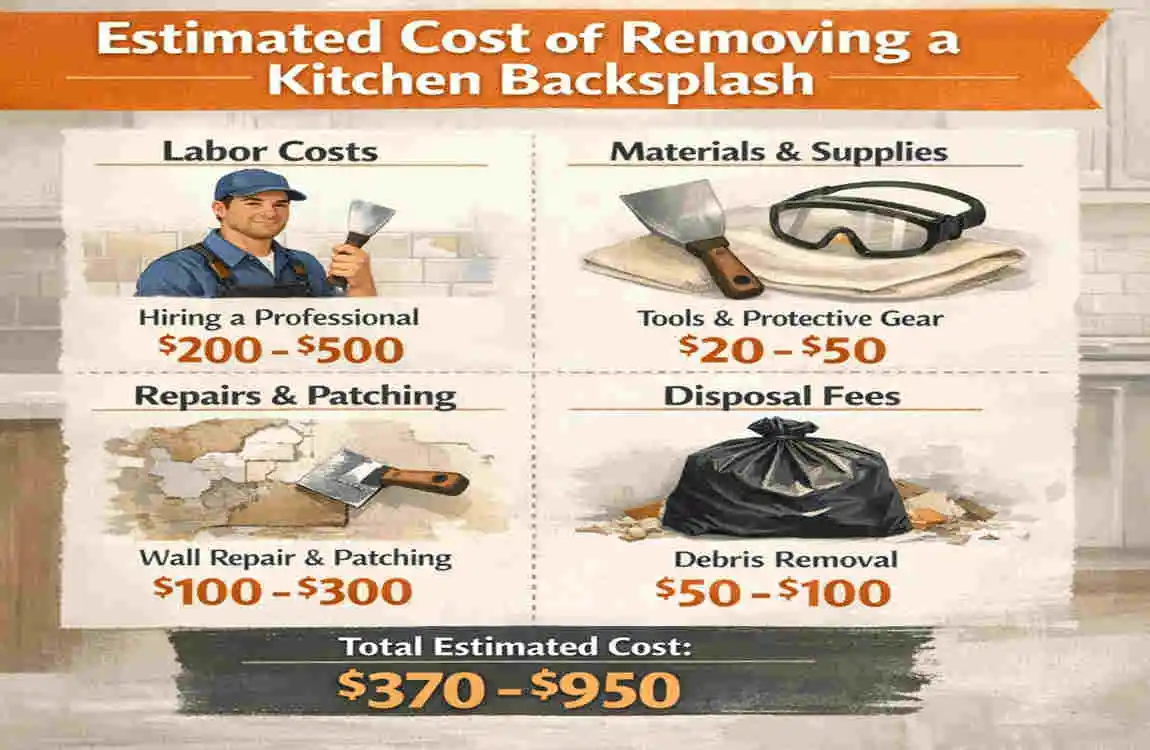
Project Type Estimated Cost
DIY Removal $20–$100
Professional Labor $200–$800
Drywall Repair $50–$300
New Backsplash Installation $500–$2,000+
Tips for Easier Backsplash Removal
- Start with a loose tile if you can find one.
- Use an oscillating tool for stubborn adhesive.
- Label outlet screws so reassembly is easier.
- Wear protective gear from the beginning.
- Keep broken tile pieces in a safe container.
- Clean the workspace regularly to work more safely.
Frequently Asked Questions
How do I remove a kitchen backsplash without damaging the drywall?
Cut the caulk first, remove tiles slowly with a putty knife, and avoid using too much force.
What is the easiest backsplash to remove?
Peel-and-stick backsplashes are usually the easiest because they need very few tools.
Can I reuse backsplash tiles after removing them?
Yes, if they come off without cracking and the adhesive is carefully cleaned off.
Do I need to turn off the electricity before removing a backsplash?
Yes. Always switch off power when working near outlets and switches.
How long does it take to remove a kitchen backsplash?
Most DIY jobs take 2–6 hours, depending on the material and wall condition.
Will removing a backsplash damage the wall?
Small drywall damage is common, but careful removal and simple patching can restore the wall.
| Step | What to Do | Helpful Tip |
|---|---|---|
| Prepare the Area | Turn off power to nearby outlets, remove outlet covers, and protect countertops with drop cloths. | Wear safety glasses and gloves. |
| Cut the Caulk | Use a utility knife to score the caulk along the backsplash edges. | This helps prevent paint or drywall from tearing. |
| Loosen the First Tile | Insert a putty knife or painter’s tool behind a loose edge and gently pry. | Start at a corner or exposed edge whenever possible. |
| Remove Tiles Slowly | Work one tile at a time using a putty knife and small pry bar. | Apply gentle pressure to reduce wall damage. |
| Remove Adhesive | Scrape away leftover thin-set or construction adhesive with a scraper. | A heat gun can soften stubborn adhesive. |
| Repair the Wall | Fill small holes or dents with joint compound and sand smooth after drying. | Prime the surface before painting or installing a new backsplash. |
| Clean the Surface | Wipe away dust and debris with a damp cloth. | Ensure the wall is dry before the next installation. |