Imagine this scenario: You absolutely love your neighborhood. The schools are great, the commute is easy, and you’ve built memories in your home. But there is one glaring problem—you are running out of space. Maybe the ceilings feel claustrophobically low, or perhaps your growing family desperately needs a second story. Still, your lot is too small to build outward. You feel stuck.
Does this sound like your situation? If so, you aren’t alone. Many homeowners face the “move or improve” dilemma. But what if I told you there is a way to double your square footage or fix those low ceilings without tearing your house down?
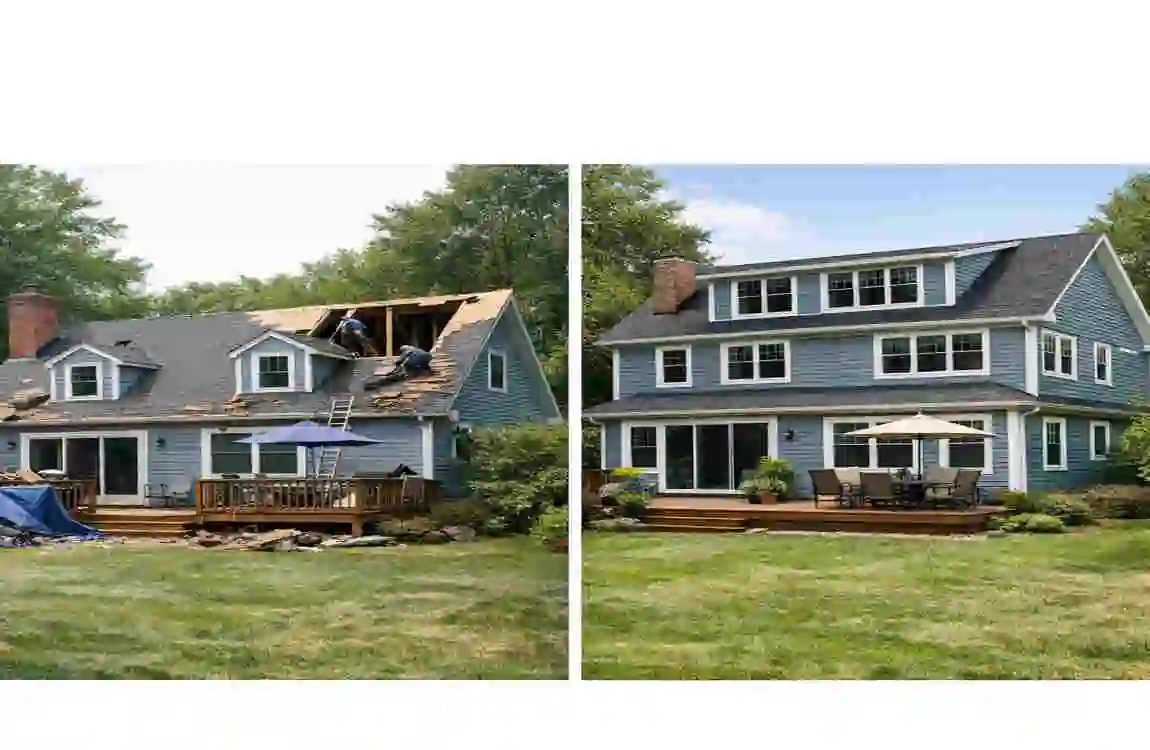
Learning how to raise the roof on a house can completely transform your living experience. It is a major renovation project, yes. Still, it is often more cost-effective and less disruptive than a total rebuild. By mechanically lifting your existing roof, you can insert a new floor, increase ceiling height, or change the pitch of your home for better curb appeal.
Why Raise the Roof on Your House? Benefits and When to Do It
Before we get into the nuts and bolts of jacks and beams, let’s talk about why you would undertake such a massive project. Raising the roof is a significant investment, but the returns can be astronomical—both for your lifestyle and your wallet.
Unlocking Massive Potential
The most obvious benefit is increased living space. By lifting the roof, you can turn a cramped attic into a luxurious main suite, add two or three extra bedrooms for the kids, or create a spacious home office. This isn’t just about comfort; it is about value. According to various real estate reports, adding a second story can increase a home’s value by significant margins, sometimes upwards of 30%, depending on the local market.
Here are a few other compelling reasons to consider this project:
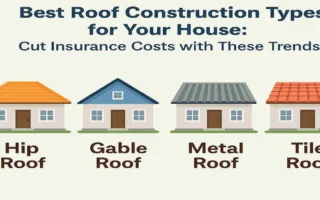
- Aesthetic Appeal: A low-pitched roof can make a house look dated or squat. Raising the roof lets you change the pitch, giving the house a grander, more modern, or more traditional look, depending on your design choice.
- Energy Efficiency: This is the perfect time to upgrade your insulation. Old roofs often leak heat like a sieve. A roof raise allows you to install modern, high-efficiency insulation and ventilation systems.
- Preserving Your Yard: If you build an addition outward, you lose garden space. If you build upward, you keep your backyard for barbecues and gardening.
When is the Right Time?
Knowing when to elevate your home roof is just as important as knowing how. This project is ideal for homes with a solid foundation but a limited footprint. It is perfect for:
- Growing Families: When you need bedrooms but don’t want to move school districts.
- Historic Homes: Where you want to preserve the original look of the first floor but need modern amenities.
- Zoning Restrictions: In many cities, you cannot build closer to the property line (setbacks), but zoning laws often allow you to build higher.
Alternatives: Roof Raise vs. Rebuild vs. Attic Conversion
Is raising the roof always the right answer? Not necessarily. Let’s look at how it stacks up against other options.
Feature: Raising the Roof, Full Rebuild, Attic Conversion
Cost Moderate ($20k – $100k+) High ($200k+) Low to Moderate
Space Gained High (Full new story) High (Custom design) Low (Limited by roofline)
Disruption High (Move out temporarily) Very High (Long-term displacement) Low (Stay in home)
Yard Impact None Varies None
Foundation Work Likely required Required Minimal to None
If you need a small playroom, an attic conversion might be a better option. But if you need serious square footage, learning how to raise the roof on a house is usually the sweet spot between cost and gain.
Preparation: Assessing Feasibility and Planning
You cannot simply wake up one Saturday morning and decide to jack up your roof. This project requires meticulous planning and forensic-level assessment of your current home.
The Home Evaluation
First, you must determine if your house can actually handle the weight of a new story. This starts with the foundation. A single-story ranch usually has a foundation designed to hold… well, a single story. If you add a second floor, you are doubling the load.
You need to look for cracks in the foundation, signs of settling, or rotting sill plates. If your foundation is weak, it will need to be underpinned or reinforced before any lifting happens.
The Essential Professional Consultation
While you might be a handy person, this is where you need to call in the cavalry. You must hire a structural engineer or an architect.
A structural engineer will calculate the “load path”—how the weight of the roof and the new walls will transfer down to the ground. They will produce the drawings required for permits. Expect to spend anywhere from $1,000 to $5,000 for these plans, but view it as insurance against your house collapsing.
Navigating Permits and Zoning
This is the bureaucratic hurdle. You will need a building permit, and likely electrical and plumbing permits if you are adding bathrooms or lights in the new space.
- Zoning Check: Visit your local municipality office. Check the maximum building height for your neighborhood. Some areas have “view corridors” that prevent you from blocking a neighbor’s view.
- The Permit Process: Submit your engineer’s plans. The city will review them to ensure they meet safety codes. Do not skip this. If you get caught raising a roof without a permit, they can force you to tear it down.
Budgeting for the Lift
The cost to raise the roof on a house varies wildly based on size and complexity. A simple lift to increase ceiling height might cost $15,000 to $20,000. Adding a full new story, including finishing work, can run $80,000 to $150,000+.
Key Budget Factors:
- Size of the Roof: Larger roofs require more jacks and more labor.
- Complexity: A simple gable roof is easier to lift than a hip roof with dormers and chimneys.
- HVAC and Electrical: You will need to extend wires and ducts upstairs.
Tools and Materials Needed for Raising the Roof
If you plan to manage this project or assist, you need to be familiar with the hardware involved. This isn’t a hammer-and-nails job; this is heavy industry.
Essential Heavy Equipment
- Hydraulic Jacks: These are the muscles of the operation. You aren’t using a car jack here. You need specialized bottle jacks or house jacks capable of lifting 12 to 20 tons each.
- Cribbing: As you lift, you need to support the structure. Cribbing usually consists of 4×4 or 6×6 solid wood blocks stacked in a cross-pattern to create a stable tower.
- Steel Beams (I-Beams): Often, temporary steel beams are slid under the roof structure to provide a solid lifting point for the jacks.
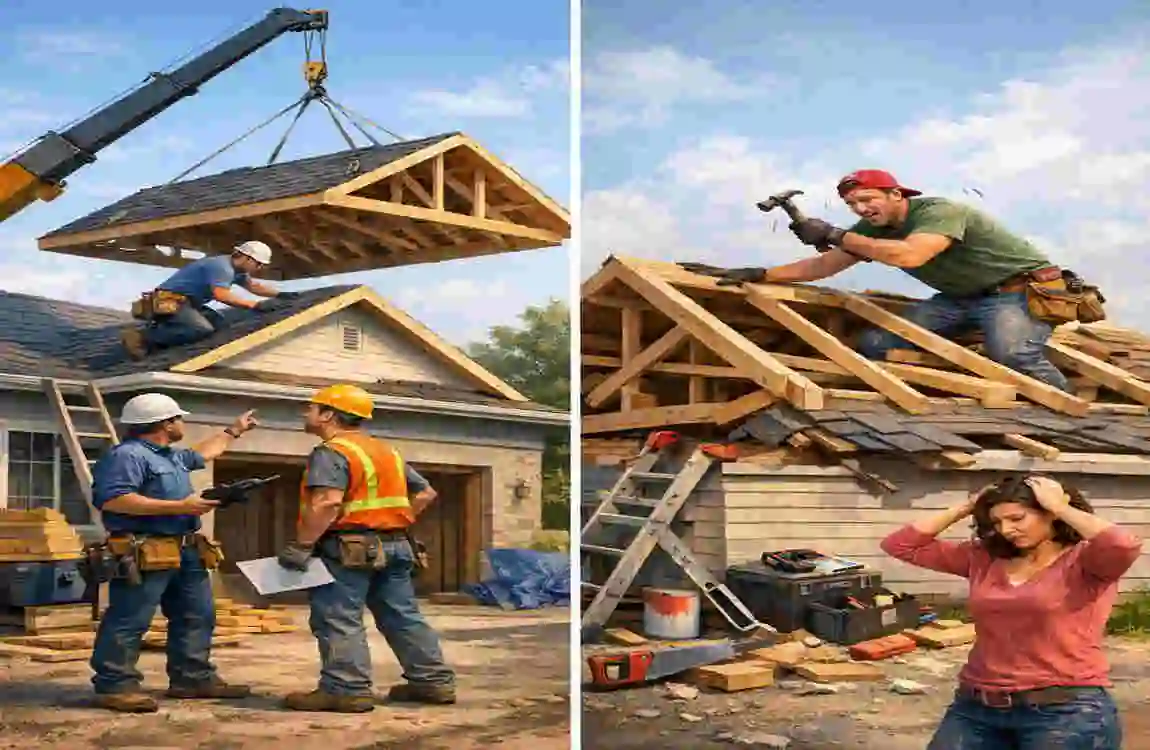
- Crane: In some cases, instead of jacking from below, a crane is used to lift the entire roof structure off, place it on the ground, and then place it back on top of the new walls later.
Materials for the Structure
- Laminated Veneer Lumber (LVL): These are super-strong engineered wood beams used for headers and supports.
- Plywood or OSB Sheathing: To enclose the new walls you build.
- House Wrap and Roofing Underlayment: To protect the home from weather once the lift begins.
- Simpson Strong-Ties and Hurricane Straps: Metal connectors are vital for securing the new structure to the old one.
Personal Protective Equipment (PPE)
Safety is non-negotiable.
- Hard Hats: Mandatory for everyone on site.
- Fall Protection Harnesses: If you are working on the roof.
- Steel-Toed Boots: Because heavy things will be moving.
Step-by-Step Guide: How to Raise the Roof on a House Safely
Now, let’s get into the process. Please note: While we are detailing this as a step-by-step roof-raising guide, it is intended to help you understand the workflow. We strongly advise against a solo DIY approach for the actual lifting phase unless you have professional construction experience.
Secure the Site and install Temporary Supports
Before a single jack is placed, your home must be prepped. This is the demolition and bracing phase.
First, the attic must be completely cleared. Insulation, old wiring, and HVAC ducts that run into the attic floor need to be removed or disconnected. Next, you need to sever the connection between the roof and the walls. The roof is typically nailed to the top plate of your wall framing. These connections must be cut.
Crucial Step: You must install temporary bracing. The roof structure, once detached, is wobbly. Diagonal bracing (often 2x4s) is nailed across rafters to keep the roof rigid so it doesn’t twist or rack during lifting.
Finally, you will prepare the lifting points. Holes are often cut into the gable ends of the house to slide heavy steel I-beams or large timber beams underneath the rafter ties. These beams will act as the “tray” that carries the roof.
Strengthen the Foundation and Walls
You might wonder why we are looking down when we want to go up. As mentioned earlier, gravity is the enemy here.
Before adding weight, you may need to excavate around your foundation and pour concrete piers or “footings” at specific point-load locations. If your engineer determined your existing studs (the vertical wood in your walls) are too far apart or too thin to support a second story, you might need to “sister” them.
Sistering involves nailing a new 2×4 or 2×6 right next to the existing old one to double its strength. You also need to inspect the exterior sheathing. If the plywood on your first floor is rotting, it won’t hold the new second floor. Replace any compromised wood now.
Lift the Roof Using Hydraulic Jacks
This is the moment of truth. This step requires a coordinated team. You cannot lift one corner of a roof 2 feet while the other corners stay put—the roof will snap.
The Setup: Hydraulic jacks are placed under the temporary beams you installed in Step 1. These jacks sit on top of “cribbing” towers inside the house or on the exterior, depending on the method.
The Lift: The team creates a rhythm. “Ready? Pump.” Everyone pumps their jack simultaneously. The roof rises perhaps 1/4 to 1/2 an inch. Then you stop. You check the levels. You listen for creaks or snaps.
Safety Protocol: As the jacks extend, you must add more cribbing (wood blocks) underneath the beams. Never rely solely on the jack’s hydraulic pressure. If a jack seal blows, the roof falls. The wood cribbing is your fail-safe.
The process is slow. Lift, block, check. Lift, block, check. Raise the roof 6 inches, then take a break. Depending on the height needed, this phase can take a day or several days.
Build New Walls and Extend Structure
Once the roof is suspended at the desired height (plus a few inches for clearance), the structure looks like a house with a floating hat. Now, you have to fill in the gap.
Carpenters will now frame the new walls in the space created between the old top plate and the floating roof. This is standard framing work—installing floor joists (if adding a floor), subflooring, and then the vertical stud walls.
If you are raising the ceiling height, you are extending the existing studs (knee walls). If you are adding a story, you are building a full platform (floor) and then new walls on top of that.
Weather Watch: This is the most vulnerable time for your house. It is open to the elements. Builders usually wrap the opening in heavy-duty tarps every night to prevent rain from destroying the first floor.
Lower and Secure the Roof
With the new walls framed, sheathed with plywood, and stable, it is time to set the roof back down.
The jacks are lowered—again, in perfect unison—millimeter by millimeter until the roof structure rests on the new double top plate of your newly built walls.
Once it touches down, the fastening begins. You will use hurricane ties and long structural screws to bolt the rafters to the new walls permanently. You also need to ensure the new plywood sheathing on the outside overlaps the seam between the old and new sections to tie the whole building together structurally. This prevents the house from hinging or buckling at the seam during high winds.
Final Inspections and Finishing
The heavy lifting is done, but the house isn’t livable yet.
- Siding and Roofing: The exterior gap needs to be sided to match the rest of the house. You’ll also need to weave new shingles in where the roof was disturbed.
- Systems: Electricians and plumbers come in to run wires and pipes into the new space.
- Insulation and Drywall: The new space gets insulated, and drywall is hung, taped, and painted.
- The Stairs: Don’t forget, you need a way to get up there! Cutting the hole in the first-floor ceiling and installing a staircase is a major finishing step.
Finally, the building inspector will return to sign off on the structural integrity, electrical safety, and insulation codes.
Safety Precautions and Common Mistakes to Avoid
Raising the roof involves fighting gravity with heavy weights. The risks are real. According to construction accident data, falls and structural collapses are the top causes of injury.
Top Risks to Watch For
- Jack Slippage: If a jack isn’t on a perfectly level surface, it can shoot out sideways under load.
- Racking: If the roof isn’t braced diagonally, it can twist and collapse into a parallelogram shape.
- Weather: A sudden windstorm while the roof is on jacks acts like a sail, potentially toppling the structure.
The “Don’t Do This” Checklist
- Mistake: Skipping the disconnects. Result: Ripping electrical wires or gas lines apart when you lift.
- Mistake: Uneven lifting. Result: Cracking the drywall on the floor below or snapping roof rafters.
- Mistake: Ignoring the weather forecast. Result: Flooding your living room.
- Mistake: Using undersized jacks. Result: Hydraulic failure and collapse.
Cost Breakdown and Financing Options
Let’s look at where the money actually goes. Understanding the costs of DIY roof elevation versus professional costs is vital.
Here is a rough percentage breakdown of a typical project:
CategoryPercentage of BudgetNotes
Labor 50% The highest cost. Skilled framing and jacking crews.
Materials 30% Lumber, steel, siding, drywall.
Design & Permits 10% Engineer fees, city fees.
Finishing 10% Paint, flooring, and fixtures.
Saving Money
You can save significantly by doing the finishing work yourself. Let the pros handle the jacking and framing (the “shell”), and then you take over for insulation, painting, and flooring. This can save you tens of thousands of dollars.
Financing
Since this is a major value-add, banks are often willing to lend.
- Home Equity Loan / HELOC: Uses the current equity in your home.
- Construction Loan: Based on the future value of the home after renovations.
- Renovation Grants: Look for local grants if your roof replacement includes energy-efficiency upgrades (such as adding solar or high-grade insulation).
Hiring Professionals vs. DIY: What’s Right for You?
We have touched on this, but let’s be direct. Should you DIY this?
The DIY Case: If you are a licensed contractor or have extensive framing experience, you can rent the jacks and buy the steel. You can manage the project. However, the margin for error is zero.
The Professional Case: Hiring a general contractor (GC) who specializes in “pop-tops” or second-story additions is the safest route. They have the insurance. If they drop the roof, their policy covers it. If you drop the roof, you lose your house.
How to Find the Right Pro:
- Look for contractors with specific experience in structural modifications.
- Ask for references from past “pop-top” clients.
- Ensure they are bonded and insured for structural collapse (not all policies cover this).
FAQ: Common Questions About Raising the Roof
Q: How much does it actually cost to raise a roof? A: The cost varies widely based on the size of your home. For just the mechanical lift and structural framing, expect to pay between $15,000 and $25,000. However, if you are finishing a full second story (plumbing, electric, drywall, insulation), the total project often ranges from $80,000 to $150,000+.
Q: Can I live in my house while the roof is being raised? A: Generally, no. During the lifting phase, utilities (electric, water, gas) are often disconnected, and the house is exposed to the elements. Most contractors recommend moving out for at least 2 to 4 weeks during the heavy framing and waterproofing stages.
Q: Do I need a permit to raise my roof? A: Yes, absolutely. You will need a building permit, and likely specific approvals for height restrictions in your neighborhood (zoning). You also need a structural engineer to approve the plans before the city will let you start.
Q: Is it cheaper to build out (an addition) or build up (raise the roof)? A: Building out is typically cheaper per square foot because it requires less complex engineering and heavy machinery. However, if you have a small lot and don’t want to lose your backyard, building up is the best option and adds significant value to the home.
Q: How long does the actual lifting process take? A: The physical act of jacking up the roof is surprisingly fast—often done in one or two days. However, the prep work (disconnecting utilities, bracing) takes a week, and framing the new walls underneath takes several more weeks.
Q: Can I raise the roof on any type of house? A: Most houses can be raised, but it depends on the foundation. If your foundation is weak or cracked, it must be reinforced first. A structural engineer must inspect your foundation to confirm it can handle the added weight of a higher roof or second story.