Installing a water pump can make daily life much easier. It helps when your home has low water pressure, a well water system, an overhead tank, or a rainwater harvesting setup. If you want a steady water supply for bathing, cooking, cleaning, or outdoor use, a pump can solve many problems.
| Key Action | |
|---|---|
| 1 | Choose the right pump type (booster, submersible, or well pump) for your house and water source. |
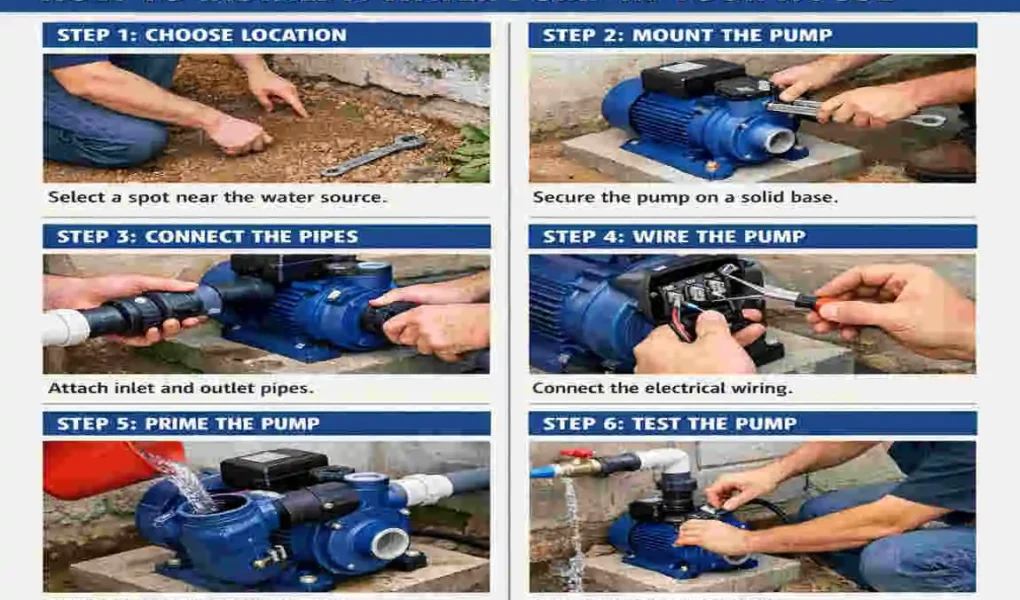
| 2 | Select a dry, well‑ventilated location near the water tank or main line, with enough space for wiring and maintenance. |
| 3 | Mount the pump on a level, stable base and secure it with bolts or brackets. |
| 4 | Install a check valve on the outlet side to prevent backflow into the pump. |
| 5 | Connect inlet and outlet pipes using PVC or metal pipes, with proper fittings and thread‑seal tape to avoid leaks. |
| 6 | Wire the pump to a dedicated circuit following local electrical rules; use an isolator switch and proper earthing. |
| 7 | Prime the pump (if required) by filling the casing with water to remove air. |
| 8 | Turn on power, run the pump briefly, and check for leaks, noise, and correct water pressure/flow. |
If you are searching for how to install water pump for house, this guide will help you simply understand the process. You will learn what a water pump does, which type is best for your home, what tools you need, and how to install it step by step.
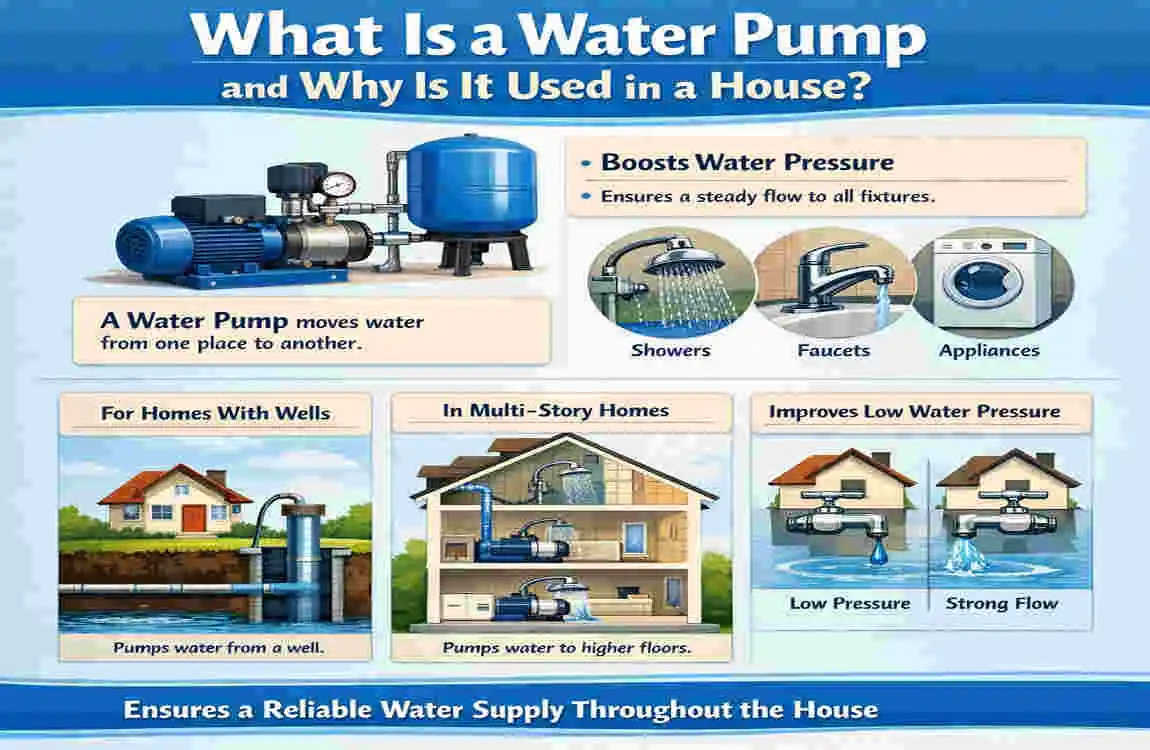
What Is a Water Pump and Why Is It Used in a House?
Understanding a Water Pump
A household water pump is a machine that moves water from one place to another. It also helps increase water pressure, so water flows more freely through taps, showers, and pipes.
In simple terms, a pump provides your home with a stronger, more reliable water supply.
Common Uses of House Water Pumps
Homeowners use water pumps for many reasons:
- Pumping water from underground tanks
- Bringing water from a well into the house
- Boosting weak water pressure
- Supplying water to gardens and outdoor areas
Benefits of Installing a Water Pump
A good pump can improve your daily routine in many ways:
- Better water pressure
- Steady water flow
- Reliable supply
- More efficient water use
Types of Water Pumps for Residential Use
Choosing the right pump matters because each type works best in different situations.
Pump Type Best For Main Benefit Main Limitation
Centrifugal Pump Short-distance water transfer Simple and affordable Not ideal for deep wells
Jet Pump Shallow wells Good suction power Needs careful setup
Submersible Pump Deep wells High efficiency More complex installation
Booster Pump Low pressure in house lines Improves pressure fast Not for water lifting from deep sources
Which Pump Is Best for Your House?
The best pump depends on:
- Your water source
- How far the water must travel
- The pressure you need
- The size of your household
If your home has low pressure, a booster pump may be enough. If you use a deep well, a submersible pump is usually a better choice.
Tools and Materials Needed Before Installation
Before you start, gather the right tools and materials. This saves time and reduces mistakes.
Essential Tools
- Pipe wrench
- Adjustable spanner
- Screwdrivers
- Drill machine
- PVC cutter
- Teflon tape
- Voltage tester
- Measuring tape
Materials Required
- Water pump
- PVC or CPVC pipes
- Check valve
- Pressure tank
- Pipe fittings
- Electrical cables
- Circuit breaker
- Hose connectors
How to Choose the Right Water Pump for Your Home
Calculate Water Demand
Start by thinking about how much water your home uses every day. Check:
- Number of bathrooms
- Kitchen needs
- Outdoor watering needs
A larger family usually needs a stronger pump.
Check Pump Capacity
Pump capacity is usually shown by flow rate and horsepower. A pump that is too small will not do the job. A pump that is too large may waste energy.
Evaluate Lift Height
Lift height is the distance the pump must move water upward and across the house. If the water source is deep or far away, you will need a stronger pump.
Consider Power Source
Most homes use electric pumps. Some homes use solar pumps or backup systems. Choose what fits your power setup and budget.
Preparing for Installation
Good preparation makes the installation smoother and safer.
Select the Installation Location
Place the pump on a dry, stable, and ventilated surface. Make sure you can reach it easily for cleaning and repairs.
Turn Off Utilities
Before doing anything, shut off the water supply and disconnect electricity. This step is very important for safety.
Inspect Existing Plumbing
Check whether your pipes match the pump size. Look for leaks, cracks, or blocked lines. A weak pipe setup can reduce performance.
Read Manufacturer Guidelines
Each pump is different. Read the manual carefully for voltage, mounting, and safety instructions.
Step-by-Step Guide: How to Install Water Pump for House
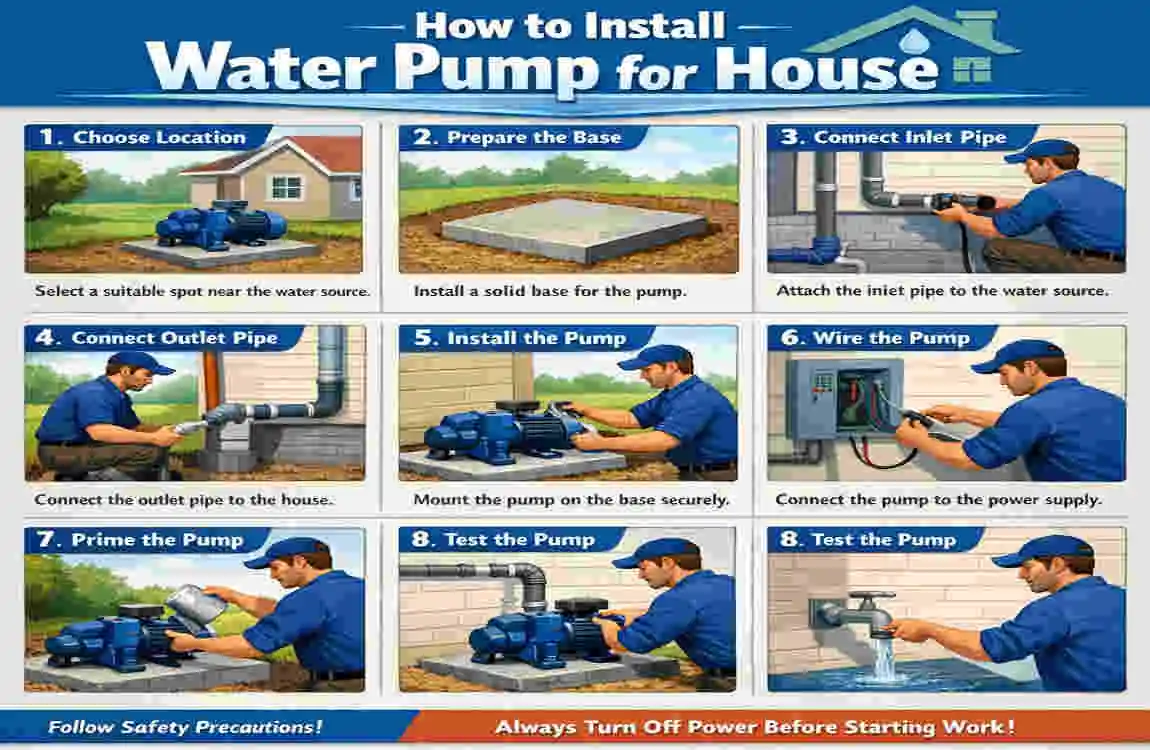
Here is the basic process for installing a house water pump.
Shut Off Water and Electricity
First, turn off the main water line and power supply. This prevents shocks, leaks, and accidents.
Position the Pump
Place the pump on a firm, level base. A stable base reduces vibration and helps the pump run quietly.
Install the Inlet Pipe
Connect the inlet pipe to the water source. Use the correct fittings, and add a check valve if needed. This valve helps stop water from flowing backward.
Connect the Outlet Pipe
Attach the outlet pipe so water can move into your house plumbing. Make sure every joint is tight.
Seal All Pipe Joints
Wrap the threads with Teflon tape before tightening. This helps stop leaks and air entry.
Electrical Wiring Setup
Connect the pump to the correct voltage. Install a circuit breaker for protection. Grounding is also important because it reduces electrical risk.
If you are not fully confident with wiring, hire an electrician. That is often the safest choice.
Prime the Pump
Priming means filling the pump with water before starting it. This step matters because a dry pump can get damaged.
To prime it:
- Open the priming plug
- Fill the pump with clean water
- Close the plug tightly
Start the Pump
Turn on the power and watch the pump carefully. Listen for strange sounds and check whether water begins to flow.
Check Pressure and Flow
Test the water pressure at the taps. Look for leaks around joints, valves, and pipe connections.
Step 10: Final Inspection
Check for:
- Noise
- Vibration
- Loose pipes
- Uneven water flow
If everything looks steady, your installation of a residential water pump is complete.
Safety Tips During Water Pump Installation
Electrical Safety
Never touch wires with wet hands. Use proper insulation and keep the area dry.
Plumbing Safety
Make sure all fittings are tight, but do not force them too hard. Too much pressure can damage pipes.
Personal Safety
Wear gloves, safety glasses, and non-slip shoes. These small steps can prevent injuries.
Common Mistakes to Avoid When Installing a House Water Pump
Choosing the Wrong Pump Size
A pump that is too small will struggle. A pump that is too large may lead to excess cost and wear.
Poor Pipe Sealing
Loose joints can cause leaks and air in the line. That reduces pressure and efficiency.
Ignoring Priming
If you skip priming, the pump may run dry and get damaged quickly.
Incorrect Wiring
Wrong wiring can cause short circuits or even safety hazards.
Wrong Pump Placement
If the pump sits on a weak surface, it can shake, overheat, or become noisy.
How Much Does It Cost to Install a Water Pump in a House?
The cost depends on the pump type, your home size, and whether you do it yourself or hire help.
Basic Cost Breakdown
- Pump price: depends on type and power
- Pipes and fittings: varies by pipe length
- Electrical materials: includes cables and breaker
- Labor cost: applies if you hire a professional
DIY vs Professional Installation
DIY can save money, but it works best for simple setups. Professional installation costs more, but it is often safer and faster, especially for complex plumbing or wiring.
Maintenance Tips After Installing a Water Pump
A pump lasts longer when you care for it regularly.
Regular Leak Checks
Look for drips or wet spots around the pipes and joints. Fix small leaks early.
Clean Filters and Valves
Clogs can reduce pressure. Cleaning helps the pump work better.
Monitor Pressure
If pressure drops suddenly, something may be wrong.
Schedule Routine Inspection
A simple check every 6 to 12 months can prevent bigger problems later.
Troubleshooting Common Water Pump Problems
Pump Not Starting
Check the power supply, fuse, breaker, and wiring.
Low Water Pressure
This may happen because of clogged pipes, air in the line, or a worn part inside the pump.
Pump Runs Continuously
This often indicates a leak or a pressure switch issue.
Noisy Pump
A noisy pump may have loose mounting, trapped air, or internal wear.
Should You Install a Water Pump Yourself or Hire a Professional?
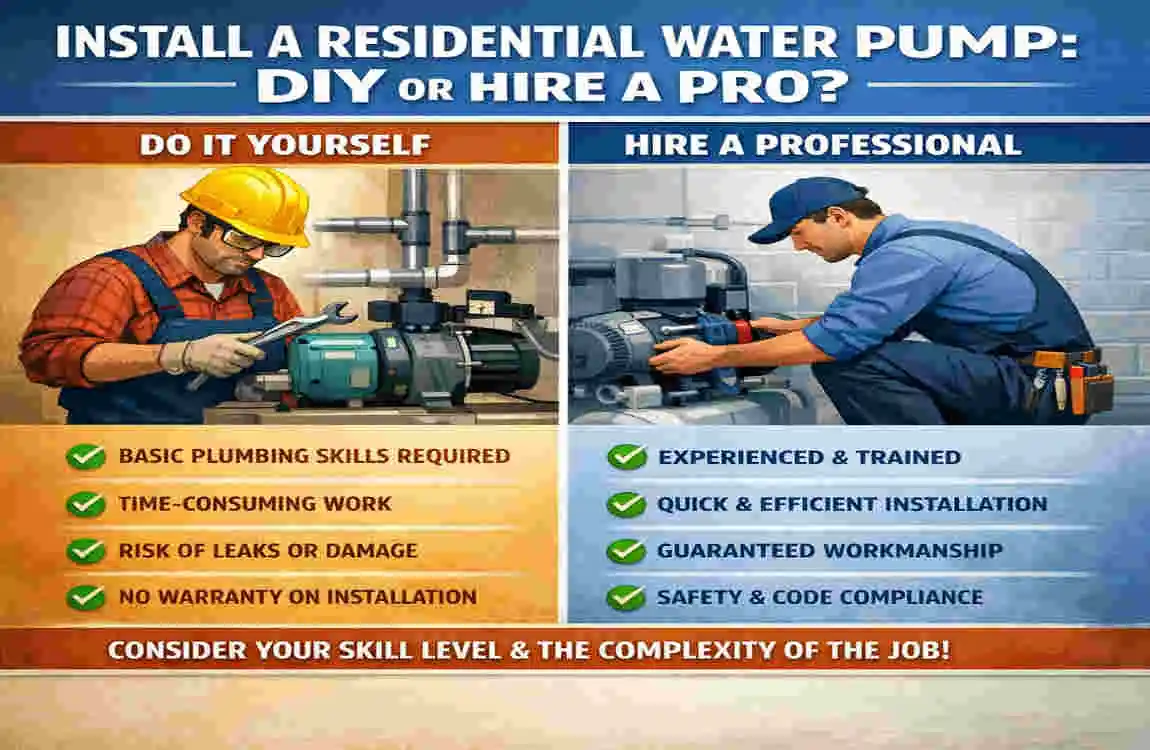
If the setup is simple, you may handle it yourself. But if the plumbing is complex or the wiring needs special care, a professional is the better choice.
DIY Installation
Good for basic systems and lower budgets.
Professional Installation
Better for safe wiring, complex plumbing, and peace of mind.
Your decision should depend on your skill level, time, budget, and local rules.
FAQ
How long does it take to install a water pump in a house?
Usually 2 to 6 hours, depending on the system and complexity.
Can I install a house water pump myself?
Yes, for basic setups. But electrical work may need a professional.
What size water pump do I need for my home?
It depends on water demand, pressure needs, and source depth.
Why is my water pump not building pressure?
Common reasons include leaks, priming problems, or damaged parts.
How often should a residential water pump be serviced?
Most pumps should be checked every 6 to 12 months.