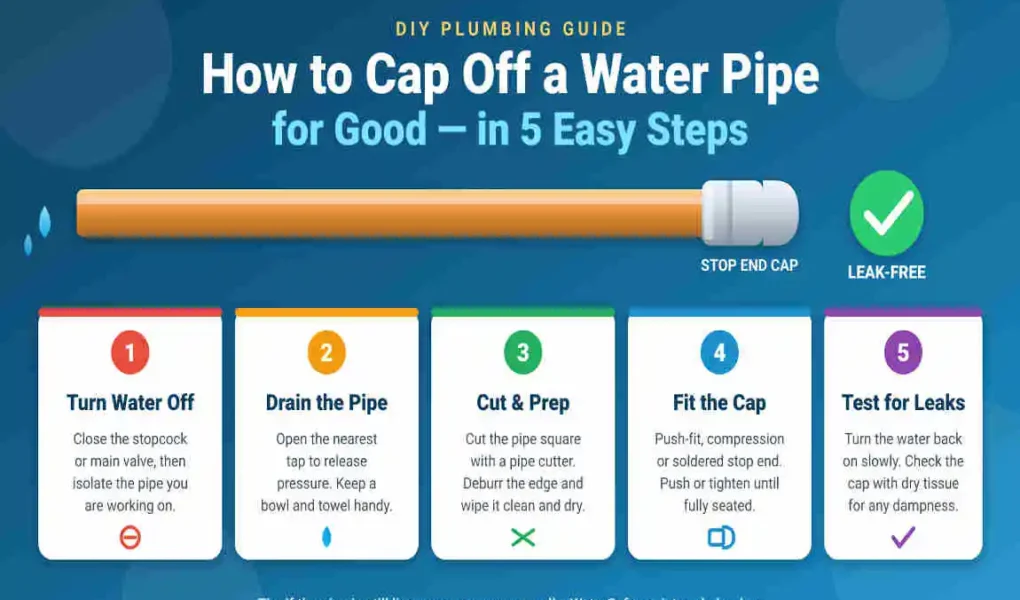
To permanently cap off a water pipe, shut off the water, drain the line, cut the pipe square, deburr the end, then fit a cap made for your pipe type: a soldered copper cap, a push-to-connect brass cap, or a crimped PEX plug. Turn the water back on slowly and check the cap for drips. Cap as close to the live supply line as you can so no unused pipe is left behind.
Why Would You Need to Cap Off a Water Pipe at Home?
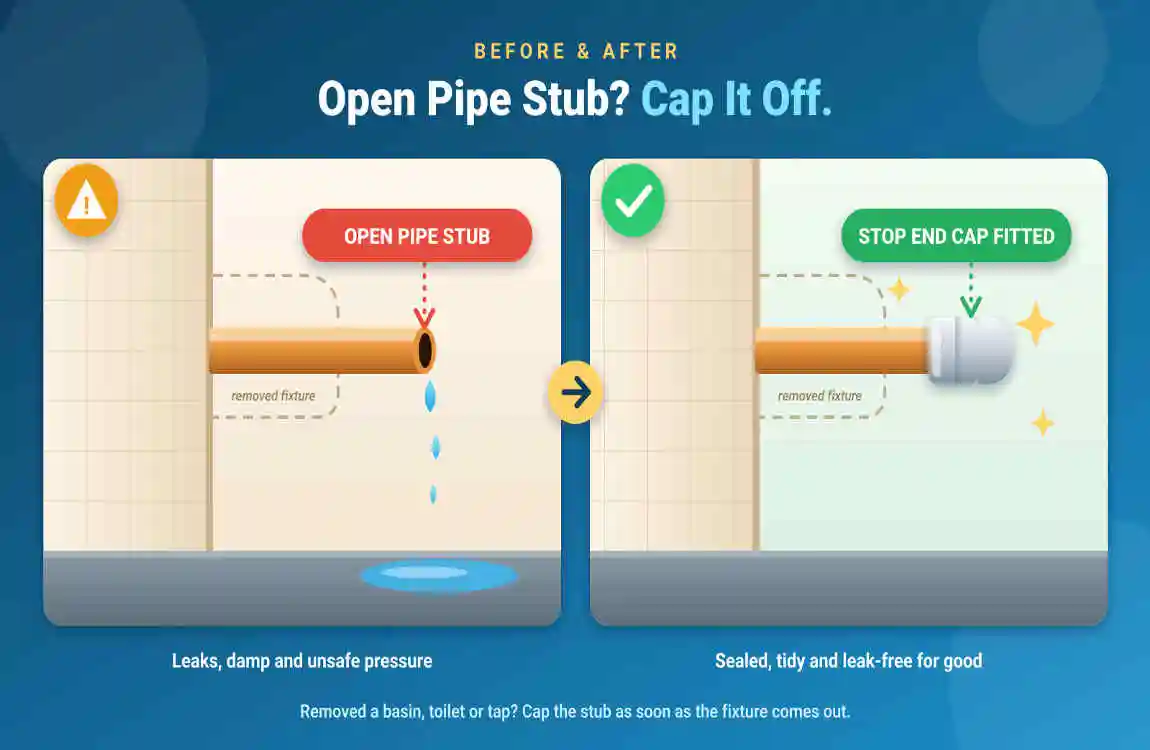
Most homeowners end up here during a remodel. You pull out an old kitchen sink, remove a washing machine hookup, take out a water heater, or move a bathroom wall. The home pipe that fed it is still live, and it needs a proper seal. A cap closes that opening so water stays in the system and out of your walls.
Which Cap Should You Use? (Pick by Pipe Type)
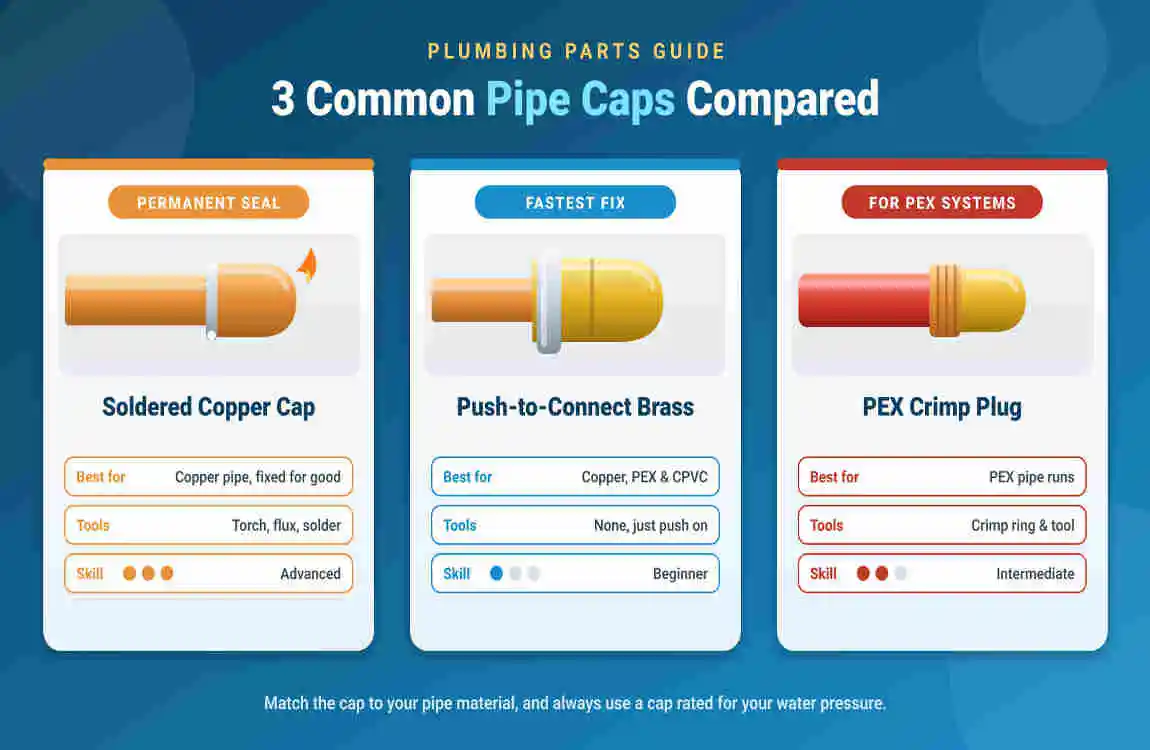
The right cap depends on what your pipe is made of. Check the pipe first. Copper is metallic and reddish-brown, PEX is flexible plastic pipe (often red, blue or white), and CPVC is rigid cream or light-yellow plastic.
| Pipe type | Best permanent cap | Tools needed | Difficulty |
|---|---|---|---|
| Copper | Soldered copper cap | Tube cutter, flux, lead-free solder, torch | Medium |
| Copper, PEX or CPVC | Push-to-connect brass cap | Tube cutter, deburring tool, marker | Easy |
| PEX | Crimp or clamp plug, or PEX-only push cap | PEX crimp or clamp tool, ring | Easy to medium |
| CPVC | CPVC cap with solvent cement, or push cap | Pipe cutter, primer, cement | Easy to medium |
Push-to-connect brass caps from SharkBite are rated for 200 psi and 200°F, and the brand lists them as approved for burial and as installable on wet or dry pipe (Ace Hardware product specs). The PEX-only EvoPEX caps have lower ratings, so check the label if your system runs hot (SupplyHouse spec sheet).
What You’ll Need
- A cap that matches your pipe type and size (½”, ¾” or 1″)
- Tube cutter or pipe cutter
- Deburring tool or emery cloth
- Permanent marker and tape measure
- Towels and a bucket
- For soldering: flux, lead-free solder, propane torch, heat shield, fire extinguisher
- For PEX: crimp or clamp tool and the matching ring
Step-by-Step: How to Permanently Cap Off a Water Pipe
Shut Off and Drain the Water
Turn off the main water valve, or the local shut-off valve for that line. Then open a faucet at the lowest point in your home to drain the pipe. Cut the power or gas to your water heater first if you are working on a hot line. Water left in a copper pipe can stop it from reaching soldering temperature, so drain it well (This Old House).
Cut the Pipe Square
Choose a spot on the pipe with a clean pipe, straight section. Cut it square with a tube cutter. A hacksaw leaves uneven edges that make sealing harder. Cut as close to the active supply line as you reasonably can.
Deburr and Clean the Pipe End
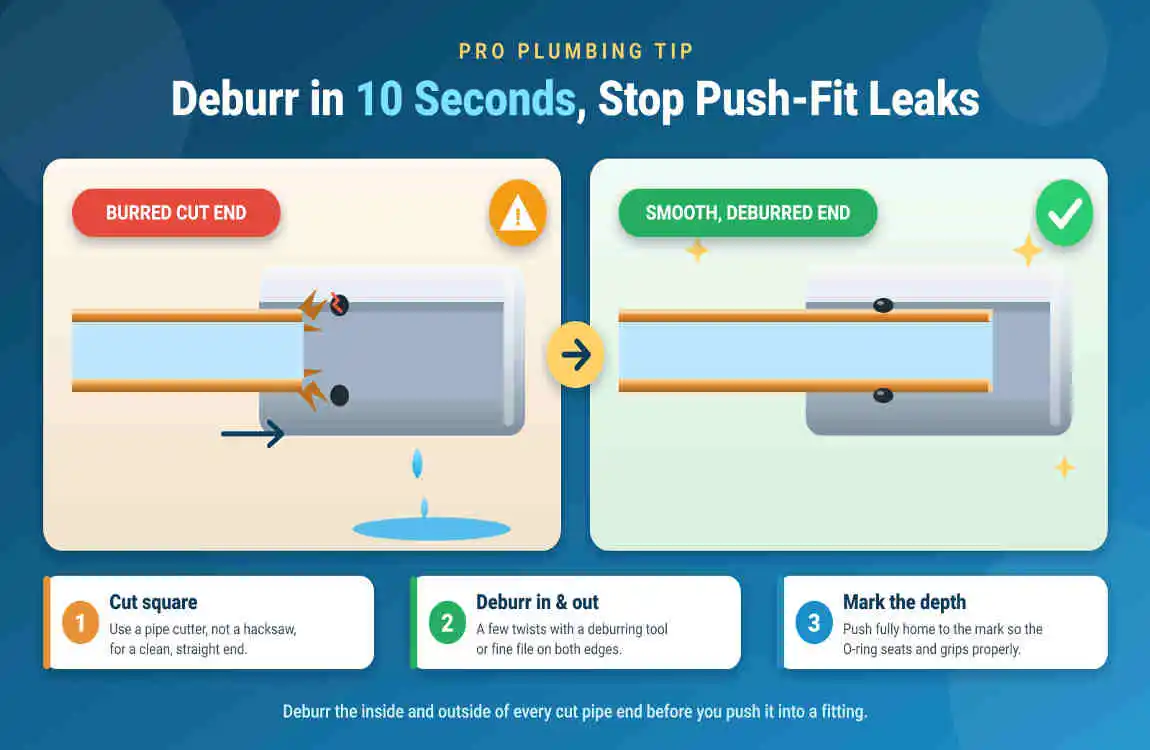
Remove the sharp inner and outer edges. This matters for push-fit caps, because a rough edge can slice the rubber O-ring inside the fitting and cause a slow leak (SharkBite installation guide). For soldering, scrub the pipe end and the inside of the cap with emery cloth until both are shiny.
Install the Cap
Option A: Push-to-connect cap (easiest). Mark the insertion depth on the pipe. For SharkBite fittings that is about 0.938″ for ½”, 1.125″ for ¾” and 1.313″ for 1″ (SharkBite guide). Push the cap on with a slight twist until it reaches your mark. The mark should sit within 0.005 inch of the release collar (Reliance Worldwide end cap data sheet).
Option B: Soldered copper cap (traditional permanent fix). Brush a thin layer of flux on the pipe end and inside the cap, then slide the cap on and twist slightly. Heat the cap evenly until the flux bubbles. Touch lead-free solder to the side of the joint opposite the flame, and let the heat pull it in until a small bead forms all the way around (This Old House). Keep a heat shield behind the joint and a fire extinguisher nearby (Family Handyman).
Option C: PEX plug. Slide a crimp or clamp ring over the pipe, insert the plug and crimp or cinch the ring. PEX plugs can seal a pipe end permanently, or temporarily for pressure testing (PEX Universe).
Turn the Water On Slowly and Test
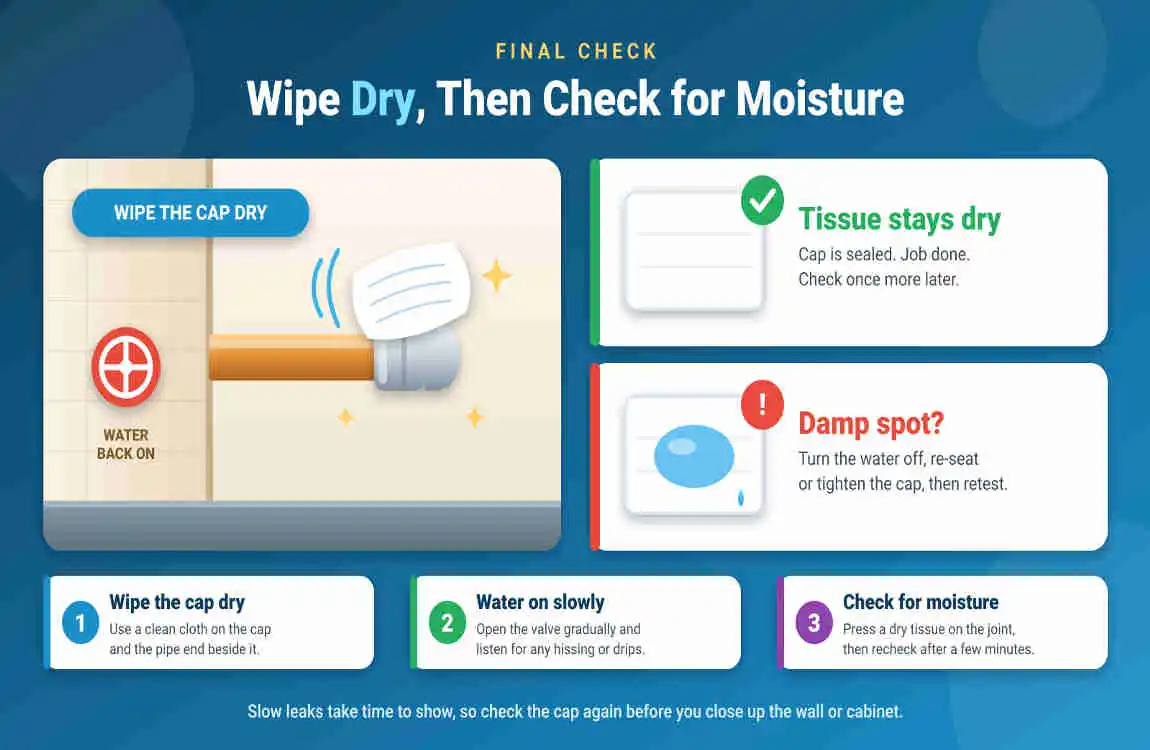
Close the faucet you opened, then turn the water back on slowly. Dry the cap with a paper towel and look and feel for moisture. Check again after 10 minutes, then again after 24 hours. If a push-fit cap weeps, shut off the water, remove it with a disconnect clip, re-deburr the pipe and reseat it.
Why You Should Cap Close to the Live Line
This is the step most DIY guides skip. A capped pipe with no flow through it is called a “dead leg.” The CDC defines dead legs as piping with little or no flow, and gives capped pipes as an example (CDC Legionella Control Toolkit). Public health guidance also lists pipe lines that have been capped off as a spot where water can sit and disinfectant can fade (Vermont Department of Health). In a typical house the risk is low, but the fix costs nothing: cut back to the tee or main line before you cap, so no long stub of idle water is left in the wall.
Common Mistakes to Avoid
- Skipping the deburr. A sharp edge can damage the O-ring in a push-fit cap.
- Soldering wet pipe. Leftover water keeps the joint too cool, so the solder will not flow.
- Using the wrong cap for the pipe. Some PEX caps work with PEX only, so read the label.
- Using 50/50 solder. Use lead-free solder on drinking-water lines (This Old House).
- Burying a cap without checking code. Push-fit caps are listed for use behind walls, but local rules can differ, so confirm before closing the wall.
- Forgetting a leak test before the drywall goes up.
Frequently Asked Questions
Can I permanently cap a water pipe without soldering?
Yes. A push-to-connect brass cap or a PEX crimp plug works without a torch. Push-fit caps are listed as approved for burial and behind-the-wall use without access panels, as long as your local code allows it.
What is the best way to permanently cap a copper pipe?
A soldered copper cap is the classic permanent method and gives the strongest connection. A push-to-connect brass cap is the easiest alternative and suits most homeowners.
Do I need to drain the pipe before capping it?
For soldering, yes. Water inside the pipe stops the joint from heating up. For push-fit caps you can work on wet pipe, but draining the line first still makes the job cleaner and safer.
Can I cap a water pipe with the water on?
It is not recommended. Push-fit fittings can be installed on wet pipe, but a pressurized open pipe will spray water. Shut off the water, relieve the pressure and then cap.
Can I cap a PEX pipe permanently?
Yes. Use a PEX crimp or clamp plug, or a push-to-connect cap rated for PEX. Match the cap size to the pipe and use the right ring and tool.
How long does a pipe cap last?
A properly soldered copper cap can last as long as the pipe itself. Push-fit caps from major brands carry a manufacturer warranty, which for SharkBite is listed at 25 years when installed per instructions and local code.
Do I need a plumber or a permit?
Small caps are a common DIY job, but permits and rules vary by city. This Old House advises hiring a licensed plumber for work that needs permits, such as pipe installation or replacement. If you are unsure, call your local building department.
Final Thoughts
Capping a pipe takes under an hour once the water is off. Pick the cap that matches your pipe, deburr the end, seat or solder it properly and leak-test before closing the wall. Do that, and the job stays dry for the life of your plumbing.
Sources
- This Old House: How to Solder a Pipe
- Family Handyman: How to Solder Copper Pipe Joints
- CDC: Legionella Control Toolkit Glossary
- Vermont Department of Health: Legionella in Building Water Systems
- Reliance Worldwide (SharkBite): End Cap Data Sheet
- SharkBite Installation Guide (insertion depths, deburring)
- Ace Hardware: SharkBite End Stop specifications
- SupplyHouse: SharkBite EvoPEX Cap specifications
- PEX Universe: PEX Plug