Rough-in plumbing is the stage where you install the hidden pipes before walls, floors, and fixtures are finished. It is one of the most important parts of new home construction because it lays the groundwork for the entire plumbing system.
If this step is done well, the rest of the plumbing work becomes much easier. If it is done poorly, you may face leaks, bad drainage, low water pressure, or costly repairs later.
What Is Rough-In Home Plumbing?
Definition of Plumbing Rough-In
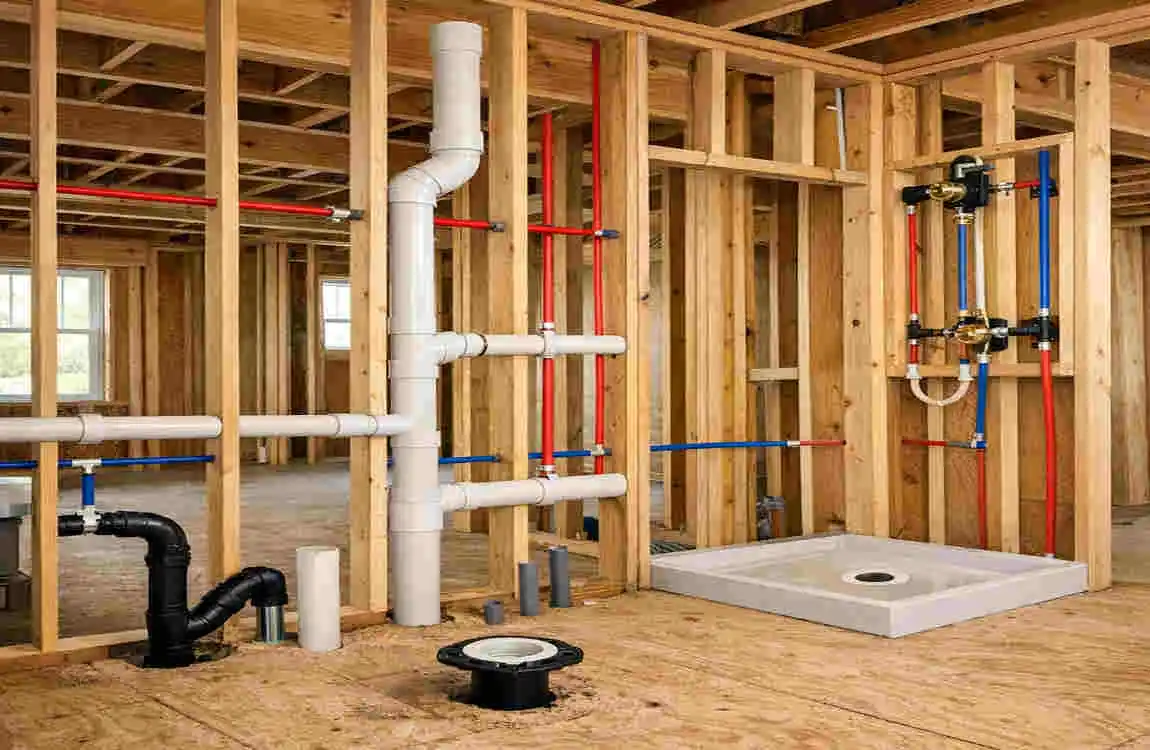
Rough-in plumbing means placing all the main water supply lines, drain pipes, and vent pipes before the walls and floors are closed up. At this stage, the pipes are installed, but the sinks, toilets, showers, and faucets are not connected yet.
Think of it as building the plumbing skeleton of the house.
Why Rough-In Plumbing Is Important
This step matters because it helps everything flow the right way. Good rough-in plumbing:
- Prevents leaks and drainage issues
- Helps water move properly through the system
- Makes future fixture installation easier
- Keeps the home closer to local plumbing code
When you get the rough-in right, you save time, money, and stress later.
Tools and Materials You’ll Need
Essential Plumbing Tools
Before you start, gather the right tools. A few common ones include:
- Pipe cutter
- Measuring tape
- Pipe wrench
- Level
- Drill
These tools help you measure, cut, fit, and secure pipes with better accuracy.
Common Plumbing Materials
You will also need the right materials for the job. Common choices are:
- PVC pipes for drains and vents
- PEX tubing for water supply lines
- Copper pipes in some older or special systems
- Pipe fittings
- Vent pipes
- Pipe straps
The exact materials may depend on your local code and the type of home you are building.
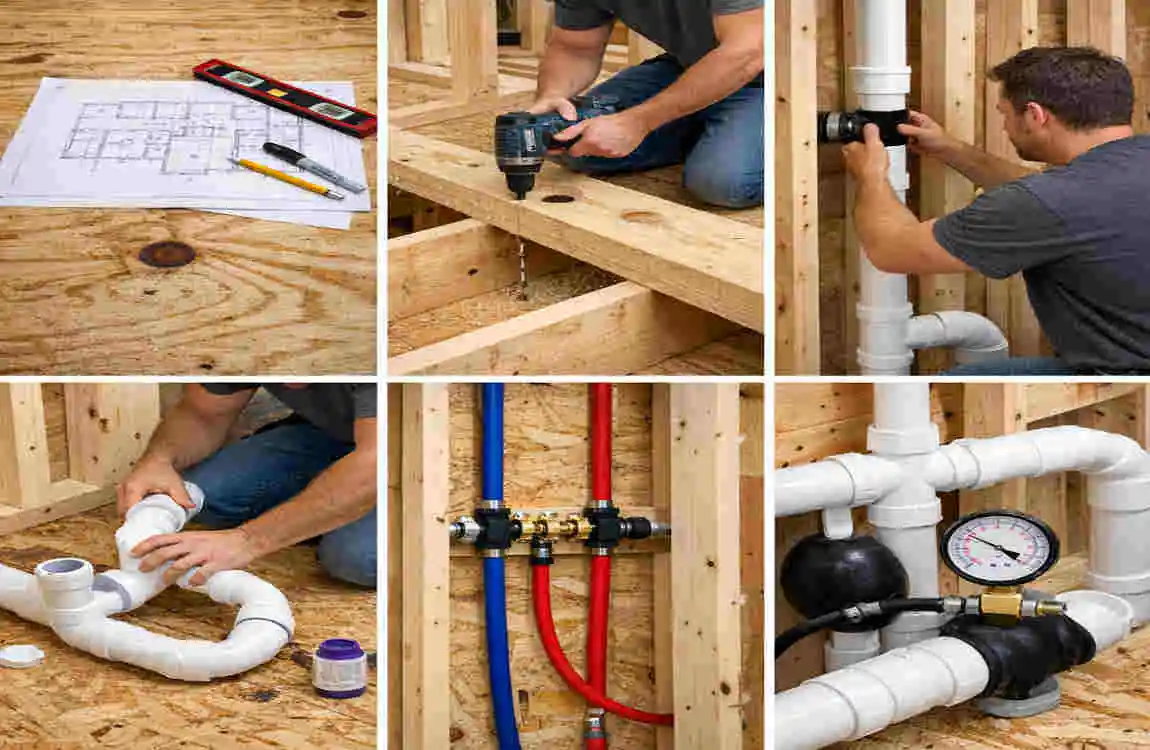
How to Plan Your Plumbing Layout
Read the House Blueprint
Start with the house plan. The blueprint shows where the kitchen, bathrooms, laundry room, and other fixtures will go. This helps you figure out where pipes need to run.
Take your time here. Planning first is much easier than changing pipe routes later.
Locate Fixtures
Mark the spot for each fixture, such as:
- Kitchen sink
- Bathroom sink
- Toilet
- Shower
- Laundry room
Each fixture needs a proper drain line, water line, and sometimes a vent line too.
Plan Water Supply Lines
Water supply lines carry clean water to the fixtures. These lines should be laid out in a simple and organised way. Try to keep them easy to reach and avoid running them too close to sharp edges or heat sources.
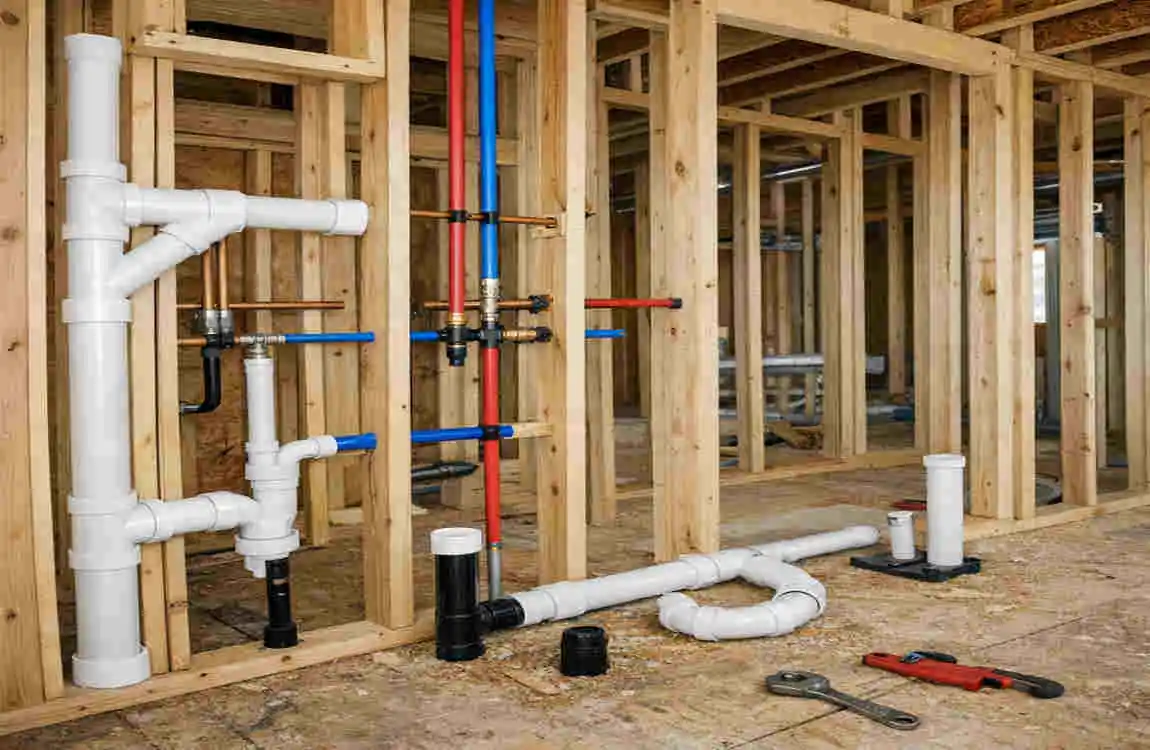
Plan Drain, Waste, and Vent System
The DWV system stands for drain, waste, and vent. This system removes dirty water and keeps air moving in the pipes.
A good DWV plan helps wastewater flow smoothly and prevents sewer gases from coming back into the house.
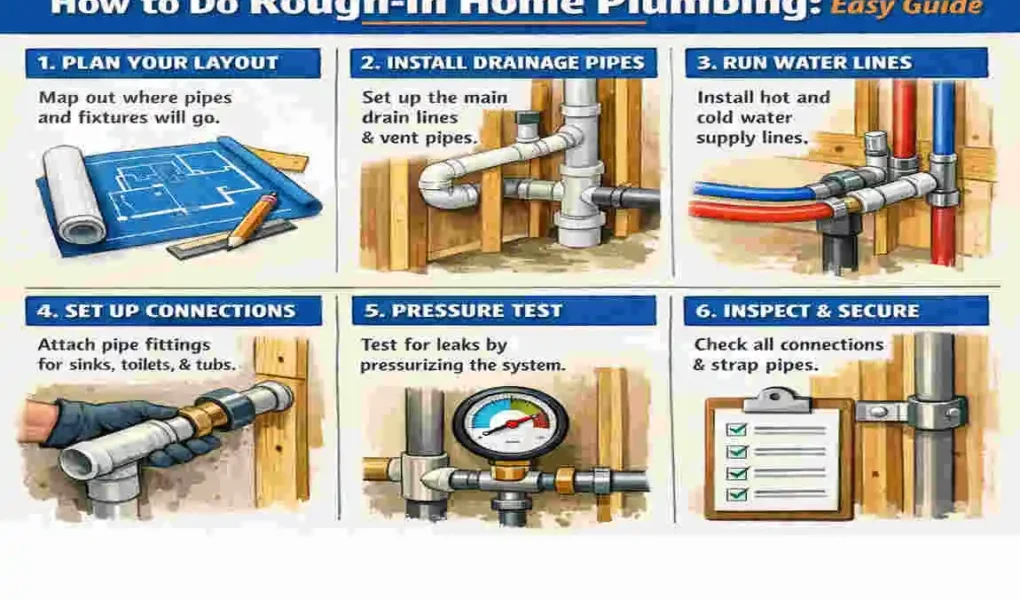
How to Do Rough-In Home Plumbing Step-by-Step
Mark Fixture Locations
Use a tape measure and mark every fixture spot on the floor and walls. Double-check the measurements before moving forward.
This is the point where small mistakes can grow into big problems, so be careful.
Install Drain Pipes
Start with the drain pipes. These pipes carry wastewater away from sinks, toilets, showers, and tubs.
Make sure the pipes slope properly so water can move out by gravity. If the slope is wrong, water may sit in the pipe and cause clogs.
Install Vent Pipes
Vent pipes let air into the drainage system. This may sound small, but it is very important. Without vents, drains may gurgle, slow down, or pull water out of traps.
The vent system also helps keep sewer smells out of the home.
Install Water Supply Lines
Now install the water supply lines. These lines bring fresh water to each fixture.
Keep hot and cold lines separated and organised. Use secure fittings and make sure every connection is tight and properly fitted.
Secure Pipes Properly
Pipes should not hang loose. Use straps and supports to hold them in place. This helps reduce movement, noise, and damage over time.
Proper support also makes the system last longer and work more smoothly.
Standard Rough-In Plumbing Measurements
Here are some common rough-in heights. These can vary by code and fixture type, so always check your local rules.
Fixture Typical Rough-In Height
Toilet Drain 12 inches
Bathroom Sink Drain 18–20 inches
Kitchen Sink Drain 16–20 inches
Shower Valve 45–48 inches
Bathtub Faucet 20–22 inches
Plumbing Code Requirements
Drain Pipe Slope
Drain pipes must slope enough for wastewater to move out. A common rule is ¼ inch per foot. Too little slope can cause standing water. Too much slope can also cause problems because liquids may move too fast and leave solids behind.
Pipe Support Requirements
Pipes must be supported at proper points. This keeps them from sagging or shifting. Strong support is also important for reducing stress on joints and fittings.
Venting Rules
Vent pipes must be placed correctly so air can enter the system. Poor venting often leads to slow drains, gurgling sounds, and smell issues.
Water Pressure Standards
Water pressure should stay within a safe range. If it is too high, it can damage pipes and fixtures. If it is too low, the home may not get enough flow.
Permit Requirements
Most plumbing rough-ins need a permit. Permits help ensure the work complies with local code. Always check with your local building office before starting.
Common Mistakes to Avoid
Some mistakes happen again and again during rough-in plumbing:
- Incorrect pipe slope
- Poor vent placement
- Using the wrong pipe size
- Skipping pressure testing
- Not following local plumbing codes
These problems can be expensive to fix later, so take your time and check each step carefully.
Helpful Tips for Beginners
If you are new to plumbing, these tips can save you trouble:
- Measure twice before cutting pipes
- Label every pipe
- Leave room for future maintenance
- Keep water and drain lines organised
- Double-check all fittings
A careful approach is always better than rushing.
Estimated Cost of Rough-In Home Plumbing
Costs can vary widely depending on home size, materials, and labour rates. Here is a simple cost guide:
Item Estimated Cost
Pipes & Fittings $300–$1,500
Tools $150–$600
Permit Fees $50–$500
Professional Labour $2,000–$8,000
DIY Project Material costs only
If you do the work yourself, you may save money, but you also take on more risk and responsibility.
DIY vs Hiring a Professional
DIY Advantages
Doing rough-in plumbing yourself can be rewarding. The biggest benefits are:
- Lower cost
- More control over the project
- A chance to learn useful skills
Professional Advantages
A professional plumber can often finish the job faster and more safely. You also get:
- Better code compliance
- Lower risk of leaks
- Warranty on the work
- Less stress during inspection
If the project is large or complex, hiring a pro is often the smarter choice.
Final Inspection Checklist
Before closing the walls, make sure this checklist is complete:
- Drain pipes installed correctly
- Water lines secured
- Vent system complete
- Pressure test passed
- Pipe supports installed
- Plumbing inspection approved
If all of these are checked off, you are in good shape to move forward.
Frequently Asked Questions
What is rough-in home plumbing?
Rough-in plumbing is the installation of water supply, drain, and vent pipes before the walls and floors are finished.
Can I do rough-in plumbing myself?
Yes, if you have experience and follow local codes and inspection rules.
What pipes are best for rough-in plumbing?
PEX is common for water supply lines, and PVC is often used for drain and vent pipes.
How long does rough-in plumbing take?
Most residential rough-in plumbing jobs take 2–5 days, depending on the home size and layout.
Does rough-in plumbing require an inspection?
Yes, most areas require an inspection before drywall or wall finishes are installed.
| Step | What to Do | Key Tip |
|---|---|---|
| Plan the Layout | Mark the locations of sinks, toilets, showers, and appliances. | Follow your home’s floor plan and local plumbing code. |
| Gather Materials | Collect PEX, PVC, or copper pipes, fittings, valves, and tools. | Choose pipe materials suitable for your project. |
| Install Drain Pipes | Run the DWV (Drain, Waste, and Vent) system first. | Maintain the required slope for proper drainage. |
| Add Vent Pipes | Connect vent pipes to prevent sewer gas and improve drainage. | Every plumbing fixture should be properly vented. |
| Install Water Supply Lines | Run hot and cold water lines to each fixture location. | Secure pipes to prevent movement and noise. |
| Leave Stub-Outs | Extend pipes through walls or floors for future fixture installation. | Clearly label hot, cold, and drain lines. |
| Pressure Test the System | Test water supply lines for leaks before closing walls. | Repair any leaks immediately. |
| Inspect the Plumbing | Schedule a rough-in inspection if required by local code. | Don’t cover pipes until the inspection is approved. |
| Insulate Pipes | Add insulation where needed, especially in cold areas. | Helps prevent freezing and reduces heat loss. |
| Finish the Project | After approval, close walls and install plumbing fixtures later. | Keep photos of the rough-in for future repairs. |