If you are installing or checking a roof, nail depth matters more than many people think. A roofing nail that is too short can leave shingles loose. A nail that is driven too far can damage the shingle and weaken the roof seal.
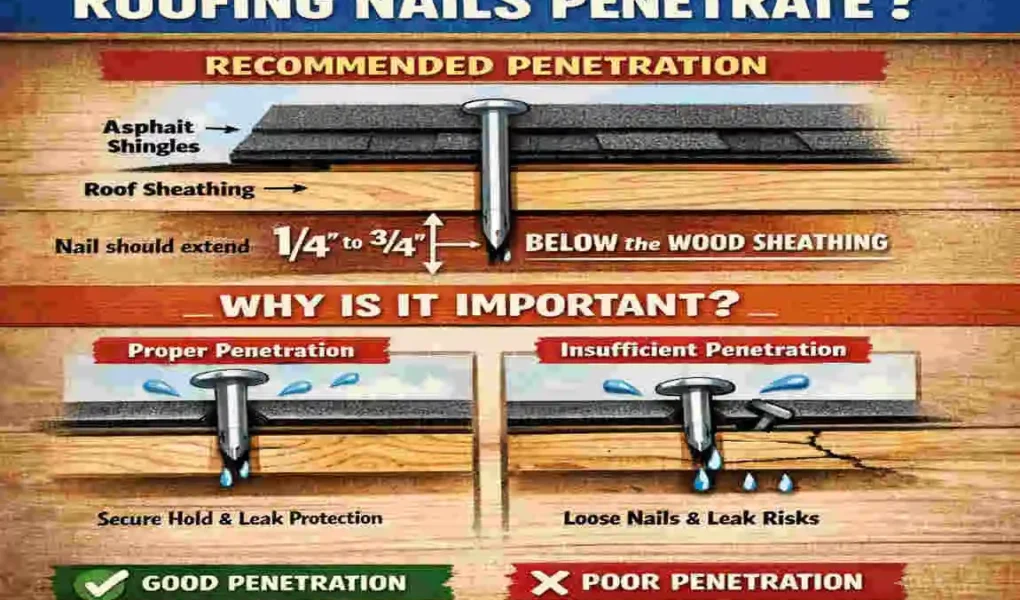
So, how far should house roofing nails penetrate? In most cases, they should go at least 3/4 inch into the roof deck or pass completely through thinner decking, such as plywood or OSB. That simple rule helps keep shingles secure, supports wind resistance, and protects your roof from leaks.
Why Roofing Nail Penetration Matters
Structural Strength
Roofing nails do one main job: hold shingles in place. If the nails do not go deep enough, shingles may lift, shift, or blow off during strong winds.
Good nail penetration provides the roof with greater strength and helps the shingles stay attached longer.
Leak Prevention
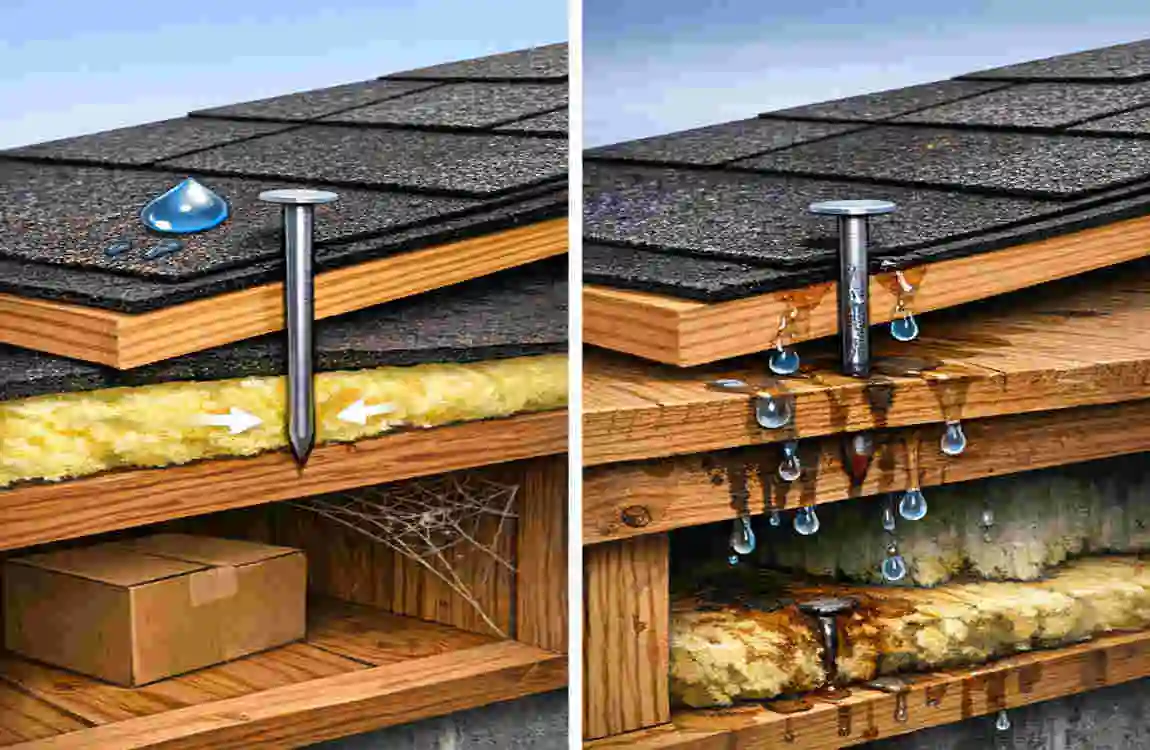
When nails are set correctly, shingles stay flat and sealed. That helps keep water out.
If nails are too shallow, shingles may move, leaving small gaps where rain can sneak in. Over time, that can lead to roof leaks and water stains inside the home.
Building Code Compliance
Most roofing rules expect nails to be installed at the proper depth. This is important not only for safety but also for warranty protection.
If the nails are wrong, the roof may fail inspection or lose warranty coverage. That is why following the right depth is always worth the effort.
How Far Should House Roofing Nails Penetrate?
General Rule
The most common rule is simple: roofing nails should penetrate at least 3/4 inch into the roof deck.
If the roof deck is thin, the nail should go all the way through the decking. This is often the case with thinner plywood or OSB sheets.
That means the nail must be long enough to hold the shingle securely without sticking out in a harmful way.
Standard Nail Penetration Requirements
Roof Deck Thickness Recommended Nail Penetration
3/8 inch deck Nail passes completely through
7/16 inch deck Nail passes completely through
1/2 inch deck Nail passes completely through
Thick decking Minimum 3/4 inch penetration
Recommended Roofing Nail Sizes
Common Nail Lengths
Different roofs need different nail lengths. The right size depends on the deck thickness and the roofing material.
Nail Length Best For
1 inch Thin decking
1¼ inch Standard asphalt shingles
1½ inch Thick shingles
2 inch Speciality roofing materials
For many asphalt shingle roofs, 1¼-inch galvanised roofing nails are the most common choice.
Types of Roofing Nails
Galvanised Steel Nails
These are the most common roofing nails. They resist rust well and work for most standard asphalt shingle roofs.
They are a strong everyday choice for many homes.
Stainless Steel Nails
Stainless steel nails are best when you need extra corrosion resistance. They are often used in coastal areas or in places with high humidity.
They cost more, but they last well in harsh conditions.
Aluminum Nails
Aluminium nails are lightweight and rust-resistant, but they are not as strong as steel. They are used in some specific roofing situations.
They are not usually the first choice for general roof work.
Copper Roofing Nails
Copper nails are often used with copper roofing materials. They look good and resist corrosion very well.
They are a speciality option and are usually more expensive.
What Happens If Roofing Nails Do Not Penetrate Enough?
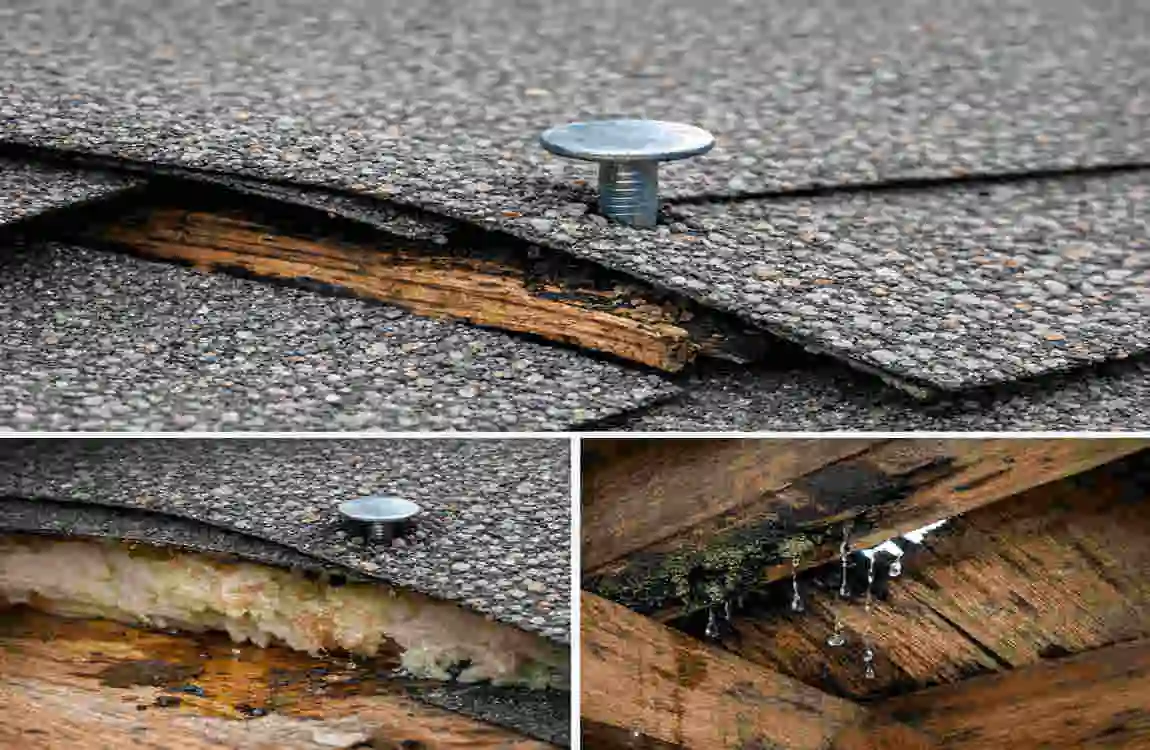
Loose Shingles
If the nail does not grab enough wood, the shingle can move. That makes the roof weaker and less stable.
Loose shingles often lead to bigger roof problems later.
Wind Damage
Strong wind can lift shingles that are not fastened properly. Once one shingle fails, others may follow.
This is one of the most common reasons for roof damage after storms.
Roof Leaks
Poor nail penetration can create small openings where water gets in. At first, the leak may be small and hard to notice.
Later, it can turn into a more serious moisture problem.
Premature Roof Failure
A roof with weak nail holding power may wear out early. That means more repairs, more stress, and a shorter roof life.
Problems Caused by Overdriven Roofing Nails
If a nail is driven too far, it can also cause trouble.
- Torn shingles
- Damaged sealing strip
- Water intrusion
- Reduced wind resistance
An overdriven nail can cut through the shingle surface and weaken the surrounding area. That makes the roof less reliable.
Problems Caused by Underdriven Roofing Nails
Underdriven nails do not sit flat enough in the shingle. They can also create several issues.
- Raised shingles
- Poor sealing
- Increased chance of blow-offs
- Uneven roof appearance
If you see nail heads sticking up, the roof may not seal correctly. That can lead to long-term damage.
Choosing the Correct Roofing Nail Length
What to Think About
Before you choose nails, look at these things:
- Roof deck thickness
- Number of shingle layers
- Roofing material
- Manufacturer recommendations
- Local building codes
The best nail is the one that fits the roof system properly. Do not guess if you can measure first.
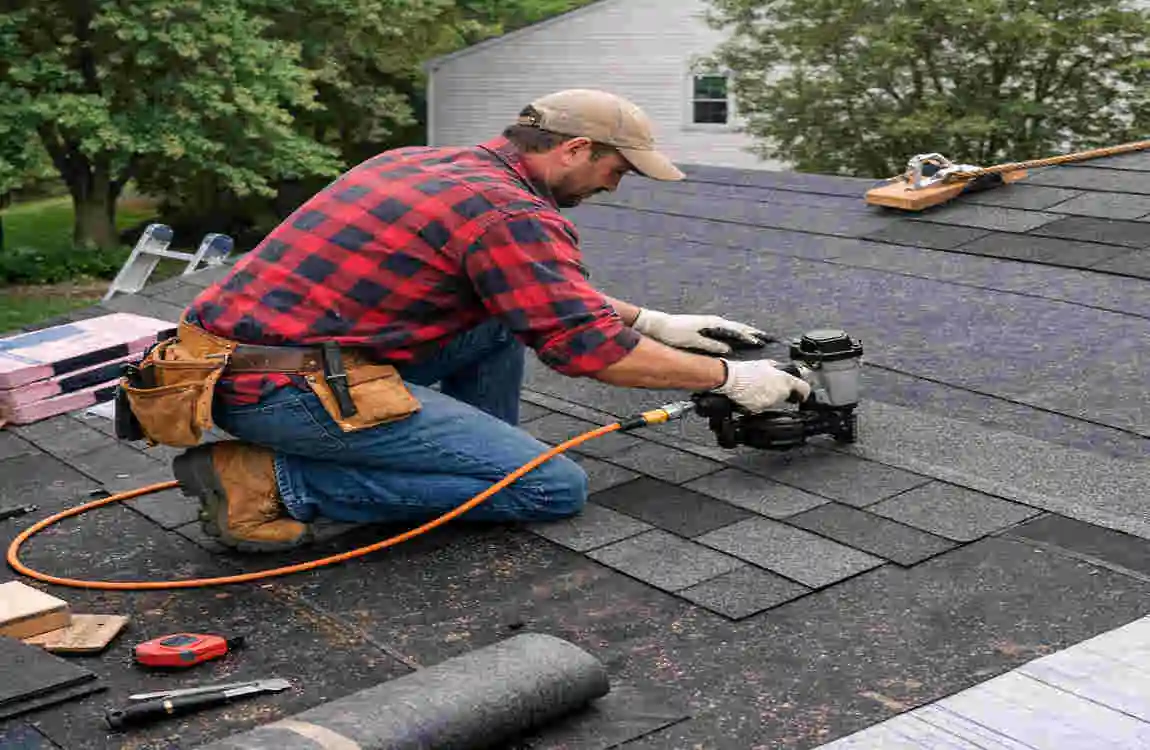
Roofing Nail Installation Best Practices
Use Proper Air Pressure
If you are using a roofing nail gun, set the air pressure correctly. Too much pressure can overdrive nails. Too little pressure can leave them sticking up.
Nail Straight
Always drive nails straight into the roof deck. A crooked nail may not hold well and can damage the surrounding material.
Follow Manufacturer Nailing Pattern
Shingle makers usually give clear nailing instructions. Follow their pattern carefully. The number and placement of nails matter just as much as depth.
Avoid Overdriving
Do not sink nails too deep. The nail head should sit flush, not cut into the shingle.
Inspect Nail Placement
Check your work as you go. A quick inspection can help you catch mistakes before they become roof problems.
Common Roofing Nail Mistakes
Some mistakes happen often during roof work:
- Using nails that are too short
- Using staples instead of nails
- Incorrect nail placement
- Too few nails
- Reusing old nails
- Ignoring local code requirements
These mistakes can reduce roof strength and create leaks later.
Signs Your Roof May Have Incorrect Nail Penetration
You may notice a few warning signs if the nails are wrong:
- Missing shingles
- Curling shingles
- Roof leaks
- Nail pops
- Loose flashing
- Interior water stains
If you see more than one of these signs, the roof may need a closer look.
Tips for DIY Roof Installation
If you are doing the work yourself, keep these tips in mind:
- Measure deck thickness first.
- Choose approved roofing nails.
- Use a roofing nail gun correctly.
- Check penetration often.
- Wear proper safety equipment.
A careful approach is safer and gives better results.
When to Hire a Professional Roofer
Call a professional if:
- The roof pitch is steep
- There are multiple leaks
- Decking needs replacement
- Storm damage is extensive
- The warranty requires professional installation
A roofer can save time and reduce the risk of costly mistakes.
Frequently Asked Questions
How far should house roofing nails penetrate?
Roofing nails should penetrate at least 3/4 inch into the roof deck or pass completely through thinner roof decking.
What size roofing nails are best for asphalt shingles?
Most asphalt shingles use 1¼-inch galvanised roofing nails, depending on deck thickness.
Can roofing nails be too long?
Yes, but extra length usually is not a problem if the nails are installed correctly.
What happens if roofing nails are too short?
Short nails may not secure shingles properly, leading to wind damage, leaks, and loose shingles.
Should roofing nails go through the plywood?
Yes. On thinner decking, the nails should pass completely through the plywood or OSB.
How many nails should be used per shingle?
Most manufacturers recommend 4 nails per shingle, while high-wind areas may require 6 nails.
| Aspect | Details |
|---|---|
| Recommended Penetration | Roofing nails should penetrate at least 3/4 inch into the roof deck or pass completely through the sheathing if it is thinner than 3/4 inch. |
| Building Code Standard | Most building codes and manufacturer guidelines require a minimum 3/4-inch penetration for secure fastening. |
| Why Proper Penetration Matters | Ensures shingles stay firmly attached, improves wind resistance, and helps prevent leaks. |
| If the Roof Deck Is Thin | Nails should extend completely through the plywood or OSB sheathing. |
| Problems with Nails Too Short | Poor shingle grip, increased risk of blow-offs, loose shingles, and possible warranty issues. |
| Problems with Nails Too Long | Usually not a structural issue, but excessively long nails may protrude into the attic and create safety concerns. |
| Common Roofing Nail Lengths | 1¼-inch nails are standard for most asphalt shingles; thicker roofing materials may require 1½-inch or longer nails. |
| Best Practice | Use galvanized roofing nails and drive them flush with the shingle surface—avoid overdriving or underdriving. |
| Key Takeaway | Proper nail penetration is essential for a durable, weather-resistant roof and compliance with roofing standards. |