Polycarbonate roofing is a smart choice for many home projects. It is lightweight, strong, and easy to work with, which makes it useful for patios, pergolas, sheds, greenhouses, and carports. Many homeowners also like it because it lets in natural light while still protecting the space below from rain, wind, and harmful UV rays.
| Key Points | ||
|---|---|---|
| Plan & measure | Confirm roof pitch ≥ 5°; measure span, sheet length, and purlin spacing. | |
| Prepare structure | Install rafters/purlins to manufacturer’s max spacing; fix noise/foam tape on purlins. | |
| Cut sheets | Cut with fine‑tooth saw; keep flutes running down‑slope; leave factory UV side up. | |
| Drill fixing holes | Oversize holes 2–3 mm for expansion; drill on crest (roof) or in valley (wall) as per profile. | |
| Lay first sheet | Start at gutter/eaves end; overhang into gutter ~50 mm; keep laps away from prevailing wind. | |
| Fix sheet to purlins | Use roofing screws with seals; do not overtighten; follow recommended spacing pattern. | |
| Add side laps/next sheets | Overlap 1–1.5 corrugations (pro |
If you are looking for roofing sheets for home use, polycarbonate is often one of the best options. It gives you a clean look, long-lasting performance, and simple maintenance. It can also be a good DIY project if you plan well and follow the right steps.
What Is Polycarbonate Roof Sheeting?
Understanding Polycarbonate Material
Polycarbonate is a strong plastic material used in many building projects. It is popular because it is tough, clear, and resistant to the weather. Some sheets are transparent, while others are tinted to reduce heat and glare.
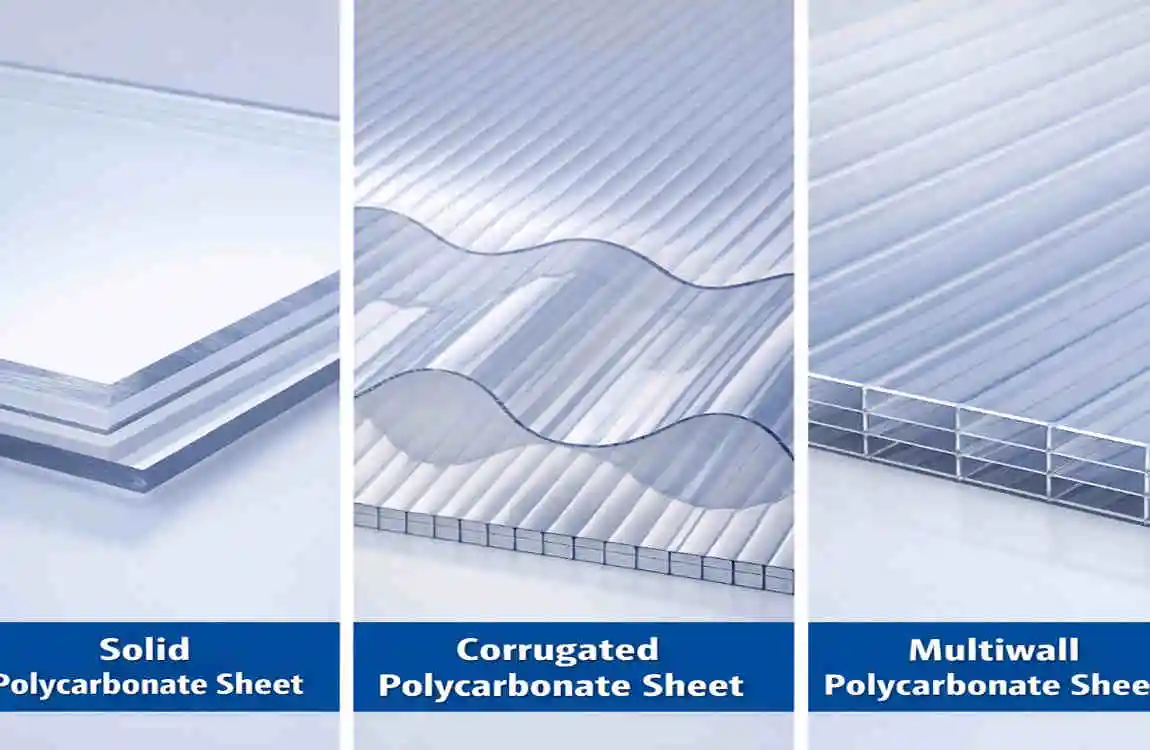
Types of Polycarbonate Roof Sheets
There are a few common types of polycarbonate roof sheets:
- Corrugated sheets: These have a wavy shape and are often used for sheds and patios.
- Multiwall sheets: These have air spaces inside and offer better insulation.
- Solid sheets: These look more like glass but are lighter and more impact-resistant.
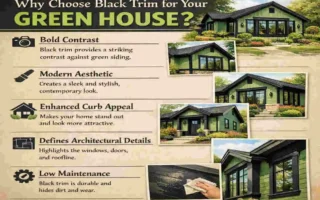
Common Residential Uses
Polycarbonate sheets are widely used for:
- Greenhouses
- Patio covers
- Gazebos
- Carports
- Outdoor kitchens
They are a flexible option for many roof sheeting installation projects around the home.
Benefits of Installing Polycarbonate Roofing at Home
Lightweight Yet Strong
One of the biggest benefits is that polycarbonate is lightweight but durable. It is easier to lift and install than glass or heavy-metal roofing, making the job simpler for DIY homeowners.
Weather Resistance
Polycarbonate roofing can withstand sun, rain, wind, and light snow. It also offers UV protection, helping reduce sun damage.
Excellent Light Transmission
These sheets allow natural daylight to pass through. That means your space stays bright without needing as much artificial light during the day.
Energy Efficiency
Because the roof brings in more daylight, you may use less electricity for lighting. This can help lower energy use over time.
Long-Term Durability
Good-quality polycarbonate sheets are crack-resistant and impact-resistant. With proper care, they can last for many years.
Tools and Materials Needed Before Installation
Before you start, gather everything you need. This saves time and makes the work smoother.
Essential Tools
- Measuring tape
- Circular saw or fine-tooth saw
- Drill machine
- Ladder
- Safety gloves
- Safety goggles
- Sealant gun
Required Materials
- Polycarbonate roof sheets
- Fixing screws
- Closure strips
- Flashing
- Foam fillers
- Sealants
- Support rafters
Safety Equipment
- Non-slip shoes
- Helmet
- Protective clothing
Quick Checklist
Make sure you have all tools, all materials, and all safety gear ready before you begin. This is one of the easiest ways to avoid delays during installation.
Planning Before Installation
Good planning makes the whole project easier. This part is just as important as the actual installation.
Measure the Roof Area Correctly
Measure the roof’s width and length carefully. Do not forget to include an overlap allowance, because the sheets need some extra space to fit properly.
Determine Roof Pitch
A proper slope helps rainwater drain off the roof. If the pitch is too flat, water may pool and cause leaks later. A good roof slope for polycarbonate sheets protects the structure and improves performance.
Check Local Building Codes
Some areas require permits or have wind-resistance rules. It is always wise to check local building codes before you begin your roofing measurement guide work.
Choose Sheet Thickness
Polycarbonate sheets come in different thicknesses, such as 4mm, 6mm, and 10mm. Thinner sheets may work for smaller projects, while thicker sheets offer stronger coverage and better insulation.
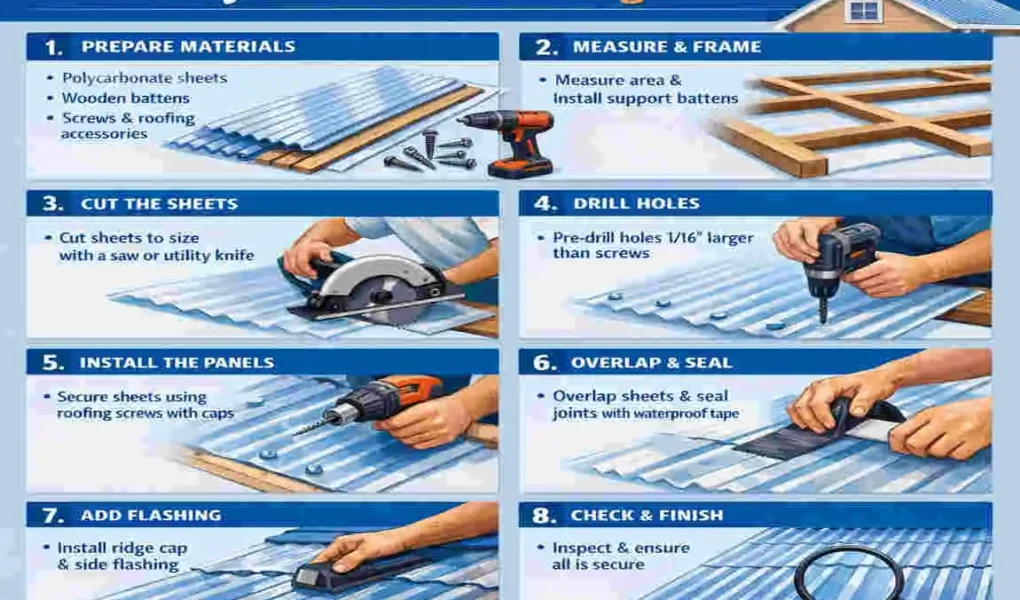
How to install Polycarbonate Roof Sheeting
Prepare the Roof Frame
Start by checking the support structure. The frame can be made of wood or metal, but it must be strong enough to support the sheets safely.
Look for weak spots, loose joints, or uneven sections. The frame should be level and aligned so the roofing sits properly. If needed, add battens for extra support.
This step is very important when learning to install polycarbonate roof sheeting, as a weak frame can lead to problems later.
Cut Polycarbonate Sheets to Size
Measure each sheet carefully before cutting. This reduces waste and helps the sheets fit the roof neatly.
Use a circular saw or fine-tooth blade for clean cuts. Cut slowly and steadily so the sheet does not crack or chip.
After cutting, clean the edges and remove any dust or loose bits. This helps the sheets fit better during the cutting of polycarbonate roofing sheets.
install Closure Strips and Support Accessories
Closure strips help seal gaps and support the sheet edges. They also reduce the chance of leaks and improve the roof’s strength.
Place foam fillers where needed to stop movement and close open spaces. Add flashing around joints and edges to prevent water from entering the roof.
Position the Polycarbonate Roof Sheets
Always start on the correct side of the roof. In most cases, you should begin opposite the direction of the prevailing wind. This helps reduce lifting and water entry.
Leave small gaps for expansion. Polycarbonate expands and contracts with temperature changes, so thermal movement must be allowed for.
Also, overlap the sheets properly. Good roof overlap planning usually includes side and end overlaps, depending on the sheet type and roof design.
Drill and Fix the Sheets Properly
Drill pilot holes before inserting screws. This lowers the risk of cracking the sheet.
Place screws carefully and do not overtighten them. Tight screws can damage the sheet or stop it from expanding naturally.
Use washers for better sealing and stronger fixing. Keep fasteners spaced evenly so the roof stays secure. This is a key part of fixing polycarbonate roof sheets the right way.
Seal Joints and Prevent Water Leaks
Apply silicone sealant where needed to improve weather protection. Pay special attention to edges, joints, and overlapping areas.
You can also install ridge caps for extra protection. Check for any open gaps that could let in rainwater. A careful sealing job helps create a more weatherproof roof sheet system.
Final Inspection and Cleaning
Once everything is fixed in place, check the roof for movement or loose fittings. Make sure all sheets are stable and aligned.
Remove the protective film at the right time, usually after installation is complete. Then clean the surface gently to remove dust and debris. Do not use rough tools that could scratch the sheet.
Common Mistakes to Avoid When Installing Polycarbonate Roofing
Many polycarbonate roofing mistakes stem from small details. Try to avoid these:
- Overtightening screws
- Ignoring expansion gaps
- Using the wrong roof pitch
- Allowing an incorrect overlap distance
- Choosing the wrong sealant
- Installing the sheet on the wrong UV side
If you avoid these problems, your roof will last longer and perform better.
Maintenance Tips for Long-Lasting Polycarbonate Roofing
Polycarbonate roofing is easy to maintain if you care for it regularly.
Regular Cleaning
Use mild soap and water to clean roofing sheets. This keeps them clear and attractive.
Check Fasteners Annually
Check screws and washers once a year to ensure they remain tight and secure.
Inspect Sealants
Sealants can wear down over time. Check them and replace them if they start to fail.
Remove Leaves and debris
Leaves, branches, and dirt can block drainage. Keep the roof clear so water flows properly.
Avoid Harsh Chemicals
Strong chemicals can damage the surface. Use gentle cleaners instead.
These simple steps help you maintain polycarbonate roof panels for longer.
Cost of Installing Polycarbonate Roof Sheeting at Home
The cost depends on the sheet type, thickness, and roof size. Accessories and tools also affect the final budget.
Item Typical Cost Range Notes
Polycarbonate sheets: Low to medium. Thicker sheets cost more
Screws, washers, sealants , Low Needed for proper fixing
Tools : Low to medium, Higher if you do not already own them
Professional labor Medium to high Depends on roof size and location
DIY installation can save money, but professional work may be better for large or complex roofs.
Is DIY Polycarbonate Roofing Installation Worth It?
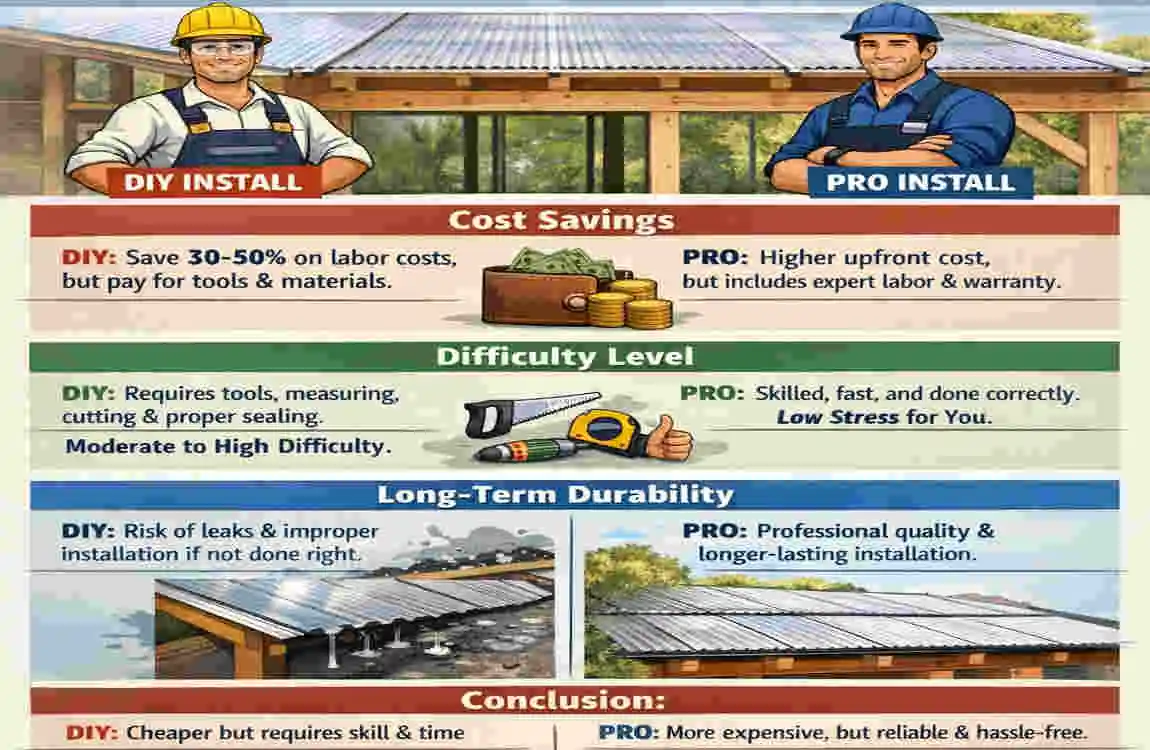
Pros
DIY can reduce labor costs and work well for small projects like pergolas, sheds, and patio roofs. It also gives you more control over the process.
Cons
The downside is that mistakes can lead to leaks, poor sealing, or safety problems. Roof work can also be risky if the structure is high or difficult to reach.
For many homeowners, DIY is a good option for smaller projects, but larger roofs may need expert help.
Frequently Asked Questions
Can I install polycarbonate roofing over an existing roof?
Sometimes yes, but only if the structure is strong enough and the surface is suitable. Always check first.
What is the best thickness for home roofing?
It depends on the project. 4mm may suit small jobs, while 6mm or 10mm is better for stronger or more insulated coverage.
How much overlap is needed?
Overlap depends on the sheet type and roof slope. Enough overlap is needed to stop leaks and allow proper water flow.
Do polycarbonate roofs leak?
They should not leak if installed correctly. Most leaks occur due to poor sealing, inadequate overlap, or loose fasteners.
How long do polycarbonate sheets last?
With good installation and care, they can last for many years.
Can I walk on polycarbonate roofing?
It is not safe to walk directly on most sheets unless the manufacturer says it is okay. Use proper support and safety steps.