Imagine this: It is a dark, stormy night in the middle of the monsoon season. You are tucked into bed, listening to the rhythmic pitter-patter of rain against your window. Suddenly, you hear a different sound. Drip. Drip. Splash. You look up to see a dark, spreading stain on your beautiful white ceiling. Within minutes, a small puddle is forming on your hardwood floor.
If you have ever experienced this, you know the immediate sense of panic it brings. A leaking roof is more than just an annoyance; it is a direct threat to your home’s safety and your peace of mind. Whether you are dealing with the heavy downpours in Lahore or a sudden spring shower elsewhere, knowing how to stop a leaking roof quickly is a skill every homeowner should have.
Why You Need to Act Fast on a Leaking Roof
When water enters your home, the clock starts ticking. Many people think a small leak can wait until the weekend, but water is incredibly destructive. It doesn’t just stay on the surface; it travels along beams, soaks into insulation, and rots wooden structures from the inside out.
The Hidden Dangers of Water Damage
First and foremost, water creates a breeding ground for mold and mildew. In humid climates, mold can start growing in as little as 24 to 48 hours. This isn’t just a cleaning issue; it is a health risk for your family, especially those with respiratory problems.
Secondly, your home’s structural integrity is at stake. When the wooden rafters of your roof stay wet, they begin to soften and decay. Over time, this can lead to a sagging roof or even a partial collapse. Learning how to stop a leaking roof isn’t just about saving your carpet; it’s about keeping your house.
The Financial Impact
According to roofing experts, nearly 80% of leaks originate from simple issues like worn-out flashing or damaged shingles. If you catch these early, the fix might cost you less than $50 in materials. However, if you wait, you could end up paying thousands of dollars for ceiling repairs, electrical work, and a complete roof replacement.
By taking charge today, you are being a proactive homeowner. We are going to show you how to handle the “rainy season damage” without breaking the bank.
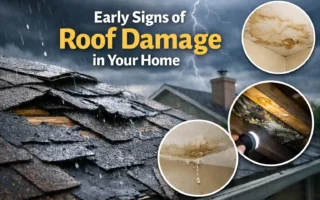
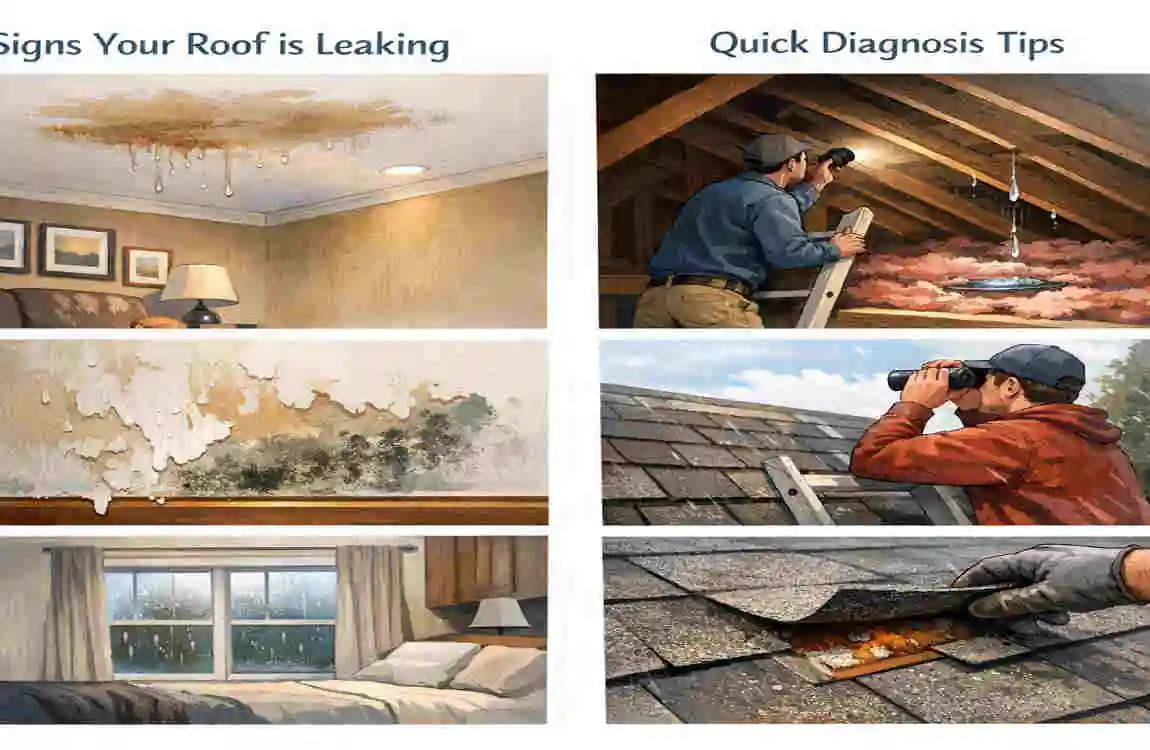
Signs Your Roof is Leaking and Quick Diagnosis Tips
Before you can fix the problem, you have to find it. Water is sneaky. The spot where the drip hits your floor is rarely directly below the hole in the roof. Water usually enters at one point and runs down a rafter before finally dripping onto your ceiling.
Common Indicators to Watch For
Keep an eye out for “coffee-colored” stains on your ceiling. These rings are a classic sign of a slow leak. You might also notice a musty, earthy smell in certain rooms, which suggests damp insulation. Outside, look for missing shingles, cracked tiles, or “bubbles” in your roofing material.
How to Perform a DIY Inspection
You don’t always have to climb onto the roof to find a leak. During a dry day, grab a pair of binoculars and walk around your yard. Look for shingles that are curling up or areas where the metal “flashing” around chimneys looks loose.
If you can safely access your attic, go up there during a rainstorm with a flashlight. Look for wet spots on the wood or the “glimmer” of water reflecting your light. If it’s not raining, you can have a friend stay on the roof with a garden hose while you look for the entry point from the inside.
Causes of Leaking Roofs
CauseCommon SymptomsDIY Check
Damaged Shingles: Missing, cracked, or curling pieces. Visible from the ground with binoculars.
Worn Flashing Water stains around chimneys or vents. Check for rusted or bent metal strips.
Clogged Gutters: Water backing up under the roof edge. Look for overflowing water during rain.
Nail Pops Small, pinpoint leaks in the attic. Look for nails “backing out” of the wood.
Valleys/Crevices Large damp spots in corners of rooms. Check for debris buildup in the roof “V” shapes.
Essential Tools and Materials for DIY Roof Leak Repairs
Before the clouds roll in, you should have a “Roof Emergency Kit” ready. You don’t want to be hunting for supplies while water is pouring into your living room. Most of these items are affordable and available at any local hardware store.
Your DIY Repair Checklist
- A Heavy-Duty Tarp: At least 10×10 feet to cover large areas.
- Roofing Cement: This is a thick, waterproof “glue” for shingles.
- Silicone Caulk: Great for sealing small gaps around vents.
- Roofing Nails: To secure shingles or tarps.
- A Sturdy Ladder: Ensure it reaches at least 3 feet above the roofline.
- Utility Knife: For cutting shingles or patches.
- Hammer and Pry Bar: For removing damaged pieces.
Budget Breakdown for 7 Fixes
You might be surprised at how cheap a temporary fix can be. Here is a quick look at what you might spend to get the job done yourself.
MaterialEstimated CostUse Case
Plastic Tarp $15 – $30 Emergency covering for large holes.
Roof Cement (1 Gal) $20 – $25 Fixing shingles and small cracks.
Silicone Sealant $8 – $12 Sealing around pipes and vents.
Box of Roofing Nails: $5-$10. Securing loose materials.
Total DIY Kit: Under $100. Covers almost all 7 fixes!
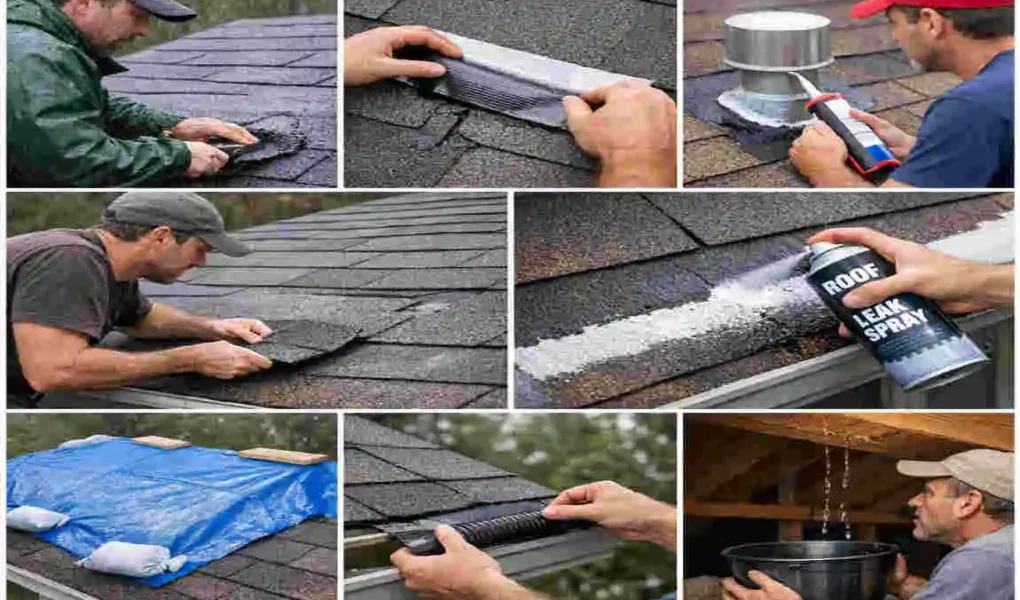
Tarp It Up – The Ultimate Emergency Cover
When the rain is coming down hard, and you can’t find the exact hole, or the damage is too big for a simple patch, tarping is your best friend. This is the fastest way to stop a leaking roof during a heavy storm. It creates an instant waterproof barrier, giving you time until the weather clears.
Why It Works
A tarp acts like a second skin for your house. It covers the damaged area and directs water down toward the gutters rather than allowing it to soak into the roof. In places like Lahore during the monsoon, where rain can last for days, a tarp is a literal lifesaver.
Step-by-Step Tarp Installation
- Safety First: Never go on a roof while it is actively raining or if there is lightning. Wait for a break in the storm.
- Locate the Area: Find the general area of the leak. You want a tarp that is large enough to cover the damage and extend at least 3 feet past it on all sides.
- Unroll the Tarp: Lay the tarp over the peak of the roof if possible. This prevents water from running under the top edge of the tarp.
- Secure with 2×4 Wood: Don’t just nail the tarp directly to the roof (that creates more holes!). Instead, wrap the ends of the tarp around 2×4 wooden boards and nail the boards into the roof.
- Weigh it Down: If you can’t nail it, use sandbags or heavy bricks to keep the edges from flapping in the wind.
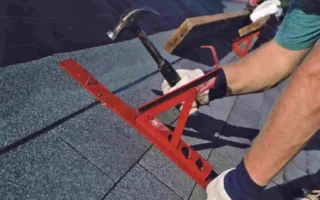
Seal Cracked Shingles with Roof Cement
Asphalt shingles are the most common roofing material, but they can become brittle over time. In the intense heat of Pakistan’s summers, shingles can crack or “curl.” When the rain hits these cracks, it goes straight into your plywood decking.
How to Identify the Problem
Look for shingles with a visible vertical crack or that appear to be “lifting” off the roof. These are prime candidates for a fast DIY fix for leaking roof shingles.
Steps to Repair
- Clean the Area: Use a brush to get rid of any dirt or moss. The sealant won’t stick to a dirty surface.
- Apply the Cement: Use a putty knife to spread a thick layer of roofing cement underneath the cracked shingle.
- Press and Hold: Press the shingle down firmly.
- Seal the Top: Apply another small dab of cement on top of the crack to create a “bridge.”
- Nail it Down: If the shingle is lifting, drive a roofing nail through it and cover the nail head with a blob of cement to make it waterproof.
This fix is incredibly effective for small leaks and can last for several months, giving you plenty of time to plan a permanent repair.
Patch Flashing Around Chimneys and Vents
Did you know that nearly 30% of roof leaks happen around chimneys, skylights, and plumbing vents? These areas use flashing, metal strips to bridge the gap between the roof and the structure protruding from it. Over time, the sealant around this metal dries out and cracks.
Why Flashing Fails
Metal expands and contracts at a different rate than wood and shingles. This constant “tugging” eventually breaks the waterproof seal. If you see water stains on the ceiling near your chimney, the flashing is likely the culprit.
Steps to Patch Flashing
- Scrape Away Old Caulk: Use a screwdriver or a knife to remove the old, dried-out sealant.
- Clean the Metal: If the flashing is rusty, use a wire brush to scrub it clean.
- Apply New Sealant: Use a high-quality silicone caulk or roofing cement. Run a thick bead along the edge where the metal meets the chimney or vent.
- Use Mesh Tape: For larger gaps, apply a piece of adhesive mesh tape over the gap, then “butter” it with roofing cement. This creates a reinforced patch that won’t crack easily.
Repair Valley Leaks with Ice and Water Shield
The “valleys” of your roof are the V-shaped angles where two roof slopes meet. These are the busiest parts of your roof because they act like a highway for rainwater. Because so much water flows through them, even a tiny hole can cause a massive leak.
The Rainy Season Challenge
During the monsoon, leaves and debris often get stuck in these valleys. This creates a “dam” that forces water to back up under the shingles.
How to Fix Valley Leaks
- Clear the debris: The first step is always to remove leaves, twigs, and dirt. Sometimes, this alone stops the leak!
- Use an Ice and Water Shield: If you find a hole in the valley lining, you can use a “peel-and-stick” ice and water shield.
- Application: Cut a strip of the shield, peel off the backing, and press it firmly into the valley. Make sure it extends several inches up each side of the “V.”
- Overlap Properly: If you are using multiple pieces, always start from the bottom and work your way up. This ensures the top piece overlaps the bottom one, keeping water on top of the patch.
Fix Loose or Missing Nails
Sometimes, the cause of a leak is as small as a single nail. This is often called a “nail pop.” As the wood in your roof gets hot and cold, it can actually “spit” a nail out, pushing it up through the shingle.
The 30-Minute Fix
This is perhaps the easiest way to stop a leaking roof. If you find a nail that has backed out, don’t just hammer it back in. The hole is already “stretched” and will likely leak again.
Steps to Fix
- Pull the Old Nail: Use the claw of your hammer to remove the loose nail.
- Fill the Hole: Squirt a small amount of silicone sealant into the hole.
- New Nail: Drive a new roofing nail about an inch away from the old hole, making sure it goes into the solid wood underneath.
- Seal the Head: Cover the head of the new nail and the old hole with a generous amount of roof cement.
Caulk Gaps in Roof Tiles or Metal Seams
In many parts of Pakistan, especially in Punjab, tile and metal roofs are very popular. These roofs are durable, but they have many seams and joints that can fail.
Handling Tile and Metal
Tile roofs can crack if someone walks on them, or the mortar between them can crumble. Metal roofs can develop leaks at seams or where screws are installed.
How to Seal Gaps
- Clean the Seam: Use a damp rag to wipe away dust from the metal seam or the tile gap.
- Backer Rod: If the gap is vast (more than 1/4 inch), stuff a “backer rod” (a foam rope) into the gap first. This gives the caulk something to sit on.
- Apply Flexible Caulk: Use a high-quality, UV-resistant outdoor caulk. Apply it smoothly along the seam.
- Smooth it Out: Use a wet finger to smooth the caulk, ensuring it makes a tight seal against both surfaces.
Temporary Roof Patch Kit for Larger Holes
If a tree branch has fallen or a storm has ripped away a large section of shingles, you need more than just a tube of caulk. You need a roof patch kit. These kits usually contain a large, reinforced adhesive sheet that acts like a giant “Band-Aid” for your house.
When to Use a Patch Kit
Use this for holes that are too large for a single shingle to cover, but not so large that they require a complete structural rebuild. It is an excellent emergency fix for a leaking house roof during rain.
Steps to Apply
- Prepare the Surface: The area must be as dry as possible. Use a towel to soak up any standing water.
- Cut to Size: Cut the patch so it is at least 6 inches larger than the hole on all sides.
- Peel and Stick: Press the patch down firmly, starting from the center and working outward to remove air bubbles.
- Seal the Edges: For extra security, run a bead of roofing cement around the very edge of the patch.
Safety First: Protecting Yourself During Roof Repairs
We cannot stress this enough: your safety is more important than your ceiling. Working on a roof is dangerous, especially when it is wet and slippery.
The Golden Rules of Roof Safety
- Never Work Alone: Always have someone on the ground to hold the ladder and call for help if needed.
- Check the Weather: If you hear thunder or see lightning, get down immediately. A wet roof is an electrical conductor.
- Use the Right Ladder: Make sure your ladder is on level ground. For every 4 feet of height, the base of the ladder should be 1 foot away from the wall.
- Wear Grip Shoes: Use rubber-soled shoes with good traction. Never wear flip-flops or sandals on a roof.
- Avoid the “Danger Zones”: Stay away from power lines that connect to your house.
In places like Lahore, winter mornings can be very foggy and damp. The roof might look dry, but a thin layer of dew can make it as slippery as ice. Always wait until the sun has dried the surface before climbing up.
Long-Term Prevention: Stop Leaks Before They Start
The best way to handle a leaking roof is to prevent leaks from happening in the first place. A little bit of maintenance twice a year can save you a decade of headaches.
Habits to Prevent Leaking Roof Rainy Season Damage
- Clean Your Gutters: Clogged gutters are the #1 cause of “roof rot.” When water can’t flow away, it sits against your roof edge and seeps in.
- Trim Your Trees: Keep branches at least 6 feet away from your roof. This prevents branches from scraping shingles and keeps leaves out of your gutters.
- Annual Inspections: Every spring and autumn, take 15 minutes to look at your roof. Look for the signs we discussed earlier.
- Check the Attic: Go into your attic during heavy rain once a year. It’s the best way to catch a “silent” leak before it ruins your ceiling.
- Professional Tune-Up: Every 5 years, have a professional roofer inspect the flashing and seals. It’s a small investment for long-term peace of mind.
FAQ: Common Questions on How to Stop a Leaking Roof
Q: Can I fix a leaking roof myself while it is still raining? A: It is tough to get sealants to stick to a wet surface. The best thing to do during active rain is to use a tarp or place buckets inside to catch the water. Wait for a break in the rain to apply permanent patches.
Q: How much does professional roof leak repair cost? A: A simple professional patch can cost between $150 and $400. However, if the damage is extensive, it could be much more. Doing it yourself with the fixes above usually costs less than $50.
Q: What if I can’t find the leak? A: If you see water inside but can’t find the hole outside, the water might be traveling from a high point on the roof to a lower point. Check around your “roof penetrations,” such as vents and chimneys, first, as these are the most common culprits.
Q: Is a DIY fix permanent? A: Most DIY fixes, like roofing cement or tarps, are temporary. They are designed to stop the damage now. You should still have a professional look at it later to ensure a long-term solution.
Q: Does home insurance cover roof leaks? A: Usually, insurance covers leaks caused by “sudden events” like a storm or a fallen tree. They often do not cover leaks caused by old age or lack of maintenance.