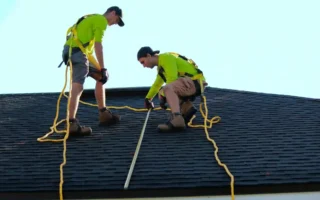
Roofing work can feel risky fast. A steep slope, loose shingles, shifting tools, and a bad step can turn a simple home project into a serious problem. That is why many homeowners and DIY roofers look for safer ways to work above ground.
| How roof brackets help | Benefit |
|---|---|
| Add stability | Reduces slips and falls while working on the roof |
| Create a secure platform | Makes shingle repair, leak fixing, and maintenance easier |
| Improve access | Helps workers reach different roof areas more comfortably |
| Support efficiency | Speeds up roofing tasks by making movement and work positioning easier |
One of the most useful tools for this kind of job is a roof bracket. If you are learning how to use a roof bracket, you are already taking a smarter approach to roof work safety. Roof brackets help create a more stable place to stand, move, and place tools while working on a roof.
They are especially helpful when you need to replace shingles, make small repairs, inspect the roof, or install gutters. They can also make long jobs less tiring because you are not balancing on the slope the whole time.
What Is a Roof Bracket?
Definition of a Roof Bracket
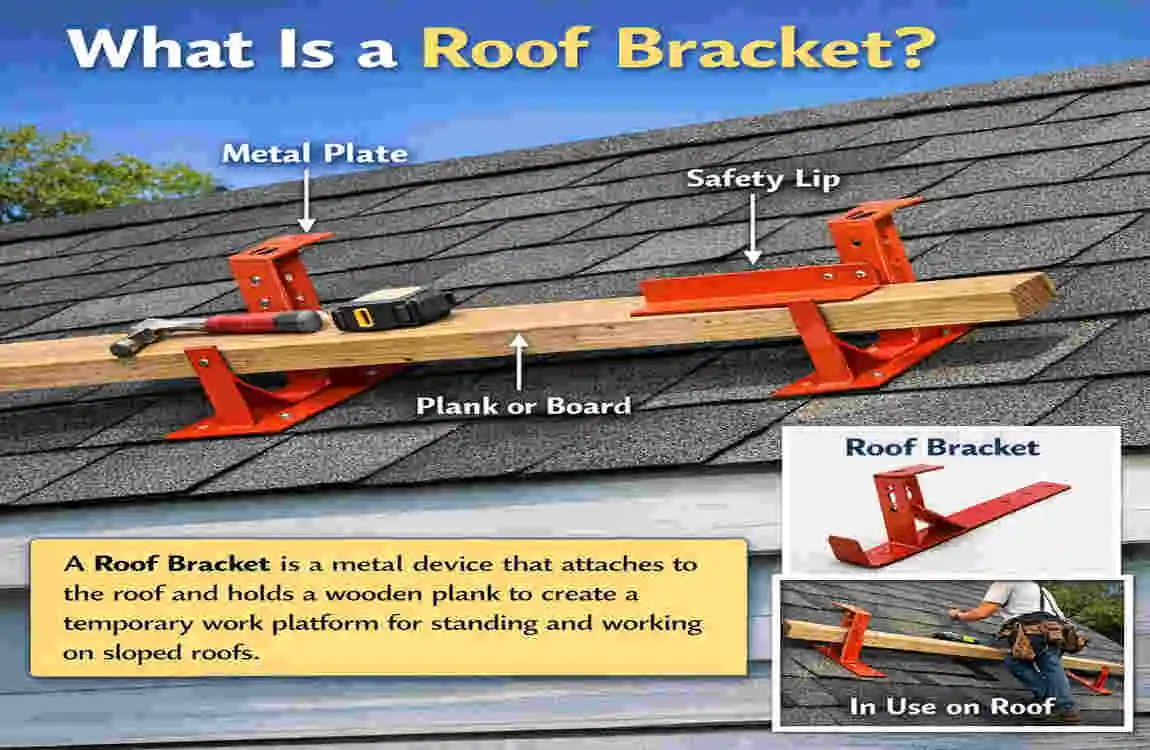
A roof bracket is a support tool that attaches to a roof and holds a plank in place. Many people also call it a roof jack or roofing bracket. These names are often used for the same kind of tool.
The main job of a roof bracket is simple. It gives you a more stable working surface on a roof so you can move around with better balance and control.
How Roof Brackets Work
Roof brackets work as part of a support system. You install the bracket on the roof surface, then place a plank across a set of brackets. That plank becomes a small work platform.
This platform gives you a place to stand, kneel, or set materials while working. It does not turn the roof into a floor, but it makes roofing tasks much easier and safer than standing directly on the slope.
Main Components of a Roof Bracket
A roof bracket is usually made of a few simple parts:
- Bracket body: the main metal frame that supports the plank
- Nail holes: openings used to fasten the bracket to the roof
- Support arm: the angled part that holds the plank level
- Roofing plank: the board placed across the brackets to create a platform
These parts work together to create roofing platform support that can make a big difference during a home project.
Why Roof Brackets Are Important for Roofing Projects
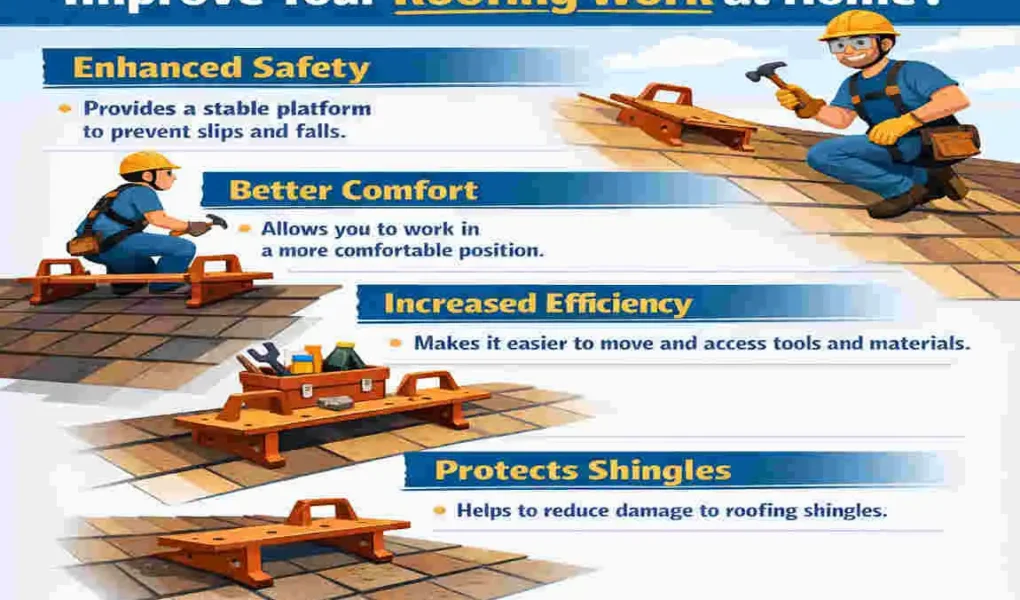
Enhanced Worker Safety
Safety is the biggest reason people use roof brackets. A roof can be slippery, and even a small mistake can lead to a fall. Roof brackets help reduce that risk by creating a steadier place to work.
They also help improve balance on steeper roofs. When your feet have better support, you can focus more on the task and less on staying upright.
Increased Productivity
Roof work takes time, and time matters when you are on a roof. Roof brackets help by giving you easier access to tools and materials. You do not need to climb up and down as often.
That means less wasted effort and a smoother workflow. When your supplies are closer, you can finish the job more efficiently.
Better Material Handling
Shingles, nails, sealant, and other supplies can be awkward to manage on a roof. A roof bracket platform gives you a better place to keep them nearby.
This makes it easier to move materials from one spot to another without dropping them or losing balance.
Reduced Fatigue
Standing or crouching on a sloped roof for a long time can quickly wear you out. A roof bracket setup helps reduce strain by giving you a more stable surface.
That added comfort can make a long job feel much more manageable, especially for homeowners who are doing the work themselves.
Types of Roof Brackets Available
Fixed Roof Brackets
Fixed roof brackets are the simple, standard type. They have a set shape and are used in common roofing tasks.
They are a good choice for basic home projects where the roof pitch is not too complex. If you want a straightforward tool with fewer moving parts, fixed brackets can be a solid option.
Adjustable Roof Brackets
Adjustable roof brackets are more flexible. They can work with different roof pitches, which makes them useful when your roof is steeper or has an unusual slope.
These adjustable roof brackets are helpful if you need a little more control over setup. They often make roof bracket installation easier for jobs that do not fit a one-size-fits-all design.
Heavy-Duty Roof Brackets
Heavy-duty brackets are built for tougher work. They are often used in commercial settings or on larger projects where the platform needs to support more weight.
If you plan to carry more materials or need a stronger support system, these brackets may be worth considering.
Lightweight Residential Roof Brackets
These are made for homeowners and small DIY projects. They are usually lighter, easier to carry, and simpler to install.
For many people, this is the best place to start when learning how to use a roof bracket for the first time.
Tools and Materials Needed Before Installation
Before you start, gather everything you need. This keeps the job moving and reduces the chance of mistakes.
Essential Tools
You will usually need:
- Hammer
- Measuring tape
- Chalk line
- Roofing nails
These basic tools are enough for many roof bracket installation jobs.
Safety Equipment
Do not skip safety gear. Roofing safety equipment is just as important as the brackets themselves.
Use:
- Safety harness
- Helmet
- Non-slip footwear
- Gloves
This is a key part of DIY roofing safety, especially when working on a slope.
Materials Required
You also need the right materials for the platform itself:
- Roof brackets
- Wooden planks
- Fasteners
Make sure the plank fits the brackets properly and is in good condition before you climb up.
How to Use a Roof Bracket: Step-by-Step Guide
Assess Roof Pitch and Conditions
Start by checking the roof pitch. The slope indicates the type of bracket setup you need and how careful you must be during installation.
Also, check the weather. A dry, calm day is best. Wet shingles, strong winds, and poor visibility make roof work much more dangerous.
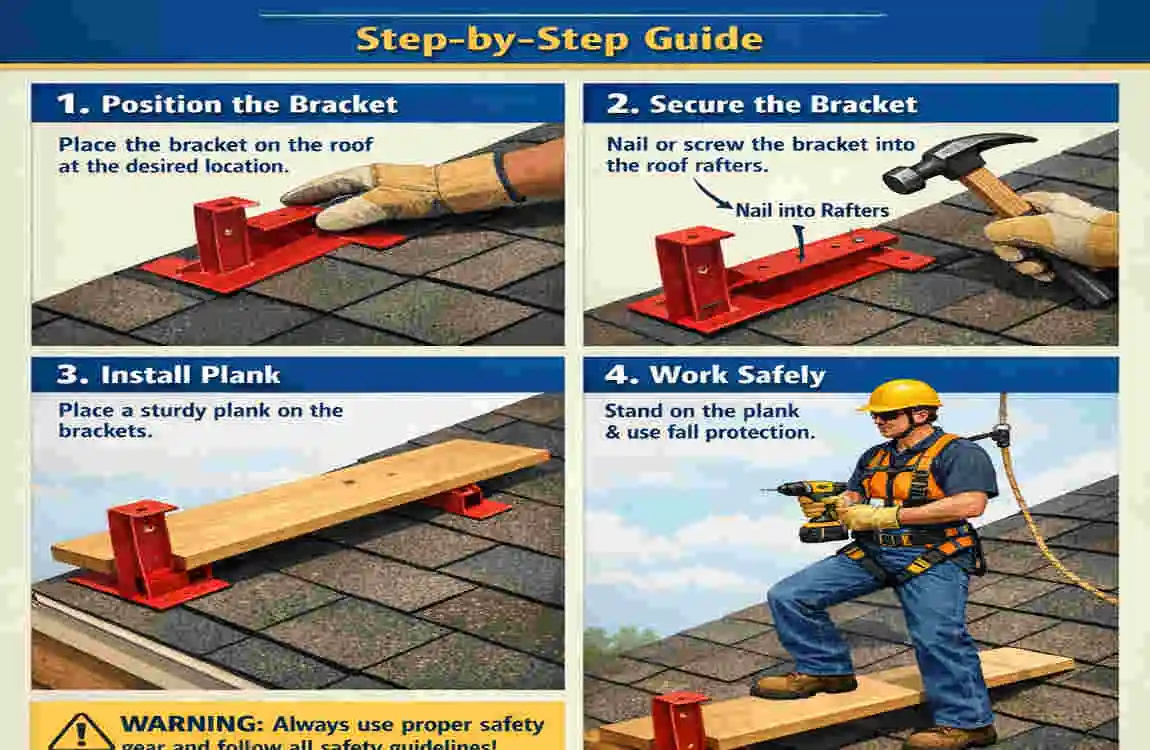
Mark Bracket Placement
Next, decide where the brackets should go. Use a measuring tape and chalk line to mark even spacing.
Proper roof bracket spacing helps keep the platform balanced. Place the brackets where they can support the plank evenly and match the work area you need.
Secure the Roof Brackets
Now fasten the brackets to the roof. Use the proper nail holes and make sure each bracket is tight.
This is one of the most important parts of installing roof brackets on a shingle roof. Loose brackets can shift, and that can make the whole setup unsafe.
install Roofing Planks
Once the brackets are secure, place the plank across them. The plank should sit firmly and reach across the support points without sliding.
Choose a plank size that matches the setup. It should be strong enough to hold you and your tools without bending too much.
Test Stability
Before you put full weight on the platform, check it carefully. Press down gently and look for movement.
This quick test helps you spot problems before you begin actual work. It is much better to find a weak point now than after you start moving around.
Begin Roofing Work
Once everything feels stable, you can begin the job. Keep tools organised, move slowly, and stay aware of where you place your feet.
A roof bracket platform is there to help you work better, but it still requires careful movement and good judgment.
Safety Tips When Using Roof Brackets
Always Wear Fall Protection
A roof bracket is helpful, but it is not a replacement for fall protection. A safety harness can provide an additional layer of protection if something goes wrong.
This is one of the most important roof work safety tips you can follow.
Check Weather Conditions
Never ignore the weather. Rain makes shingles slippery, and strong wind can affect your balance.
If the roof is damp, icy, or unstable, wait for safer conditions.
Inspect Equipment Before Use
Look over the brackets, planks, and fasteners before every job. Check for cracks, rust, bent metal, and loose hardware.
A small defect can become a major hazard once weight is added.
Never Exceed Weight Limits
Every product has a weight rating. Follow the manufacturer’s instructions and do not overload the platform.
Too much weight can damage the brackets or make the plank unsafe.
Maintain Three Points of Contact
When moving on a roof, keep three points of contact whenever possible. That means two hands and one foot, or two feet and one hand.
This simple habit improves balance and lowers the chance of slipping.
Common Mistakes to Avoid When Using Roof Brackets
Incorrect Bracket Placement
If the brackets are spaced incorrectly, the plank may shift or sag. That creates an unstable surface and increases the risk of a fall.
Take time to measure carefully before you fasten anything.
Using Damaged Equipment
Never use a bracket or plank that looks weak, bent, or cracked. Damaged gear can fail without warning.
A quick inspection can save you from a serious accident.
Improper Fastening
Loose nails or weak fastening can make the whole setup unsafe. Brackets need to be firmly secured.
If they move during testing, stop and fix the problem before continuing.
Ignoring Roof Pitch Ratings
Not every bracket works on every roof. If the roof is too steep for the bracket type, the system may not hold correctly.
Always match the bracket to the roof pitch.
Overloading the Platform
A platform should hold you and your tools, but not too much more. Carrying too many materials at once can strain the setup.
Move heavy items in smaller loads when possible.
Roof Brackets vs Scaffolding
Roof Brackets vs Scaffolding
Both tools help with roofing work, but they serve different needs. Roof brackets are simpler and often better for smaller home projects. Scaffolding is larger and usually better for long or complex jobs.
Here is a quick comparison:
Feature Roof Bracket Scaffolding
Cost Usually lower Usually higher
Setup Time Faster Slower
Best For Small to medium roof jobs Larger or longer projects
Mobility Easy to move Less flexible
Safety Use Good with proper harness use Strong support for extended work
Cost Comparison
For homeowners, roof brackets are often the more affordable option. You buy fewer parts, and the setup is usually simpler.
Scaffolding can be more expensive because it needs more materials and more time to install.
Ease of Installation
Roof brackets are easier to install for many people. They are light, direct, and less bulky than a scaffold system.
That makes them a practical choice for short home projects.
Safety Factors
Scaffolding can feel more secure for some large jobs, but roof brackets are very useful when installed correctly. The best choice depends on the task, the height, and the roof shape.
Best Applications
Use roof brackets when you need a simple, efficient platform for repairs, shingle work, or inspections. Use scaffolding when the project is bigger, longer, or needs more work area.
Roof Brackets vs Roof Harness Systems
Key Differences
A roof bracket creates a work platform. A roof harness system helps protect you from falling.
They perform different roles, which is why many professionals use them together.
Safety Benefits
The best setup often includes both. The roof bracket makes your work easier, while the harness adds another layer of protection.
If you are learning roof brackets for steep roofs, this combination is especially helpful.
Cost and Practicality
For homeowners, a roof bracket setup may feel more practical for hands-on work. A harness is still essential, but it does not provide a place to stand or to store tools.
So the real answer is not usually “one or the other.” In many cases, the safest choice is to use both.
Choosing the Right Roof Bracket for Your Home Project
Consider Roof Pitch
Your roof pitch should guide your choice. Steeper roofs often need more suitable or adjustable support.
This is one of the first things to check when selecting the best roof brackets for homeowners.
Evaluate Weight Capacity
Think about what you will carry. If you only need to hold a few tools, a lighter bracket may be enough. If you are moving shingles or heavier supplies, you need a stronger setup.
Material Quality
Roof brackets are usually made from steel or aluminium. Steel is strong and durable. Aluminium is lighter and easier to move.
Each material has its place, so choose based on the kind of project you plan to do.
Ease of Adjustment
Some brackets are easier to set up than others. Simple adjustment features can save time and reduce frustration, especially for first-time users.
Manufacturer Reputation
Buy from a maker with a solid reputation. Good products usually come with clear instructions, better quality control, and warranty support.
That matters when you rely on the bracket to support your work.
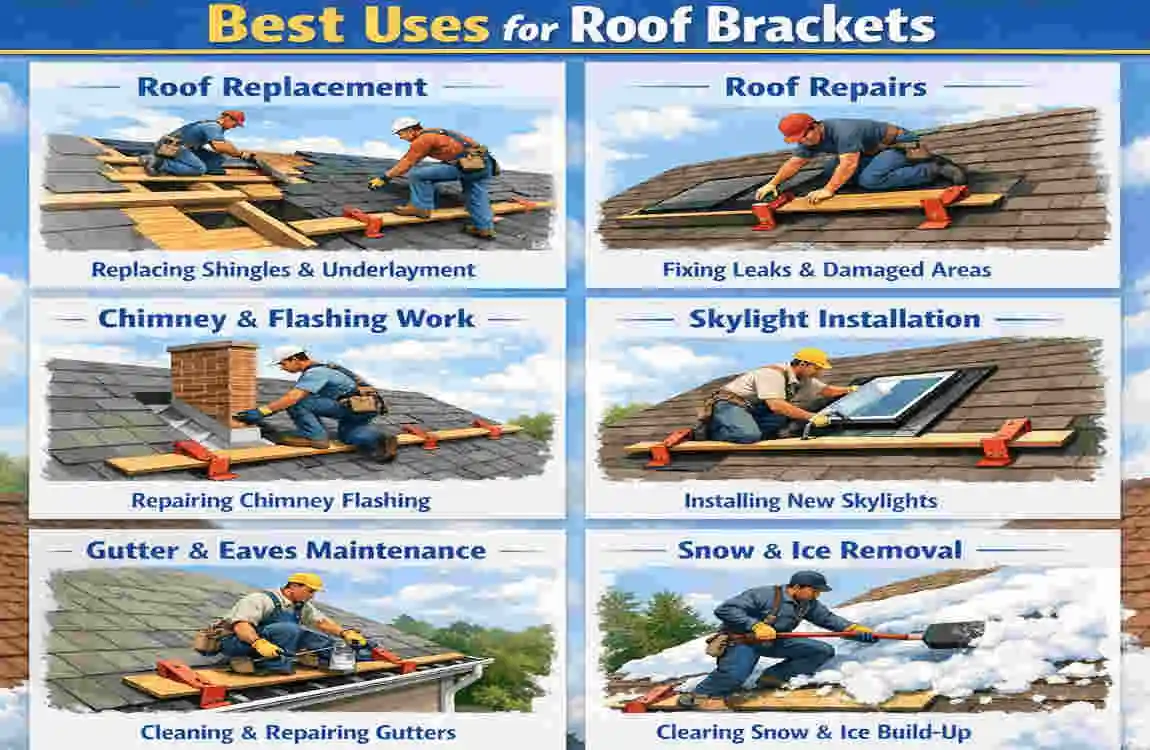
Best Roofing Projects That Benefit from Roof Brackets
Roof brackets are useful in many home projects. Here are some of the most common ones:
- Roof shingle replacement
- Roof repairs
- Roof inspections
- Gutter installation
- Solar panel installation
- Roof cleaning projects
Each of these jobs becomes easier when you have a stable platform to work from. For example, during shingle replacement, a bracket setup helps you move along the roof more precisely. During inspections, it gives you a better place to stop, look, and check problem spots.
If you are doing a smaller DIY project, a roof bracket may give you exactly the support you need without requiring a full scaffold system.
Maintenance and Storage of Roof Brackets
Cleaning After Use
After each job, clean off dirt, shingle dust, and moisture. If you leave debris on the metal, rust can form over time.
A quick wipe-down helps keep the brackets in good shape.
Inspection Procedures
Check for wear before storing the equipment. Look at the nail holes, support arms, and edges for damage.
If anything looks worn or unsafe, set it aside until it is repaired or replaced.
Proper Storage
Store roof brackets in a dry, secure place. Moisture and rough handling can shorten their life.
Keeping them organised also makes the next project easier.
When to Replace Roof Brackets
Replace a bracket if you see heavy rust, bending, broken parts, or repeated loosening during use. If the tool no longer feels reliable, do not risk it.
Safety comes first every time.
Frequently Asked Questions About How to Use a Roof Bracket
Can homeowners use roof brackets safely?
Yes, homeowners can use them safely if they follow the instructions, use fall protection, and work in good weather. The key is to treat the setup with care, not rush the job.
How far apart should roof brackets be placed?
Spacing depends on the plank size and the project, but the brackets must support the board evenly. Always follow the product guidelines for correct roof bracket spacing.
Do roof brackets damage shingles?
They can leave small marks if installed carelessly, but proper setup helps reduce damage. Use the correct fasteners and place them where recommended.
Can roof brackets be reused?
Yes, many roof brackets are reusable. Just inspect them before each use and replace any damaged parts.
Are roof brackets suitable for steep roofs?
Some are, especially adjustable models. Always check the pitch rating before using them on a steep roof.
What size plank should be used with roof brackets?
Use a plank that matches the bracket design and supports weight properly. The plank should fit securely without slipping or bending too much.
Can roof brackets replace a safety harness?
No, they cannot. A roof bracket is a support tool, not fall protection. A harness is still part of good roofing safety equipment.