If your sink is draining slowly, your shower is backing up, or there is a bad smell coming from the pipes, you are not alone. These are some of the most common signs that your plumbing needs attention. For many Lahore homeowners, a small clog can quickly turn into a bigger, more expensive problem. What starts as a slow drain can lead to a messy backup, a foul odor, or even an emergency plumber visit.
The good news is that you do not always need harsh chemicals or expensive tools to fix the problem. In many cases, you can learn how to clean plumbing pipes at home using simple items you already have in your kitchen or laundry area. Baking soda, vinegar, hot water, dish soap, and a basic drain snake can do a surprising amount of work when used properly.
| Method | How It Works | Best For | Notes On Safety/Use |
|---|---|---|---|
| Hot water + liquid soap | Flushes grease and light buildup with hot water mixed with dish soap. | Light kitchen sink clogs and greasy traps. | Avoid on PVC if water is extremely hot. |
| Baking soda + vinegar | Create fizzing reaction that dissolves organic gunk and loosens deposits. | Mild‑to‑moderate drain clogs, odors, and traps. | Let sit 30–60 minutes, then flush with hot water. |
| Boiling water flush | Melts and flushes away soap scum and light grease in pipes. | Sinks and occasional maintenance after light use. | Do not use on PVC; can soften joints. |
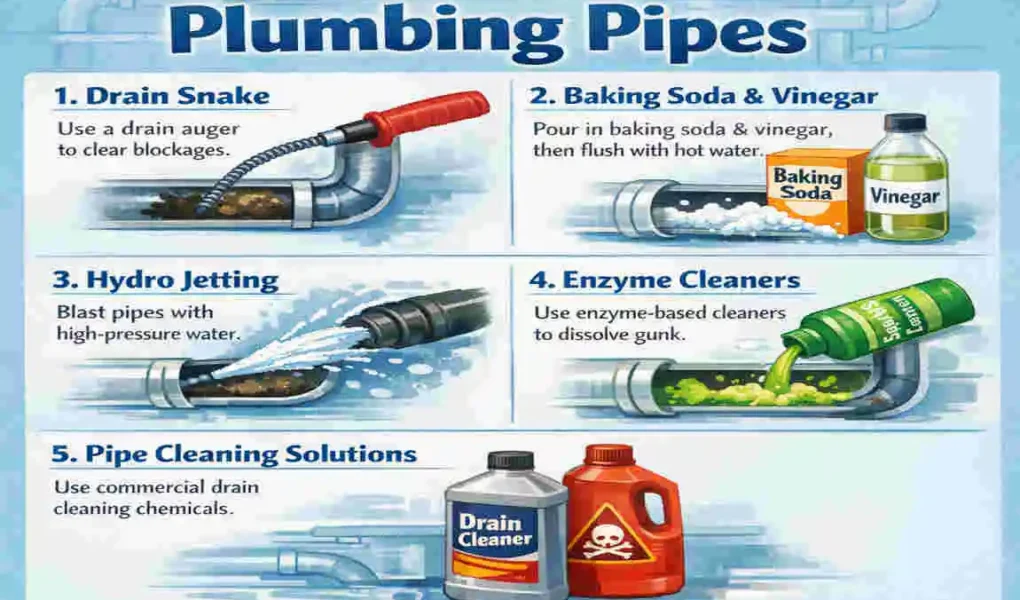
| Mechanical auger/snake | Rotating cable breaks up or pulls out solid blockages inside pipes. | Stubborn clogs deep in waste lines and toilets. | Use gently to avoid scratching pipes. |
| P‑trap cleaning | Remove and clean the curved under‑sink trap where debris collects. | Frequent sink clogs and slow drains. | Use a bucket to catch water; inspect for leaks. |
The goal here is simple: help you unclog plumbing, protect your home, and keep water moving the way it should. If you are dealing with kitchen grease, bathroom hair clogs, or mineral buildup in your lines, these methods can help you start fresh.
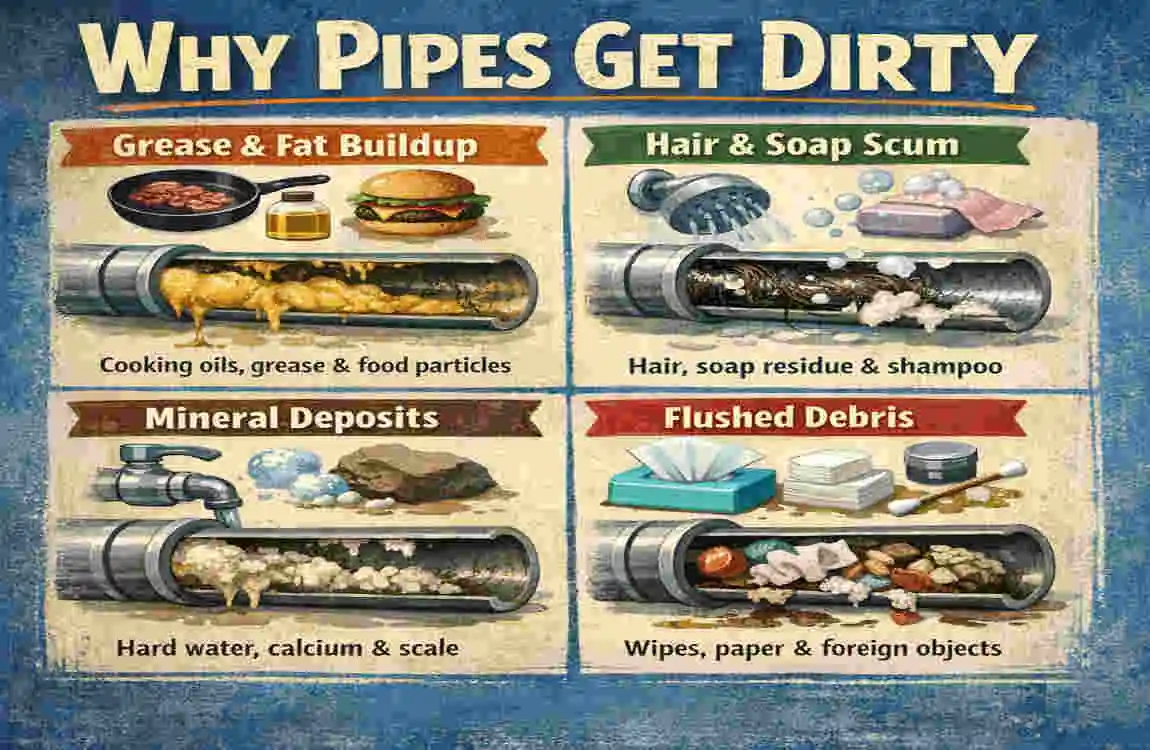
Why Pipes Get Dirty Over Time
Pipes do not usually clog all at once. In most homes, buildup happens little by little. That is why one day your drain seems fine, and the next day it feels painfully slow.
Grease, Soap, Hair, and Minerals
Kitchen drains often collect grease, oil, and food particles. Even if you rinse with hot water, greasy residue can stick to the inside of the pipe and slowly harden.
Bathroom pipes deal with a different problem. Hair, soap scum, toothpaste, and body oils can cling to pipe walls, forming a thick buildup. In showers, this often leads to slow drainage and standing water.
In many areas, hard water adds another layer of trouble. When water contains excess minerals, those minerals can settle in pipes, leaving behind a crusty layer. Over time, that layer narrows the pipe and weakens the flow.
Common Signs Your Pipes Need Cleaning
You do not need to wait for a full blockage before taking action. Watch for these warning signs:
- Slow drainage in sinks, tubs, or showers
- Gurgling sounds after water goes down
- Bad smells coming from the drain
- Water backing up after use
- Frequent minor clogs that keep coming back
If you notice these signs early, it is much easier to clean the pipes before the problem gets worse.
Why Prevention Matters
Regular cleaning does more than clear a clog. It helps keep your plumbing healthier for longer. A simple routine can reduce strain on your system, lower the chance of emergency repairs, and keep your home smelling fresher.
For busy homeowners, this is a smart habit. A little maintenance now is often far cheaper than dealing with a damaged pipe later. That is exactly why learning how to clean plumbing pipes at home is such a useful skill.
Boiling Water Flush
If you want the easiest possible place to start, this is it. A boiling water flush is one of the simplest ways to loosen grease and soften sticky buildup.
Best For
This method works best for:
- Kitchen sinks
- Light grease buildup
- Fresh clogs
- Routine maintenance
It is especially useful when the drain feels slightly slow but not completely blocked.
Tools You Need
- A kettle or pot
- 2 to 4 liters of water
- Oven mitts or a towel for safe handling
Step-by-Step Instructions
- Boil 2 to 4 liters of water.
- Use a kettle or a large pot, and let the water come to a full boil.
- Pour it slowly down the drain.
- Do not dump it all at once. A slow pour helps the heat work on the pipe walls.
- Repeat 2 to 3 times.
- Wait a few seconds between pours so the pipe can absorb the heat.
- Test the drain with running water.
- If the water moves faster, you have already improved the flow.
Why It Works
Hot water softens grease and loosens residue that has started to stick to the pipe. It is quick, cheap, and easy to do without special products.
Caution Box
Caution: Do not use boiling water on very fragile pipes or on old plastic fittings if you are unsure. If the pipe material is weak, start with hot tap water instead of full boiling water.
Baking Soda and Vinegar Reaction
This is the method most people think of first when they want a natural pipe cleaner. It is popular because it feels simple, safe, and chemical-free.
Best For
This method is ideal for:
- Bathroom drains
- Organic buildup
- Mild odors
- Light clogs from soap and residue
If you are looking for how to clean plumbing pipes at home with common ingredients, this is one of the most trusted options.
Tools You Need

- 1/2 cup baking soda
- 1 cup vinegar
- Hot water
- A drain cover or cloth
Step-by-Step Instructions
- Pour baking soda into the drain.
- Try to get as much of it into the opening as possible.
- Add vinegar slowly.
- As soon as the vinegar touches the baking soda, it will fizz. That reaction helps loosen grime.
- Cover the drain and wait 15 to 60 minutes.
- Covering the drain keeps the fizzing action inside the pipe, preventing it from escaping too quickly.
- Flush with hot water.
- After waiting, pour hot water down the drain to wash away loosened buildup.
Why It Works
The fizzing reaction helps break apart sticky debris and soft buildup. It will not fix every clog, but it can do a great job on smaller, softer blockages.
Caution Box
Caution: Never mix vinegar and baking soda with bleach or other commercial drain cleaners. Some combinations can create dangerous fumes or unwanted reactions.
Dish Soap and Hot Water
Sometimes the simplest fix is also the most practical one. Dish soap is formulated to cut through grease, making it useful for kitchen pipes.
Best For
This method is best for:
- Fatty residue
- Greasy kitchen sinks
- Light, slippery buildup
If grease is the main problem, this can be a strong, affordable solution.
Tools You Need
- 3 tablespoons of dish soap
- Boiling water
- A bowl or pot
Step-by-Step Instructions
- Add dish soap to boiling water.
- Mix a few tablespoons into a pot or large bowl of hot water.
- Pour the mixture slowly into the drain.
- The soap helps coat and loosen the greasy layer inside the pipe.
- Wait about 10 minutes.
- Give the solution time to work on the buildup.
- Run hot tap water.
- This helps rinse away the loosened residue.
Why It Works
Dish soap breaks down oily material. It is gentle, simple, and budget-friendly. In many cases, it is enough to improve a slow kitchen drain without any extra tools.
Caution Box
Caution: Do not rely on soap if the drain is fully blocked. If water will not move at all, you may need a snake or a plumber.
DIY Drain Snake
When hair or solid debris is trapped in the pipe, liquid cleaners may not be enough. A drain snake lets you physically pull the clog out.
Best For
This method works best for:
- Shower drains
- Bathroom sinks
- Hair clogs
- Small blockages that sit near the drain opening
If you want to unclog sink drain or shower lines without chemicals, this is one of the most effective tools.
Tools You Need
- A wire hanger or a simple drain snake tool
- Gloves
- A bucket or trash bag
Step-by-Step Instructions
- Straighten the wire hanger.
- Leave a small hook at the end.
- Insert it carefully into the drain.
- Move slowly so you do not scratch the pipe or push the clog deeper.
- Twist and pull.
- Try to catch hair or debris with the hook.
- Remove the debris and repeat if needed.
- You may need a few tries to get everything out.
- Flush the drain with water.
- Once the blockage is gone, run water through the line to clear it.
Why It Works
A snake does what liquids cannot. It reaches into the clog, grabs the material, and brings it back out. That makes it especially useful for hair and soap buildup.
Caution Box
Caution: Be gentle. If you force the hanger too hard, you can damage the drain opening or jam the clog deeper into the pipe.
Pro Tip
A plastic hair removal tool or a low-cost snake from a hardware shop can be easier to use than a metal hanger. If you clean bathrooms often, this is a smart tool to keep at home.
Vinegar Soak for Mineral Buildup
If your home has hard water, mineral scale may be part of the problem. This is especially useful for supply lines and areas where water leaves white or chalky residue.
Best For
This method is best for:
- Hard water scale
- Mineral buildup
- Supply lines
- Slow flow caused by deposits
For many Lahore households, this is a practical way to address water quality issues.
Tools You Need
- White vinegar
- Water
- A container
- Access to the pipe or line you want to treat
Step-by-Step Instructions
- Shut off the water.
- Make sure the line is safe to work on.
- Drain the line.
- Let any remaining water leave before adding the solution.
- Mix vinegar and water in a 1:1 ratio.
- This creates a simple cleaning soak.
- Pour or apply the solution.
- Let it sit for 4 to 6 hours.
- Flush the line thoroughly.
- Run fresh water through the pipe to clear out loosened minerals.
Why It Works
Vinegar is mildly acidic, so it can help soften mineral deposits. Over time, that can improve flow and reduce crusty buildup.
Caution Box
Caution: Use this method only where it makes sense for your pipe setup. If you are not sure how your supply lines are arranged, it is better to pause and check before pouring anything into the system.
Pro Tip
If mineral scale is a regular issue in your home, set a reminder to check your pipes every few months. A little attention can save a lot of frustration later.
Enzyme Cleaners
Sometimes you need something stronger than kitchen ingredients but still safer than harsh chemicals. Enzyme cleaners are a good middle ground.
Best For
This method is useful for:
- Stubborn organic matter
- Odors from buildup
- Repeated minor clogs
- Homes that want a gentler cleaning option
Tools You Need
- A bio-enzyme drain cleaner
- Gloves
- Hot water for flushing afterward
Step-by-Step Instructions
- Read the label first.
- Every product works a little differently.
- Pour the recommended amount into the drain.
- Do not guess. Use the amount listed on the package.
- Let it sit overnight.
- Enzyme products usually need time to work.
- Flush with hot water.
- In the morning, rinse the line well.
Why It Works
Enzyme cleaners use helpful biological ingredients to break down organic material. That makes them a strong option for stubborn residues that are too stubborn for simple home remedies.
Caution Box
Caution: Do not expect instant results. Enzyme cleaners need patience. They work best when you let them sit long enough to do their job.
Pro Tip
If you prefer natural pipe cleaners that are gentler than chemical drain openers, enzyme products are worth considering. They are often a good fit for regular maintenance.
Hydro-Jet Simulation for Deep Clogs
This is the most advanced DIY method on the list. It is not for everyone; you should only try it if you understand your plumbing setup well.
Best For
This method is best for:
- Deep sewer clogs
- Heavy buildup
- Outdoor drain lines
- Larger blockages that do not respond to simple flushing
Tools You Need
- Garden hose
- High-pressure nozzle
- Access to a cleanout point
- Protective gloves and safe footwear
Step-by-Step Instructions
- Find the cleanout access.
- This is the point where you can reach deeper into the pipe system.
- Attach the hose and nozzle.
- Make sure everything is secure before turning on the water.
- Use strong water pressure.
- Let the water blast through the pipe for 5 to 10 minutes.
- Check the flow.
- If water moves better, the clog may be breaking apart.
Why It Works
Strong water pressure can push loose buildup through the line and help clear deeper areas that simple methods cannot reach.
Caution Box
Caution: This method is not beginner-friendly. If you are unsure about the pipe layout, the cleanout location, or the pressure level, it is better to stop and call a plumber.
Pro Tip
If your drain keeps clogging even after repeated DIY cleaning, the issue may be deeper in the line. That is usually the point where professional help becomes the safer choice.
Comparison Table: Which Cleaning Method Should You Use?
Here is a simple way to compare the seven DIY methods side by side.
Method Time Cost (PKR)Best For Difficulty
Boiling Water Flush 5 min 0 Grease Easy
Baking Soda + Vinegar 30 min 100 Organic buildup Easy
Dish Soap + Hot Water 10 min 50 Fatty residue Easy
DIY Drain Snake 15 min 500 Hair clogs Medium
Vinegar Soak 6 hrs 200 Minerals Easy
Enzyme Cleaners Overnight 1000 Organic matter Easy
Hydro-Jet Simulation 20 min 2000 Deep clogs Hard
This table can help you decide how to clean your home’s plumbing pipes based on the problem you actually have. That matters because the wrong method can waste time and still leave the clog in place.
Essential Tools to Keep at Home
If you want to handle simple drain problems quickly, it helps to keep a few basic items ready. You do not need a full plumbing kit. Just a small set of useful tools can make a big difference.
Recommended Tools
- Plunger
- Drain snake
- Rubber gloves
- Bucket
- Baking soda
- White vinegar
- Dish soap
- Old towel or cloth
Natural Cleaners Worth Keeping
- Baking soda: useful for light buildup and odors
- Vinegar: helpful for fizzing reaction and mineral softening
- Dish soap: strong against grease
- Hot water: simple but effective for routine maintenance
If you buy these in bulk, the cost stays low. That makes regular DIY pipe cleaning much more affordable than repeated emergency visits.
Smart Storage Tip
Keep your cleaning items in one small box or basket under the sink. That way, when a drain starts acting up, you are not searching all over the house for supplies.
Safety Precautions You Should Never Ignore
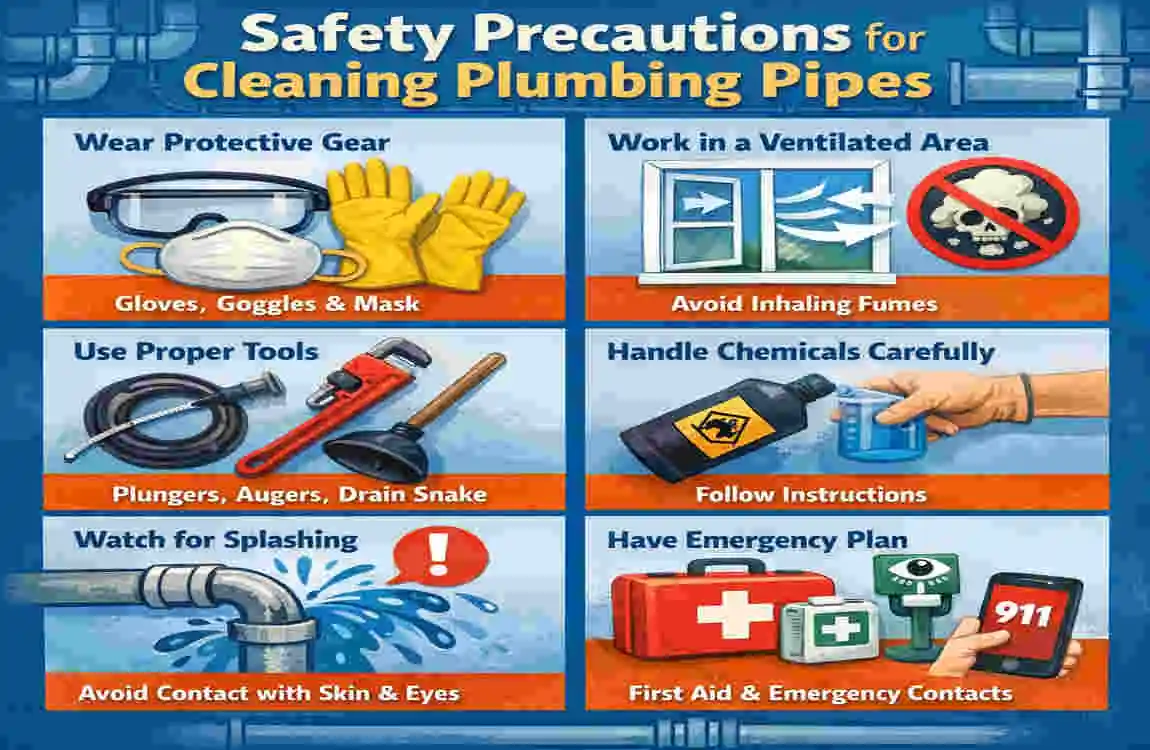
Even when you are using simple home methods, safety still matters. A small mistake can make a clog worse or create a new problem.
Basic Safety Rules
- Wear gloves when handling dirty drain debris.
- Do not mix cleaners unless you know they are safe together.
- Test hot water on older plastic parts first.
- Work slowly so you do not damage pipes.
- Keep children and pets away from cleaning areas.
Be Careful With Old Pipes
Older pipes may be more fragile than they look. If your home has ageing plumbing, high pressure, or very hot water, these may not be the best choices. In that case, gentler methods are usually safer.
When to Pause
Stop and rethink your approach if:
- Water starts leaking from a joint
- The pipe makes cracking sounds
- The clog gets worse after your attempt
- A bad smell turns into visible backup
If that happens, it may be time to bring in a professional rather than force the issue.
Simple Maintenance Schedule to Keep Pipes Clear
The best way to avoid a major clog is to stay ahead of it. A routine is easier than reacting to a full blockage.
Weekly
- Flush kitchen and bathroom drains with hot water
- Wipe grease from pans before washing them
- Remove visible hair from shower drains
Monthly
- Use baking soda and vinegar for a light clean
- Check sinks and tubs for slow drainage
- Run dish soap and hot water through greasy kitchen drains
Quarterly
- Use a drain snake to check for hair buildup
- Inspect areas that often clog
- Treat mineral buildup if hard water is a problem
This kind of schedule makes how to clean plumbing pipes at home feel less overwhelming. Instead of waiting for a crisis, you stay in control.
When You Should Call a Plumber
DIY methods work well for many common problems, but not every clog belongs in the “do it yourself” category. Some issues are signs of a bigger plumbing problem.
Call a Plumber If You Notice
- Persistent clogs that keep coming back
- Sewer backups
- Rusty or discolored water
- Multiple drains clogging at the same time
- Strong sewage smells
- Water leaking from joints or walls
These signs often point to a deeper issue in the plumbing system, not just one dirty drain.
Why Professional Help Matters
A plumber can check the full line, find hidden damage, and use stronger tools if needed. That may cost more upfront, but it can prevent larger repairs later.
For many Lahore homes, early professional attention can save both time and stress. If the issue is beyond a simple clog, getting help quickly is the smart move.
Good Rule to Follow
If you have already tried two or three gentle methods and nothing has changed, do not keep pushing harder. That is usually the point at which expert help is the better choice.
FAQs
How to clean plumbing pipes at home naturally?
The most common natural method is the baking soda-and-vinegar approach. It helps loosen light buildup and can reduce odors. For greasy drains, hot water and dish soap also work well. If you want a gentler routine, use these methods regularly instead of waiting for a full clog.
Can I clean PVC pipes at home?
Yes, but use only gentle methods. Hot water, baking soda, vinegar, and mild soap are usually safer choices. Avoid anything too harsh or too hot if the pipe material is old or fragile.
How often should I clean my pipes?
For prevention, a monthly cleaning routine is a smart idea. A weekly hot-water flush and a monthly baking soda-and-vinegar treatment can help keep drains moving smoothly.
What is the best way to clean pipes with grease?
The boiling water flush and dish soap method are usually the best choices for grease. Dish soap is especially helpful because it is made to cut oily residue.
What should I do if my sink still drains slowly after cleaning?
If the sink is still slow after using home methods, the clog may be deeper in the line. Try a drain snake next. If that still does not work, it may be time to call a plumber.
Are enzyme cleaners safe for regular use?
In many cases, yes. Enzyme cleaners are often used as a gentler option for organic buildup. Still, always follow the product label and make sure it is suitable for your plumbing system.
How do I know if the clog is serious?
A clog is more serious when several drains are affected, water backs up repeatedly, or you notice sewer smells and discoloration. That usually means the issue is beyond a simple surface blockage.