Copper pipes are common in many homes because they are strong, long-lasting, and corrosion-resistant. If you ever need to repair a leak or replace a section of pipe, knowing how to cut copper pipe for a house the right way can save time and help you avoid mistakes.
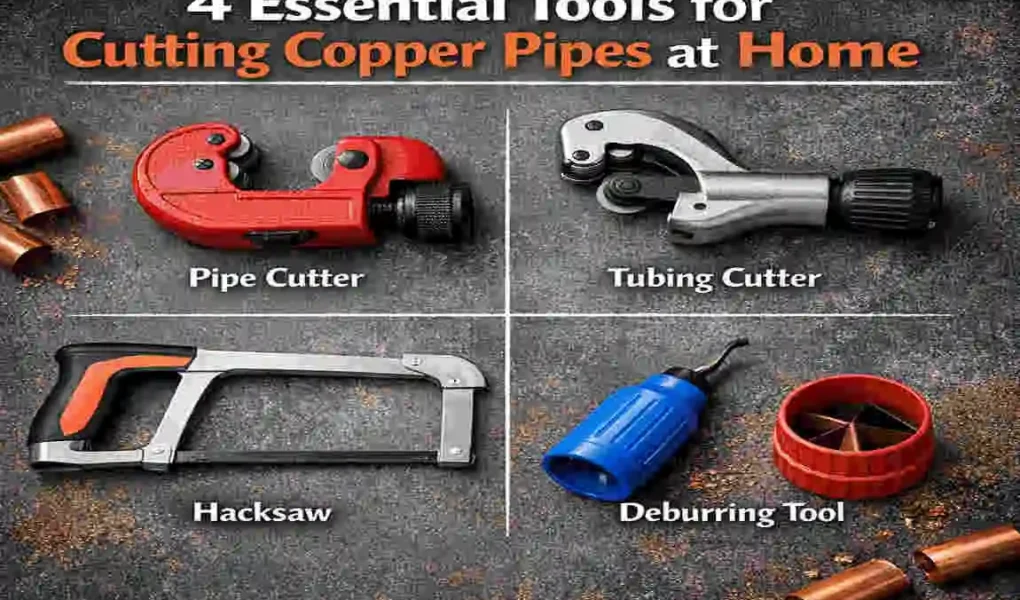
| Tool | Best Use | Skill Level | Key Benefit |
|---|---|---|---|
| Pipe Cutter | Clean, precise plumbing cuts | Beginner | Smooth, burr-free cutting |
| Hacksaw | Budget DIY cutting | Beginner | Cheap and widely available |
| Rotary Tool (Dremel) | Small or tight spaces | Intermediate | Fast and accurate cuts |
| Reciprocating Saw | Heavy-duty plumbing work | Advanced | Powerful and quick cutting |
A bad cut can leave rough edges, bend the pipe, or cause leaks later. That is why using the right tool matters. In this guide, you will learn the main tools used to cut copper pipe, how each works, and which option may best fit your home project.
Understanding Copper Pipes in Home Plumbing
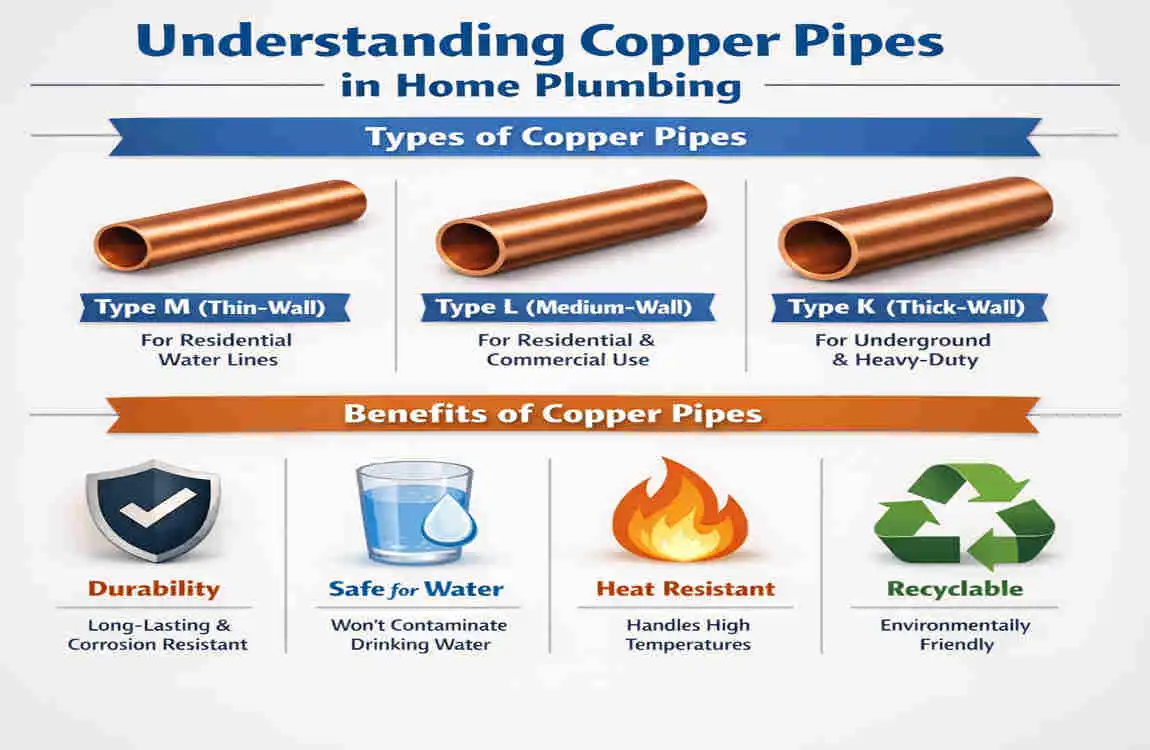
Types of Copper Pipes
Copper pipes usually come in Types K, L, and M. They vary in thickness, with some used for heavy-duty applications and others for regular home plumbing.
Where You Find Them
You may see copper pipes under sinks, behind walls, near water heaters, or in bathroom and kitchen plumbing lines.
Why the Right Cut Matters
Cutting copper pipe the wrong way can crush the pipe or leave sharp edges. A clean cut makes it easier to connect fittings and keeps the plumbing job neat and safe.
Safety Precautions Before Cutting Copper Pipes
Before you start, turn off the water supply and drain the pipe fully. This helps prevent spills and makes the work easier.
Wear gloves and goggles to protect your hands and eyes. Also, check the area for hidden wires or tight spaces before using any tool. A clean and dry workspace always makes the task safer and smoother.
Pipe Cutter
What It Is
A pipe cutter is a simple hand tool designed to cut metal pipes cleanly.
How It Works
You place the cutter around the pipe, tighten it a little, then rotate it until it cuts through. The cut is usually smooth and neat.
Why It’s Useful
This tool is one of the best choices for beginners because it gives a clean, straight cut with very little mess.
How to Use It
- Mark the spot where you want to cut
- Clamp the cutter around the pipe
- Turn the tool around the pipe
- Tighten it little by little
- Remove the cut section
This is a strong choice when you want a clean result in a small space.
Hacksaw
What It Is
A hacksaw is a manual saw with a fine-toothed blade that can cut copper pipe when other tools are unavailable.
Why People Use It
It is cheap, easy to find, and flexible for different pipe sizes.
What to Keep in Mind
A hacksaw can leave rough edges, so you will usually need extra cleaning after the cut.
How to Use It
Secure the pipe first, then cut with slow and steady strokes. Try not to push too hard, because that can bend the pipe.
Afterward, smooth the edge so the pipe is ready for fitting or repair.
Rotary Tool
What It Is
A rotary tool uses a small cutting disc that spins fast and cuts through copper with good control.
Why It Stands Out
It works well in tight spaces and gives you precise cuts when handled carefully.
What to Watch For
This tool can create heat and sparks, so you need to move slowly and take breaks if the pipe gets too hot.
How to Use It
- Mark the pipe clearly
- Fit the cutting disc
- Cut slowly and steadily
- Stop sometimes to cool the pipe
For small, careful work, this tool can be very useful.
Reciprocating Saw
What It Is
A reciprocating saw is a power tool that moves its blade back and forth very quickly.
Why It Helps
It is strong and fast, which makes it a good choice for larger plumbing jobs or thicker copper pipes.
Possible Drawbacks
It may not give the cleanest cut, and the strong vibration can make the pipe edge rough.
How to Use It Safely
Use a metal-cutting blade, hold the pipe firmly, and cut with control. Avoid rushing, since that can damage the pipe.
This tool is best when speed matters more than perfect precision.
Comparing All 4 Tools
Tool Best For Skill Level Precision Cost
Pipe Cutter Clean plumbing work Beginner High Medium
Hacksaw Budget DIY Beginner Medium Low
Rotary Tool Precision cuts Intermediate High Medium
Reciprocating Saw Heavy-duty jobs Advanced Low-Medium High
If you are new to plumbing, a pipe cutter is usually the easiest and cleanest option. If you want a low-cost choice, a hacksaw can still work well with a little extra finishing.
Step-by-Step Guide: How to Cut House Copper Pipe Safely
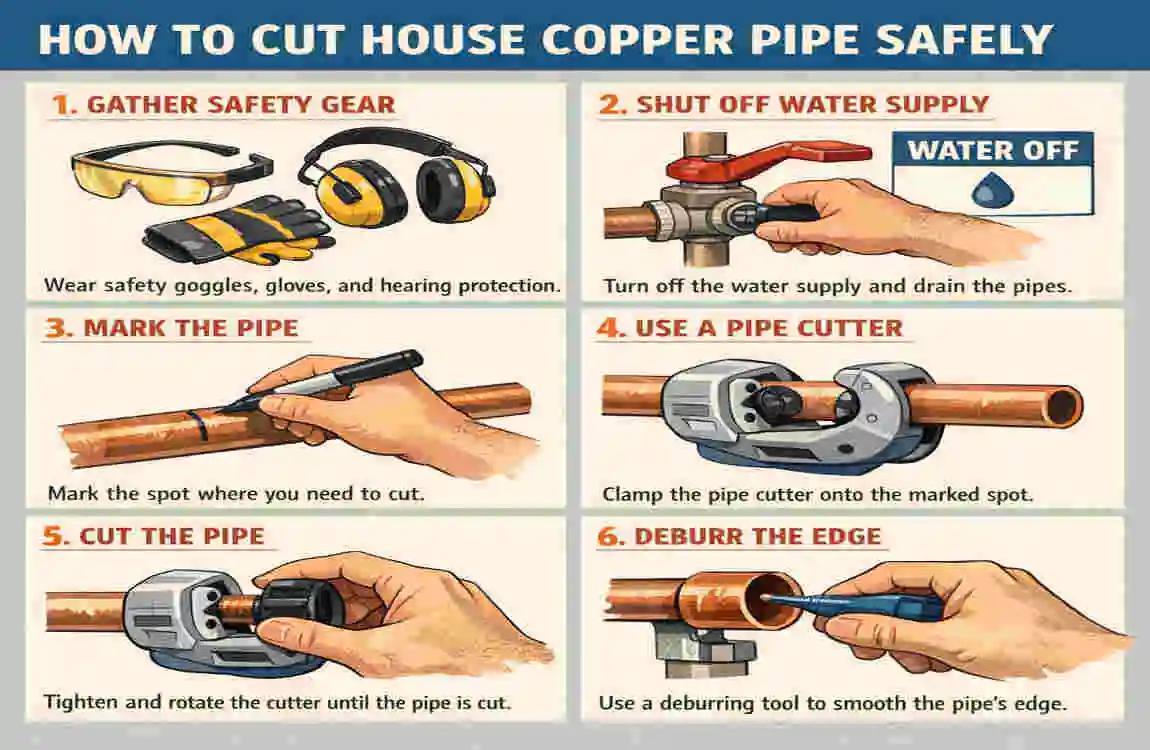
Start by finding the exact pipe you need to cut. Then turn off the water and drain the line fully.
Next, mark the cutting point clearly. Choose the right tool for your space and skill level. After that, make the cut slowly and carefully.
Once the pipe is cut, smooth the edges so they are not sharp or rough. Finally, clean the pipe before reconnecting it.
A few common mistakes include cutting too fast, using the wrong tool, and skipping the deburring step. Avoiding those errors can make your repair much easier.
Common Problems and How to Fix Them
If the pipe gets bent, the cut may have been too forceful. Slow down and use better support next time.
If the edge is rough, use a deburring tool or sand it down to smooth it. If the pipe overheats while using a rotary tool, pause and let it cool before continuing.
A straight, careful cut always gives better results than a rushed one.
Expert Tips for Better Copper Pipe Cutting
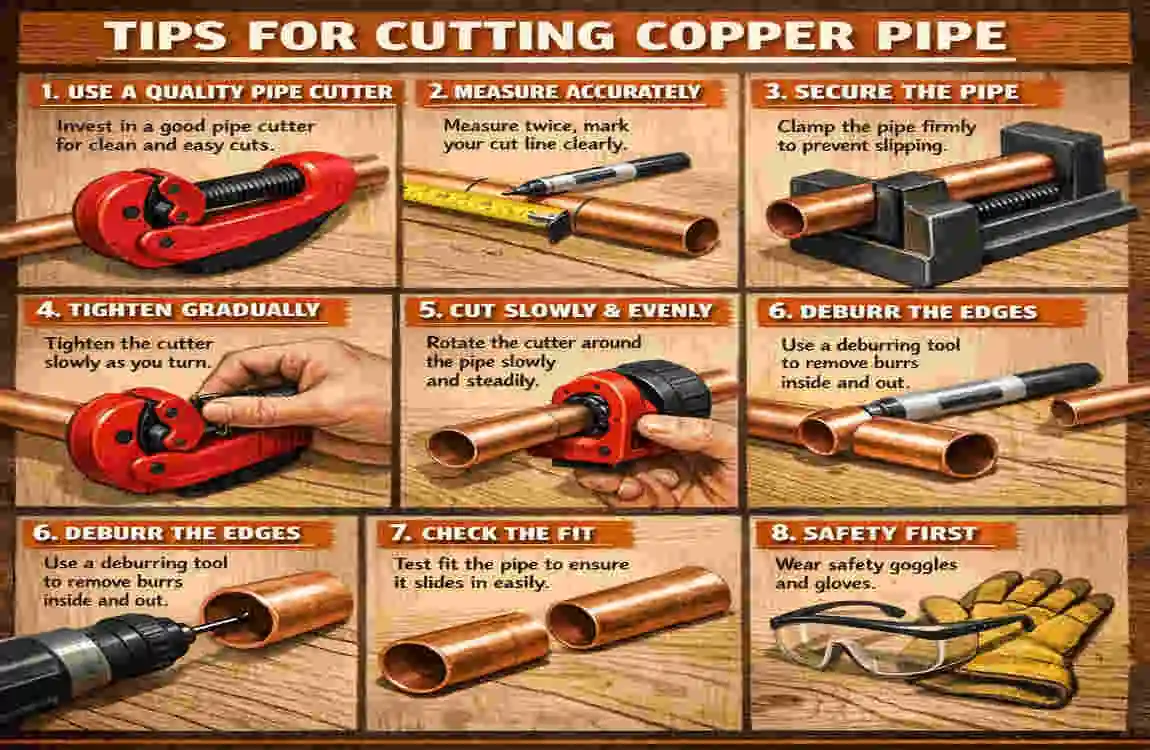
Always measure twice before you cut. This simple habit can save you from mistakes.
Use supports or clamps to keep the pipe steady. Also, replace dull blades as needed because sharp tools cut cleaner and more safely.
If you are unsure, practice on scrap pipe first. That small step can help you feel more confident before cutting the real line.
FAQ Section
What is the easiest tool to cut copper pipes?
The easiest tool for most beginners is a pipe cutter. It is simple to use, gives a neat cut, and helps reduce the chance of damaging the pipe.
Can I cut copper pipe without a pipe cutter?
Yes, you can cut copper pipe without a pipe cutter. A hacksaw, rotary tool, or reciprocating saw can also do the job, depending on the pipe size and space.
Do I need to deburr copper pipes after cutting?
Yes, you should deburr copper pipes after cutting. This removes sharp edges and helps the pipe fit properly with connectors, which can reduce leaks.
Is a hacksaw safe for copper pipes?
Yes, a hacksaw is safe for copper pipes if you use it carefully. Keep the pipe steady, cut slowly, and smooth the edge after cutting.
Which tool gives the cleanest cut?
A pipe cutter usually gives the cleanest cut. It is designed for plumbing work and leaves a smoother edge than most other tools.