Replacing a toilet seat is one of those small home tasks that can make a big difference. A cracked, loose, or stained seat can make the bathroom feel untidy and uncomfortable. The good news is that this is usually a simple DIY project.
Many modern toilets come with hidden bolts because they create a cleaner and more stylish look. These fasteners are tucked away, so the seat looks neat from above. But that same design can confuse homeowners when it is time to remove or replace the seat.
If you are learning how to change a toilet seat with hidden bolts, you are not alone. A lot of people find the hidden fixing system a little tricky at first. Once you understand where the bolts are and how they work, the job becomes much easier.
What Are Hidden Bolt Toilet Seats?
Understanding the Hidden Bolt Design
A hidden-bolt toilet seat is designed so that the fixing hardware is not clearly visible from the top. Instead of showing the bolts and nuts, the seat uses covers or concealed fittings to hold everything in place.
This home design gives the toilet a more modern appearance. It also helps reduce dust and dirt around the hinge area, which makes cleaning easier.
Traditional toilet seats usually have bolts that are easy to see. Hidden bolt models look cleaner, but they can take a little more time to remove if you do not know where the fasteners are located.
Features of Hidden Bolt Toilet Seats
Hidden bolt seats are popular for a few simple reasons:
- Sleek modern appearance
- Easier cleaning around hinges
- Secure installation system
- Improved bathroom style
These features make them a smart choice for homeowners who want a neat and practical bathroom.
Where Are the Hidden Bolts Located?
The bolts are usually found in one of three places:
- Under plastic hinge covers
- Beneath snap-on caps
- Inside quick-release fittings
In most cases, you need to open the hinge cover to reach the fasteners.
Tools and Materials Needed to Replace a Toilet Seat
Before you start, gather everything you need. Having the right tools nearby saves time and prevents frustration.
Basic Tools Required
You will usually need:
- Screwdriver
- Adjustable wrench
- Pliers
- Cleaning cloth
- Mild bathroom cleaner
- Replacement toilet seat
These simple tools are enough for most toilet seat replacement guide tasks.
Optional Tools for Difficult Bolts
Sometimes old bolts get stuck or rusted. If that happens, a few extra tools can help:
- Penetrating oil
- Rubber gloves
- Small flashlight
- Drill for severely stuck bolts
You may not need these every time, but they are useful if the hardware is old or hard to remove.
How to Remove an Old Toilet Seat With Hidden Bolts
Identify the Hidden Fasteners
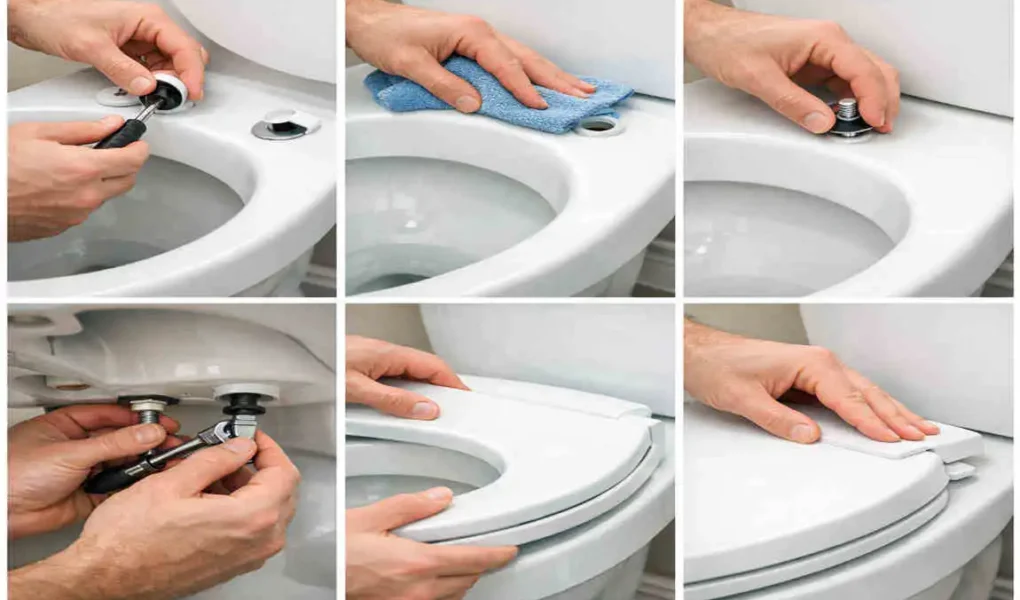
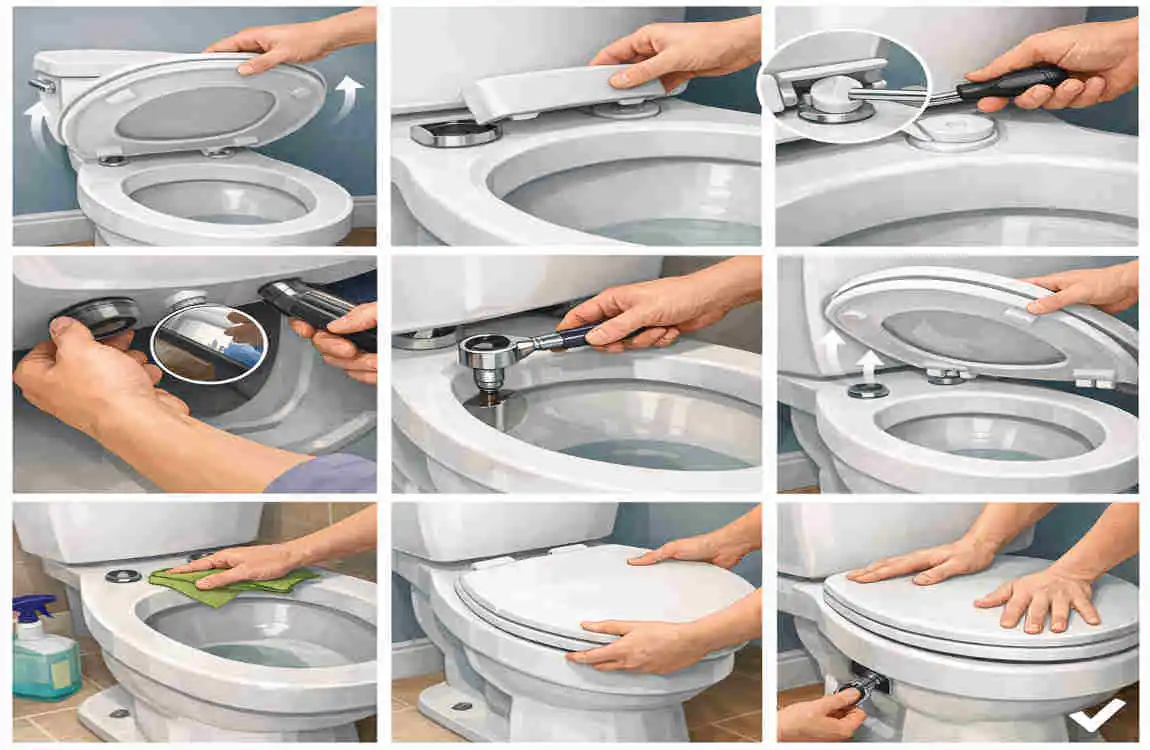
Start by looking at the back of the toilet seat where the hinges are attached. Most hidden bolt systems have small covers that protect the fixing points.
Check whether the covers open by lifting, sliding, or snapping. Be gentle so you do not break the plastic parts.
Open the Hinge Covers
Once you find the covers, open them carefully. Some lids lift straight up, while others slide off with a little pressure.
Do not force them. If they feel stuck, inspect them again and see whether there is a release point.
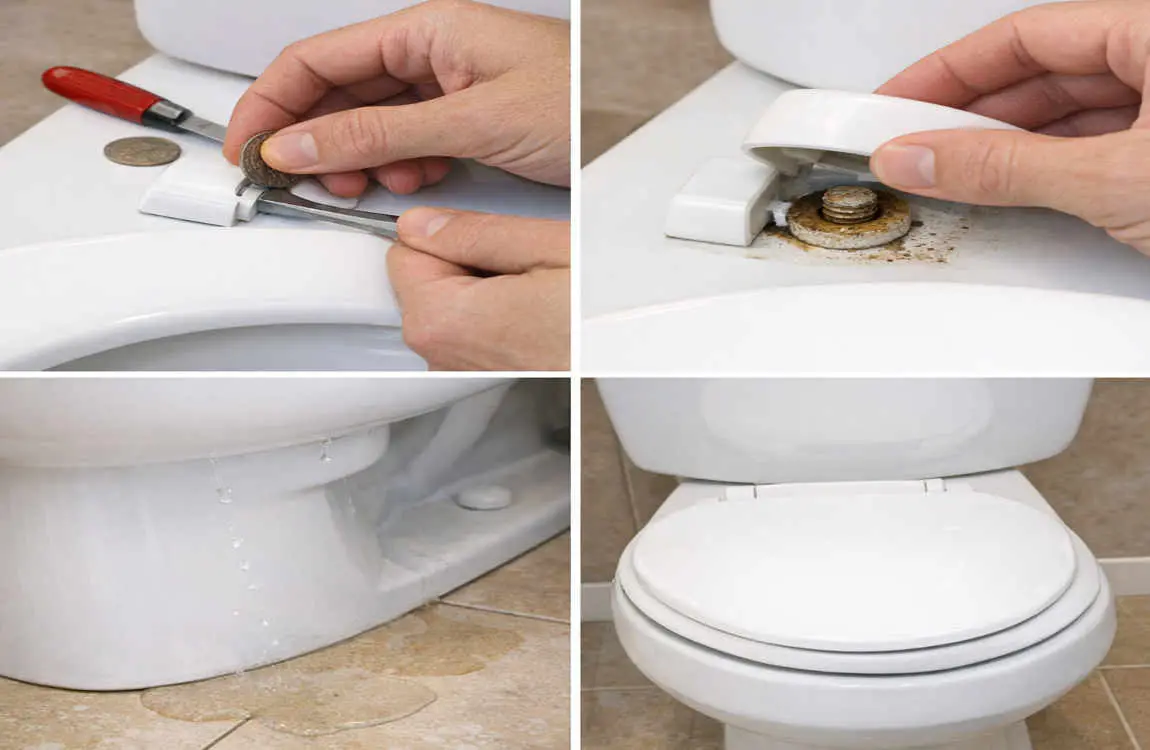
Loosen the Hidden Bolts
Now use the screwdriver or wrench to loosen the bolts. In many toilets, the screw head is on top, and the nut is underneath the bowl.
If the bolt spins without coming loose, hold the nut underneath with pliers or a wrench while turning the screw from above. Go slowly and keep steady pressure.
Remove the Old Toilet Seat
When the hardware is loose, lift the seat away from the toilet. Remove any remaining washers, nuts, or caps.
After that, clean the area around the mounting holes. A clean surface helps the new seat sit properly and look better.
How to Install a New Toilet Seat With Hidden Bolts
Check Toilet Seat Compatibility
Before installing anything, make sure the new seat matches your toilet. This is very important.
Check for:
- Toilet shape: round or elongated
- Bolt spacing
- Hinge style
- Seat size
If the size is wrong, the seat may not line up or sit evenly.
Position the New Toilet Seat
Place the new seat on the bowl and line up the hinges with the mounting holes. Make sure the seat is centred.
This is the time to check alignment from both sides. A seat that looks slightly off can feel uncomfortable when used.
Insert the Hidden Bolts
Put the bolts through the holes and attach the washers and nuts from underneath the bowl.
Do not tighten them fully yet. Keep them a little loose so you can adjust the seat position.
Adjust and Tighten the Seat
Now move the seat until it sits straight and balanced.
Once it is in the right position, tighten the bolts carefully. Avoid overtightening because that can crack plastic parts or damage the toilet surface.
Close the Bolt Covers
After tightening, close the hinge covers or snap the caps into place. This gives the toilet a clean finish and hides the hardware again.
At this stage, check the seat by lifting it, closing it, and sitting lightly on it to make sure it feels stable.
Common Mistakes When Changing a Toilet Seat With Hidden Bolts
Choosing the Wrong Toilet Seat Size
One of the most common problems is buying the wrong size. Round and elongated toilets need different seat shapes.
Even a small mismatch in bolt spacing can cause trouble. Always measure before buying.
Over-Tightening the Hardware
It is easy to think tighter is better, but that is not always true. Too much pressure can damage the bowl, strip the bolts, or break plastic parts.
Tighten only until the seat feels secure.
Installing Without Cleaning the Area
If you skip cleaning, dirt and old residue can stop the seat from fitting properly. It can also make the bathroom look untidy.
A clean area gives the new seat a better fit and a better appearance.
Ignoring Loose Hinges
If the hinges are not secure, the seat may wobble every time you use it. This makes the toilet feel unstable and can shorten the seat’s lifespan.
Always check the hardware after installation.
Tips for Installing a Toilet Seat Easily
Measure Before Buying
Before you purchase a replacement, measure:
- Bowl length
- Bowl width
- Hinge spacing
This simple step helps you avoid buying the wrong seat.
Use Quick-Release Toilet Seats
Quick-release seats are easier to remove for cleaning. They also make future replacement faster.
If you want low-maintenance bathroom DIY projects, this can be a smart choice.
Follow Manufacturer Instructions
Different brands use different hidden bolt systems. Some use snap-on hinges, while others use side-fixing hardware.
Always follow the instructions that come with your seat. That will help you get the best fit and longest life from the product.
How Long Does It Take to Change a Toilet Seat With Hidden Bolts?
For most people, this job does not take long.
- Beginner: about 20–30 minutes
- Experienced DIY user: about 10–15 minutes
- Stuck or rusted bolts: may take longer
The time depends on the condition of the old hardware, the size of the bathroom space, and the type of mounting system.
How Much Does It Cost to Replace a Toilet Seat?
DIY Replacement Costs
A basic toilet seat is usually affordable. Premium soft-close models cost more but often offer greater comfort and a quieter closing action.
You may also need to buy basic tools if you do not already have them.
Professional Installation Costs
Most people can handle this job on their own. However, a plumber may be useful if:
- The bolts are broken
- The mounting hardware is damaged
- The toilet bowl has cracks
- The old seat is badly stuck
Hiring help costs more, but it may save time in difficult cases.
Benefits of Installing a New Toilet Seat
Improves Bathroom Appearance
A fresh seat can make the whole bathroom feel cleaner and more modern. This is especially true if you choose a design that matches the rest of the room.
Provides Better Comfort
Newer seats often feel better to use. Soft-close lids and ergonomic shapes can improve everyday comfort.
Improves Hygiene
A new seat is easier to clean, especially if the old one had scratches, stains, or worn hinges.
Fixes Common Toilet Seat Problems
A replacement can solve issues like:
- Wobbling
- Cracks
- Loose hinges
- Staining
That is why learning how to change a toilet seat with hidden bolts is such a useful skill.
Troubleshooting Hidden Bolt Toilet Seat Problems
Toilet Seat Still Moves After Installation
If the seat still shifts, the cause is often one of these:
- Loose bolts
- Incorrect alignment
- Missing washers
Try tightening the hardware again and check that the seat is centred.
Hidden Bolts Won’t Come Loose
If the bolts are stuck, use penetrating oil and wait a few minutes. Then try again with the proper tool.
If the hardware is badly damaged, you may need to cut it carefully.
Toilet Seat Covers Won’t Close
This usually means the hinges are misaligned, or the cover is broken.
Check the seat position and make sure the parts are seated properly before snapping the covers shut.
Maintenance Tips for Your New Toilet Seat
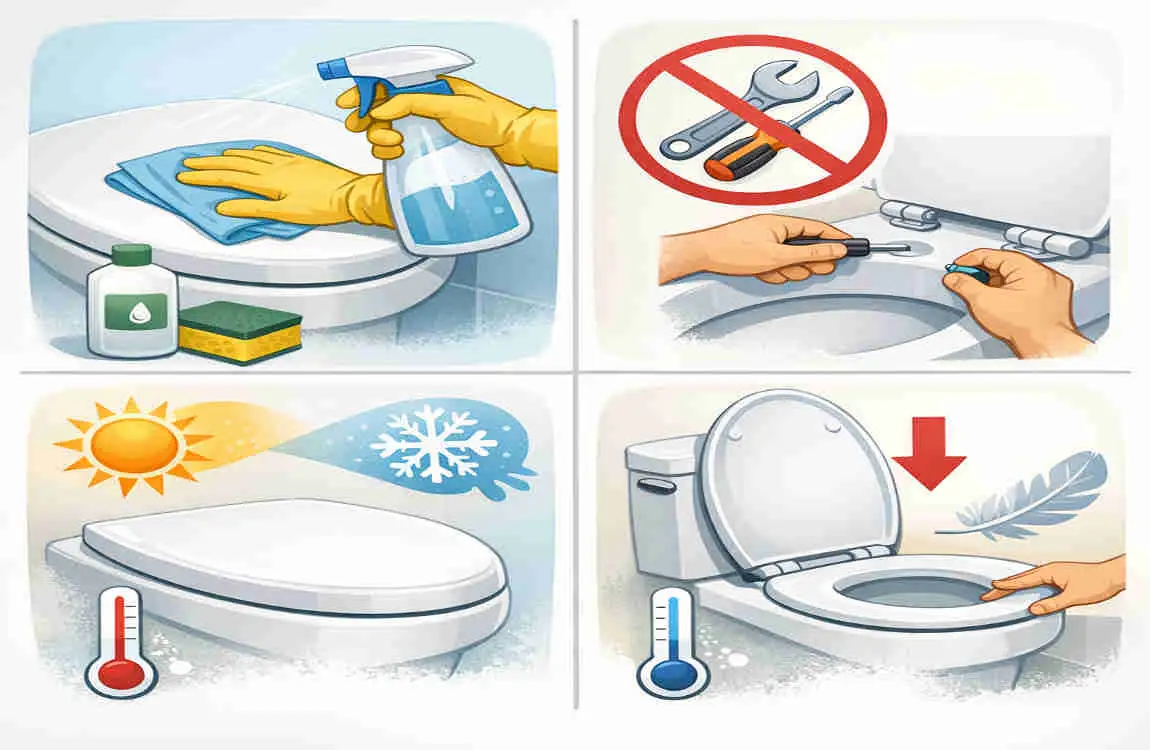
To keep the seat in good shape:
- Clean regularly with mild products
- Avoid harsh chemicals
- Check bolts every few months
- Replace damaged parts quickly
A little care helps the seat last longer and keeps the bathroom looking fresh.
Frequently Asked Questions
Q: How do you remove a toilet seat with hidden bolts?
Open the hinge covers, loosen the hidden screws, remove the nuts underneath, and lift the seat away.
Q: Are hidden bolt toilet seats harder to install?
No. They may look complicated, but installation is simple once you locate the hinge covers and fasteners.
Q: Can I replace a toilet seat myself?
Yes. Most homeowners can replace a toilet seat using basic tools in less than 30 minutes.
Q: How do I know what size toilet seat I need?
Measure the bowl shape, length, width, and hinge spacing before buying a replacement.
Q: Why does my new toilet seat keep moving?
Loose bolts, incorrect alignment, or improper tightening usually cause movement.
Q: Can hidden bolt toilet seats fit any toilet?
Most seats fit standard toilets, but you should always check the measurements before buying.
| Step | What to Do | Quick Explanation |
|---|---|---|
| Gather Tools | Prepare a screwdriver, wrench, and new toilet seat | Check that the seat fits your toilet model before installation |
| Remove Old Seat | Open the hidden bolt covers and loosen the nuts | Remove the old hinges and clean the toilet mounting area |
| Position New Hinges | Place the new hinge plates over the mounting holes | Align the holes properly for a secure fit |
| Insert Hidden Bolts | Push the bolts through the toilet holes | Hidden bolts usually slide under decorative covers for a cleaner look |
| Tighten the Bolts | Secure the nuts from underneath the toilet bowl | Tighten firmly but avoid over-tightening to prevent cracks |
| Attach the Seat | Snap or slide the toilet seat onto the hinges | Follow the manufacturer’s locking mechanism |
| Adjust Alignment | Check that the seat sits straight and evenly | Move the hinges slightly if needed |
| Test the Seat | Open, close, and gently press the seat | Make sure it is stable and does not move |