Replacing a toilet seat might seem daunting, especially when hidden bolts are involved. However, it’s much easier than you think! In this step-by-step guide, we’ll walk you through changing a toilet seat with hidden bolts in a clear, beginner-friendly way. Whether your current seat is loose, cracked, stained, or simply outdated, you’ll learn how to tackle the challenge confidently—all without needing a plumber.
Why Replacing a Toilet Seat Is Easier Than You Think
Many homeowners hesitate to replace their toilet seat because they think it’s complicated, especially when hidden bolts are involved. But the truth is, changing a toilet seat is a quick and straightforward task, even for beginners.
Hidden-bolt toilet seats offer a cleaner, sleeker appearance. Still, they can initially confuse homeowners accustomed to visible bolts. The good news? With the right tools and a little guidance, you can replace your seat in under an hour. Most of the process involves just a few simple tools and steps, making this a great DIY project for anyone.
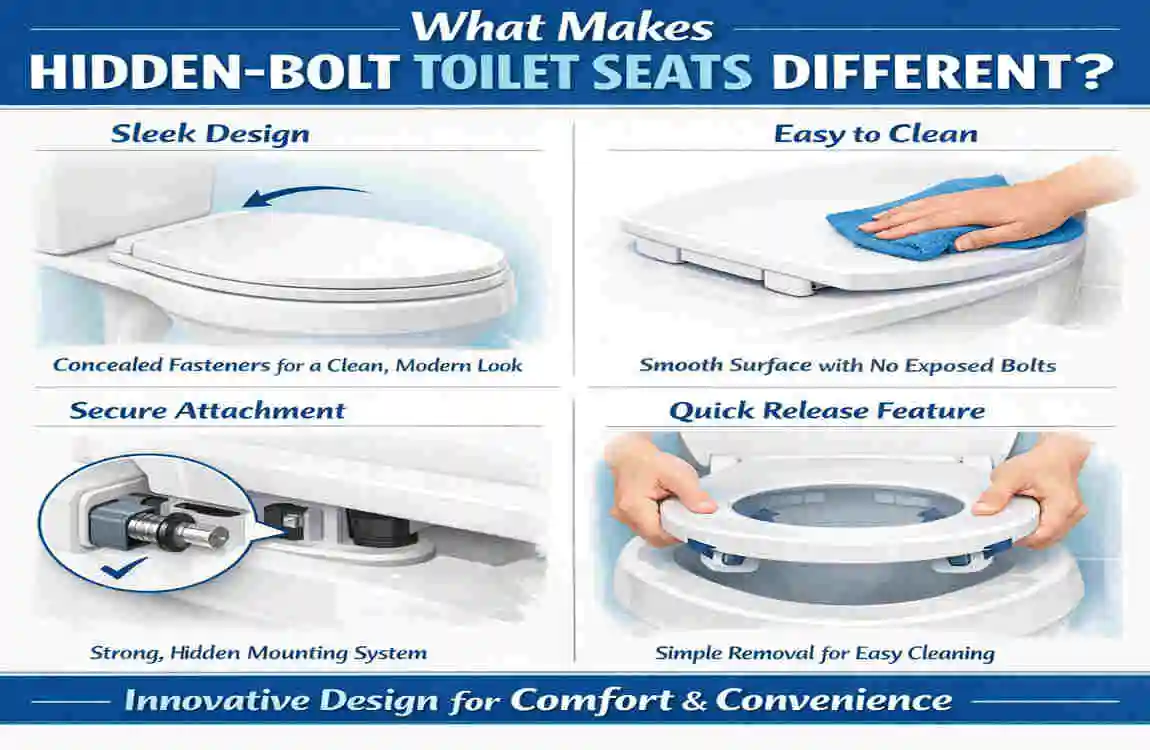
What Makes Hidden-Bolt Toilet Seats Different?
Hidden-bolt toilet seats differ from traditional ones because their mounting hardware is typically concealed, either under small caps or within the seat’s hinge area. Let’s explore the key differences and why these designs are common.
Key Differences Between Standard and Hidden Bolts
- Standard Bolts: These are visible and easy to access from the top or bottom of the toilet. Removal is straightforward since you can clearly see the bolts and nuts.
- Hidden Bolts: These bolts are tucked beneath decorative covers or behind the hinges, making them less obvious. While this creates a cleaner look, it requires a few extra steps to access them.
Why Manufacturers Use Hidden Bolts
Hidden-bolt designs are popular for their aesthetic appeal. They give your toilet a modern, seamless appearance by hiding unsightly hardware. While the removal process is slightly different, it’s still manageable and doesn’t require professional plumbing skills.
Remember: You don’t need to be a plumber to replace a hidden-bolt toilet seat—just a little patience and the right instructions.
Tools and Materials You’ll Need
Before you start, gather all the tools and materials you’ll need. Having everything on hand will make the process smoother and faster.
Essential Tools:
- Adjustable wrench: To loosen and tighten nuts.
- Flathead screwdriver: To pry off covers or caps.
- Allen key (hex wrench): Often required for hidden-bolt systems.
- Cleaning cloth: To wipe down the area.
- Disinfectant or mild cleaner: For cleaning the toilet surface.
- New toilet seat: Make sure it’s compatible with hidden-bolt hardware.
Optional Items (Helpful but Not Required):
- Flashlight: To see tight or dark spaces.
- Rubber gloves: For cleanliness and protection.
- Penetrating oil: To loosen rusted or stuck bolts.
Pro Tip: Before starting, check the packaging of your new toilet seat. Most models include all necessary hardware, such as bolts and covers. This is also a great time to confirm the correct seat size and shape (round or elongated).
Before You Start: Safety and Preparation
Preparation is key to a successful project. Follow these steps to ensure your workspace is clean and organized before you begin.
- Clear and Clean the Area: Remove any items around the toilet, and clean the base and seat areas with disinfectant to avoid transferring grime or bacteria.
- Put on Gloves: If desired, wear rubber gloves for added protection.
- Inspect the New Seat: Open the packaging and identify all hardware pieces. Check for any included instructions.
- Take Photos for Reference: Snap a quick photo of your old seat’s setup before removing it. This can be helpful when aligning the new seat.
Step-by-Step: How to Remove the Old Toilet Seat With Hidden Bolts
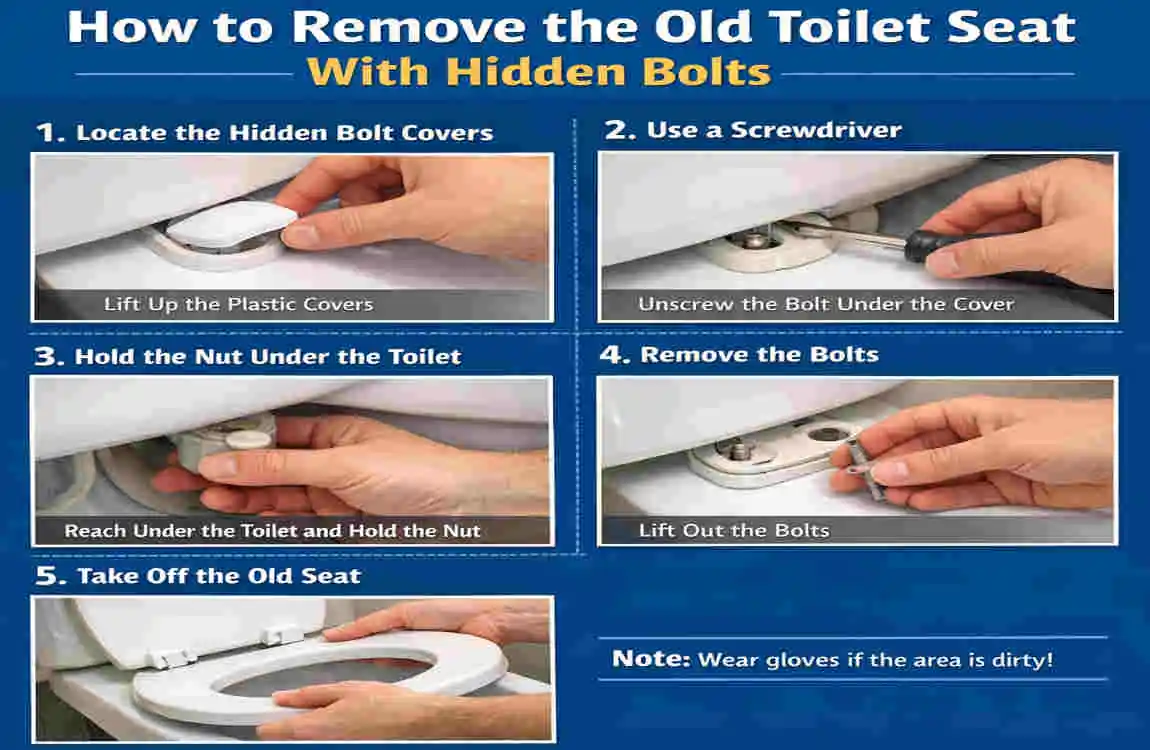
Now that you’re ready, let’s dive into removing the old toilet seat. Follow these steps carefully.
Locate the Bolt Covers or Access Points
Hidden bolts are usually covered by small plastic caps or located behind the seat’s hinge mechanism. Look closely for access points, as they may not be immediately obvious.
Remove Decorative Covers
If your seat has decorative caps:
- Use a flathead screwdriver or your fingers to pry them off gently.
- Be careful not to scratch the porcelain or damage the covers.
Loosen the Bolts
Once the bolts are exposed:
- Use an adjustable wrench or Allen key to loosen them.
- Hold the bolt steady while turning the nut on the other end (or vice versa, depending on the design).
Lift Off the Old Seat
With the bolts loosened, carefully lift the old seat off the toilet. If the bolts are stuck due to rust, apply penetrating oil and wait a few minutes before trying again.
Clean the Mounting Area
Before installing the new seat, thoroughly clean the mounting area. Use a disinfectant to remove grime, residue, or rust buildup. This ensures a fresh start for your replacement seat.
How to Identify the Correct Replacement Seat
Choosing the right toilet seat is crucial for a smooth installation. Here’s how to ensure your new seat fits perfectly.
Measure Your Toilet Bowl
- Length: Measure from the center of the bolt holes to the front edge of the bowl.
- Width: Measure the bowl’s widest point.
- Bolt Hole Distance: Measure the space between the two bolt holes.
Common Toilet Seat Shapes
- Round: Shorter and more common in older homes.
- Elongated: Longer and found in modern bathrooms.
Pro Tip: Double-check the bolt style and mounting system to ensure compatibility with hidden-bolt hardware.
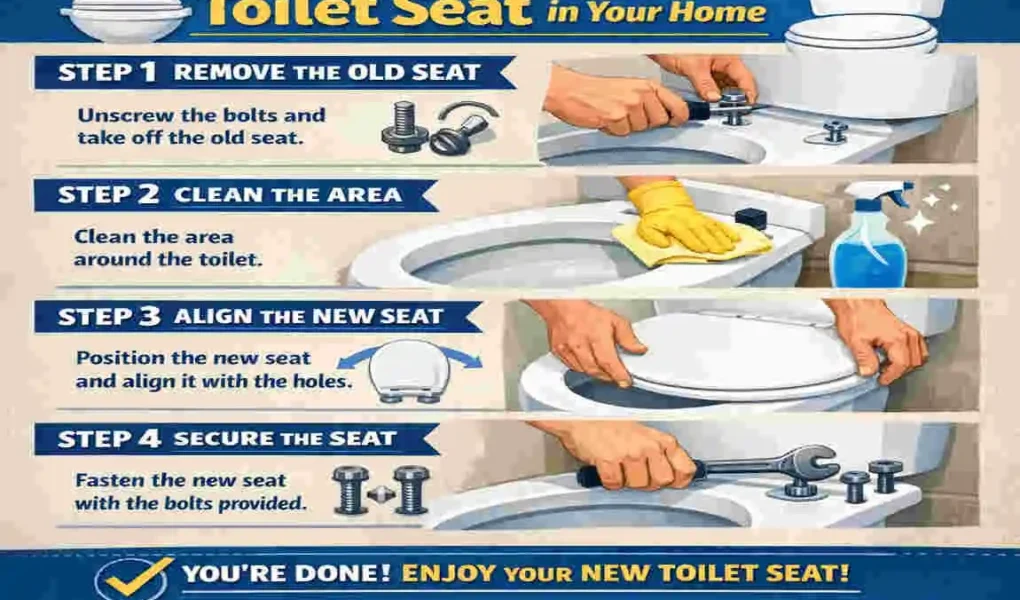
Step-by-Step: How to install the New Toilet Seat With Hidden Bolts
Now for the exciting part: installing your new toilet seat! Follow these steps for a secure and professional-looking result.
Position the New Seat Correctly
Align the new seat’s hinge mechanism with the toilet’s bolt holes. Ensure the seat and lid face the correct direction.
Insert the Hidden Bolts
Place the bolts through the mounting holes or slide them into the designated rear channel (depending on the model).
Tighten the Bolts Gradually
- Tighten each bolt a little at a time to keep the seat centered.
- Avoid overtightening, as this can crack the porcelain or damage plastic parts.
Check Alignment
Once tightened, check that the seat is square with the toilet bowl. Adjust as needed before fully securing the bolts.
Secure Decorative Covers
Snap the caps or covers back into place for a polished finish.
Test the Seat
- Open and close the lid to ensure smooth movement.
- Sit gently on the seat to check stability.
- Re-tighten bolts if necessary.
Common Problems and How to Fix Them
Here are some common issues you might encounter during installation, along with solutions.
ProblemSolution
Stuck or rusted bolts: Apply penetrating oil and wait a few minutes before trying again.
Seat won’t line up. Loosen the bolts slightly, adjust the seat, and retighten.
Bolts keep spinning. Hold the nut or anchor in place while tightening the bolt.
The seat feels loose after use. Check all hardware and tighten evenly. Replace worn parts if necessary.
Cleaning and Maintenance Tips
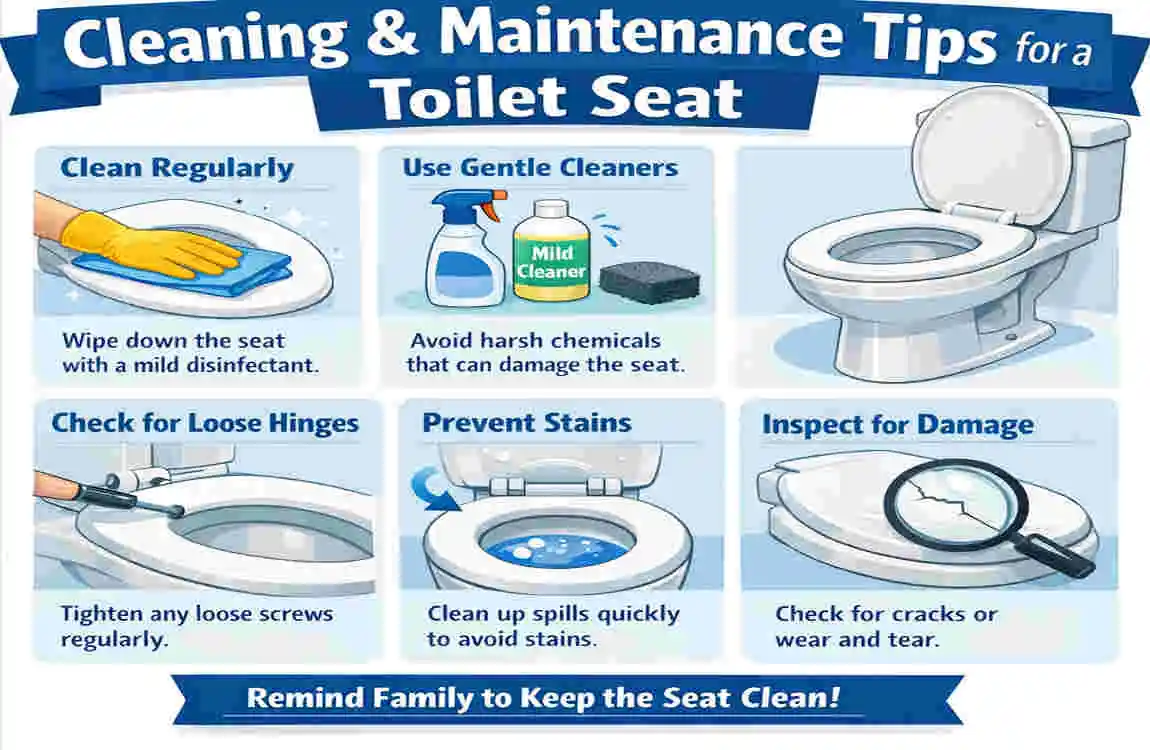
To keep your new toilet seat in great condition:
- Wipe the hinges and bolt covers regularly.
- Use mild cleaners to avoid damaging plastic finishes.
- Check and tighten hardware every few months.
- Replace worn or damaged parts promptly.
Frequently Asked Questions
How do you remove a toilet seat with hidden bolts?
Locate the bolt covers, remove them, and use a wrench or Allen key to loosen the bolts. Lift off the seat once the bolts are free.
What tools do I need to change a toilet seat?
An adjustable wrench, flathead screwdriver, Allen key, and cleaning supplies are typically sufficient.
How do I know if my toilet seat is round or elongated?
Measure the length from the bolt holes to the front edge of the bowl. Round seats are about 16.5 inches, while elongated ones are around 18.5 inches.
Can I replace a hidden-bolt seat myself?
Yes! With basic tools and this guide, anyone can replace a hidden-bolt toilet seat.
Why does my new seat keep shifting?
Ensure the bolts are tightened evenly, and the hardware is properly anchored.