Starting a flooring project can feel exciting, but it can also feel a little confusing. After all, new floors can change the whole look of your home. They can make a room feel cleaner, brighter, and more finished. That is why flooring is one of the most important upgrades you can make.
But many homeowners ask the same question before they begin: where to start flooring in a house. The answer matters more than people think. If you start in the wrong place, you may waste material, create uneven lines, or make the finished floor look off.
| Where to Begin | Key Action | |
|---|---|---|
| 1 | Hallway | Start installation here since it sets the layout for the entire home |
| 2 | Subfloor | Ensure it’s clean, dry, and flat before laying any flooring |
| 3 | Acclimation | Let flooring materials sit in the room for 48–72 hours before installing |
| 4 | Layout Lines | Snap chalk lines to establish straight reference lines for the first row |
| 5 | First Row | Install along the longest straight wall, leaving ¼” expansion gap |
| 6 | Progression | Work from the hallway outward to each room for consistent alignment |
Good planning makes the whole job easier. It saves time, helps you avoid extra costs, and gives you a more professional result. Whether you are doing the work yourself or hiring a contractor, knowing the right starting point will help you feel more confident.
Understanding Flooring Installation Basics
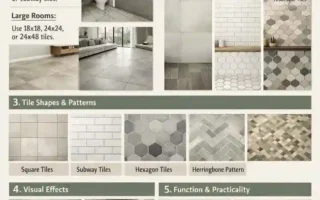
Types of Flooring
Different flooring types need different planning. Some are easier to install in one big run, while others work better room by room.
- Hardwood flooring offers a classic look and typically requires careful layout planning.
- Laminate flooring is often easier for DIY projects because many pieces click together.
- Vinyl flooring is popular in kitchens and bathrooms because it handles moisture well.
- Tile flooring is durable and great for wet areas, but it needs more precision.
- Carpet flooring is softer and usually installed differently from hard floors.
Installation Methods
How the floor goes down also matters.
- Floating floors sit above the subfloor and move slightly with temperature changes.
- Glue-down floors are bonded to the surface below.
- Nail-down floors are common for some hardwood installations.
- Click-lock systems are simple because pieces snap together.
Why Order Matters
The order of installation affects the final result. If you start in the wrong spot, you can trap dirt under the floor, create awkward transitions, or make the layout harder to finish. A good plan keeps the work flowing in the right direction.
Key Factors That Decide Where to Start Flooring in a House
Before you lay a single plank or tile, look at the whole space. The best starting point depends on your home, your flooring type, and how the rooms connect.
Main Factors to Consider
Factor Why It Matters
House layout : Open layouts need more flow, while closed rooms can be handled one at a time
Flooring type : Some materials need a specific direction or layout
Subfloor condition: A weak or uneven subfloor must be fixed first
Natural light. Flooring often looks best when it runs with the light
Entry points: The first visible areas usually need the cleanest finish
House Layout and Floor plan
In an open-concept home, flooring often starts in the main living area and continues into connected spaces. In a home with separate rooms, you may start in the room that gives the best visual line or easiest access.
Subfloor Condition
Do not skip this step. If the subfloor is moist or has uneven spots, your new flooring may not sit right. A level, dry base gives you better results.
Natural Light and Sightlines
Many installers like to run flooring in the direction of the light. This helps the floor look more natural. It also makes rooms feel longer and cleaner. The same idea applies to main sightlines. Start where people first notice the floor.
Expert Answer: Where to Start Flooring in a House
If you want the simplest rule, here it is: start from the farthest point from the main entrance and work back toward the exit. This helps you avoid walking over finished sections while you work.
Start from the Farthest Corner
This is the most common approach. It provides a clean path out of the room and helps keep the floor neat during installation. It also makes the process easier to manage.
Why the Main Living Area Is Often First
In many homes, the living room is the best place to begin. It is usually one of the largest and most visible spaces. If the floor looks good there, the rest of the house often follows that same flow.
Hallways or Rooms First?
Sometimes hallways need to come first, especially if they connect several rooms. A hallway can act like a guide for the rest of the layout. On the other hand, if the hallway is narrow or tricky, you may want to finish it after the main room.
Multi-Room Flooring Strategy
If you are installing flooring across multiple rooms, plan the direction before you begin. Keep the plank lines consistent when possible. Also, think about doorways and transition strips early so the rooms connect smoothly.
How Professionals Think About It
Contractors usually do more than guess a starting point. They measure carefully, snap chalk lines, and test the layout before installing anything. That is one reason their work often looks clean and balanced.
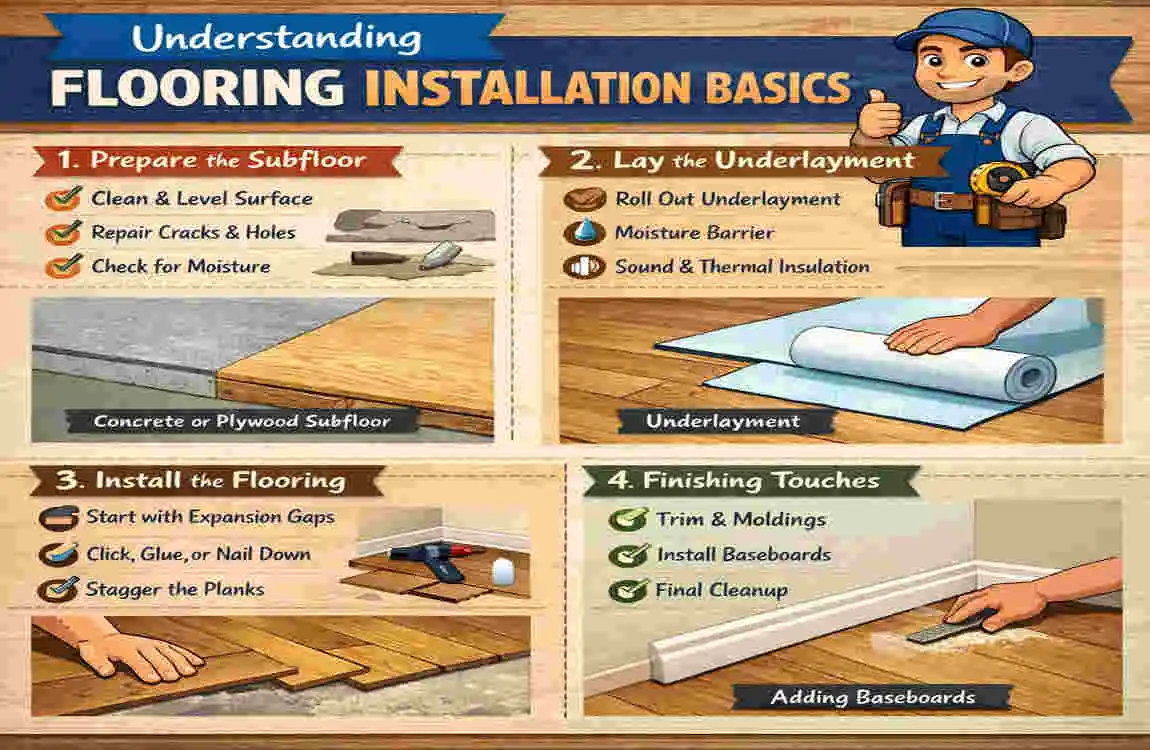
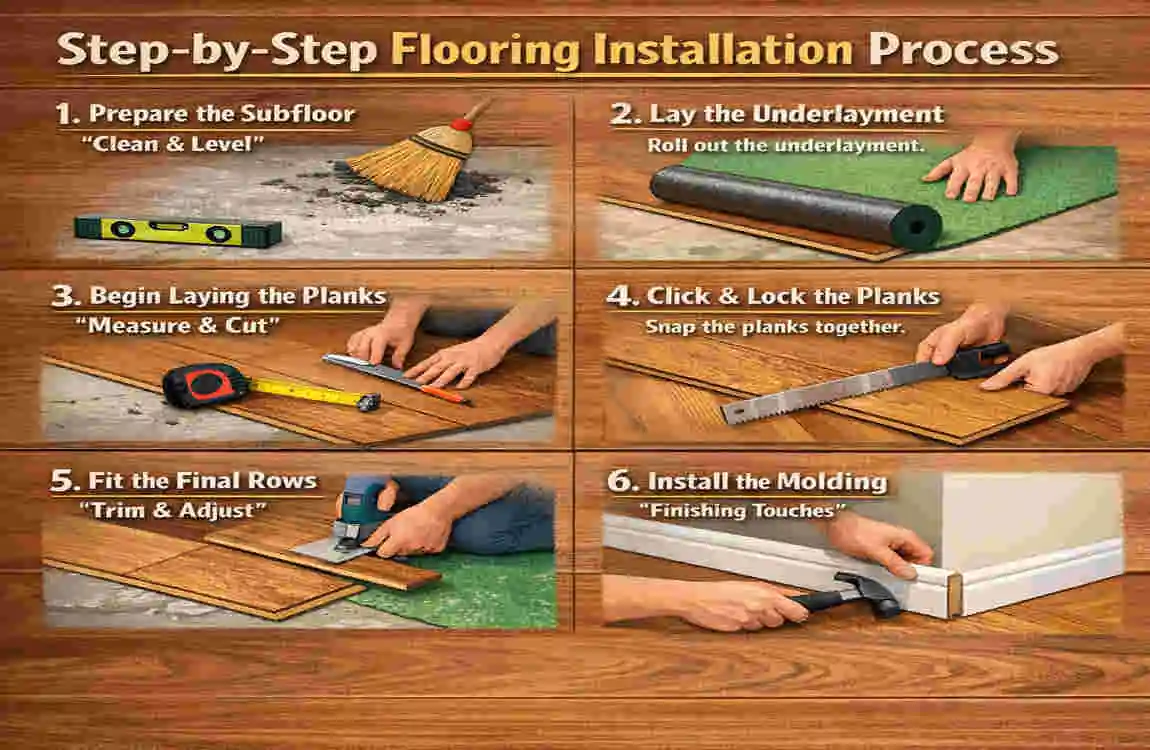
Step-by-Step Flooring Installation Process
Prepare the Space
Start by removing old flooring if needed. Then clean the subfloor well. Dust, nails, and uneven spots can cause problems later.
Check for Moisture
This is especially important in basements, bathrooms, and concrete areas. If moisture is present, use the right barrier before flooring goes in.
Measure and plan
Mark your starting point. Use chalk lines to keep everything straight. This step helps you stay organized and avoid crooked rows.
install the First Row
The first row matters the most because it sets the tone for the whole floor. If the first line is off, the rest of the room will show it.
Continue Room by Room
As you move across the space, keep expansion gaps in mind. These small spaces allow the flooring to move naturally. You also need to plan for transition strips where rooms meet.
Finish the Edges
Trim the edges carefully and install baseboards or trim to cover the gaps. This final step completes and polishes the floor.
Common Mistakes When Deciding Where to Start Flooring in a House
A few simple mistakes can create big problems later. Here are the most common ones:
- Starting in the wrong room
- Ignoring subfloor leveling
- Forgetting expansion gaps
- Skipping layout planning
- Not checking the plank direction
- Poor transition planning between rooms
Even one of these mistakes can affect the final look. Take your time at the beginning, and the rest of the project becomes much easier.
Professional Tips for Better Results
If you want a smoother installation, keep these tips in mind:
- Do a dry layout first to see how the floor will look.
- Follow the manufacturer’s instructions for your exact flooring type.
- Use spacers to keep expansion gaps even.
- Let the flooring acclimate to the room before installation if the product requires it.
- Use a laser level or chalk line to keep rows straight.
These small habits can make a big difference. They help you work with more confidence and avoid costly rework.
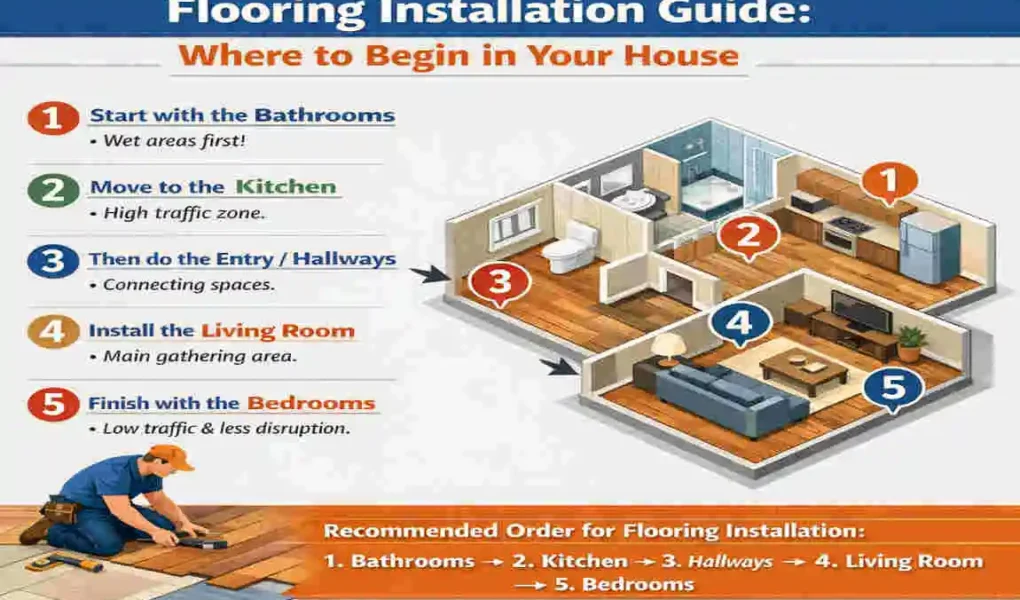
Room-by-Room Flooring Strategy
Living Room
The living room is often the best place to start. It is usually the most visible area, so it helps set the style for the rest of the home.
Kitchen
Kitchens need flooring that handles moisture and daily wear. Many homeowners install kitchen flooring after the main living area, especially if the layout connects the two spaces.
Bedrooms
Bedrooms are usually easier to work in because they are smaller and less complex. They can be a good choice for later stages of the project.
Bathrooms
Bathrooms require special care due to their exposure to water. Tile or waterproof flooring is often the best choice here, and these spaces are often handled separately.
Hallways
Hallways are important because they connect rooms. They must line up well, so careful planning is needed even if they are not the first area installed.
Flooring Direction and Design Flow
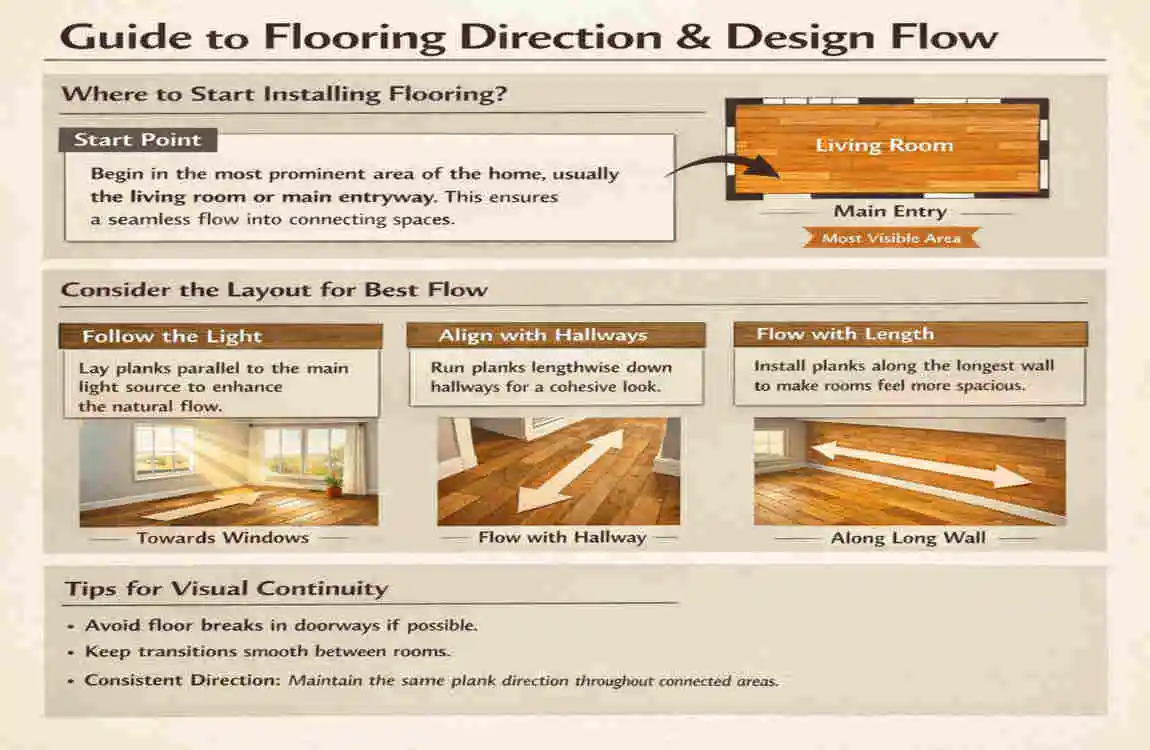
Flooring direction affects how your home feels. In many cases, running planks along the longest wall creates a cleaner look. It can also make the room feel larger.
Simple Direction Rules
- Run flooring with the longest wall when possible.
- Keep direction consistent across connected rooms.
- Use light direction to make the floor look more natural.
This is one of those details that seems small, but it changes the whole feeling of the space.
Cost and Time Considerations
How long the project takes depends on the room size, the flooring type, and the amount of prep work needed. DIY projects can save money, but they often take longer. Professional installation usually costs more, but it may give you a faster and cleaner finish.
A good layout plan also reduces waste. That means fewer extra materials and fewer surprise costs.
FAQs
Where should I start flooring in a house?
Start from the farthest point from the main entrance and work outward. This keeps the finished floor cleaner and easier to manage.
Should flooring go under doors?
Usually, yes. Flooring under doors helps create a smoother, more seamless transition between rooms.
Do you install flooring before or after cabinets?
It depends on the flooring type and the room, but many projects install flooring after cabinets. Always check the product instructions.
What room should I start with first?
In many homes, the living room or main hallway is the best starting point because it sets the visual direction for the rest of the house.