Your home’s exterior is its first impression. When people walk up to your front door, the condition of your exterior walls speaks volumes. That is why damaged front bricks should never be ignored. Even a single broken brick can make a beautiful home look neglected.
Homeowners often find themselves needing to replace exterior bricks for a variety of reasons. From harsh weather to accidental bumps, bricks take a beating over the years. The good news is that you do not have to tear down an entire wall to fix the problem.
Replacing just the damaged bricks offers incredible benefits. It saves you money, protects your home’s structural integrity, and restores your pristine curb appeal. Plus, learning how to replace brick on the front of the house is a highly rewarding DIY skill.
Why Front House Bricks Need Replacement
Bricks are incredibly durable, but they are not invincible. Over time, the elements and environment can cause serious wear and tear. Here are the most common culprits behind damaged bricks.
Weather Damage
Mother Nature is tough on masonry. Rain constantly batters your exterior, slowly wearing down the protective outer layer of the brick.
When winter arrives, frost becomes a major enemy. If water soaks into a brick and then freezes, it expands. This freeze-thaw cycle can literally blow the face right off the brick. Finally, intense heat exposure can cause bricks and mortar to expand and contract, leading to hairline fractures.
Structural Movement
Houses are heavy, and the ground beneath them is always shifting. House settling is a natural process, especially in newer homes. As the house sinks slightly into the dirt, it puts pressure on rigid brick walls.
Major foundation shifts can also cause deep, stair-step cracks along your brickwork. When the foundation moves, the bricks have to absorb that stress, which often causes them to snap or pop out of place.
Moisture Problems
Water is the quiet destroyer of modern homes. Water infiltration happens when rain finds its way behind your brick veneer due to clogged gutters, roof leaks, or poor drainage.
Once trapped inside, this moisture creates a perfect breeding ground for mold and mildew. Not only does this weaken the brick from the inside out, but it can also rot the wooden frame of your house hidden behind the wall.
Physical Damage
Sometimes, brick damage is purely accidental. Vehicle impact in a driveway can easily crush corner bricks.
Flying rocks from landscaping equipment like lawnmowers or weed whackers can chip the faces of lower bricks. Even a stray baseball thrown by a child can cause accidental cracks that eventually need replacing.
Signs You Should Replace Front Bricks
How do you know when it is time to grab your tools? Keep an eye out for these clear warning signs on your exterior walls.
Cracked or Broken Bricks
A visible crack running through the center of a brick is a red flag. Once a brick splits, it loses its structural strength and allows water to seep directly into the wall cavity.
Loose Bricks
If you can wiggle a brick with your bare hands, the surrounding mortar has failed. Loose bricks are dangerous, especially if they are located higher up on the wall, as they can easily fall and cause injury.
Crumbling Brick Faces
When the front of a brick turns to powder or flakes off in chunks, it is known as spalling. This means the brick has lost its hard outer shell and is rapidly deteriorating from water damage.
Missing Mortar
The mortar joints hold your wall together. If the mortar between your bricks is receding, falling out in dusty chunks, or completely gone, the bricks are no longer supported.
Water Leaks Around Exterior Walls
If you notice damp spots on your interior walls or water pooling at the base of your exterior brickwork, you leak. Damaged front bricks are often the entry point for this unwanted moisture.
Tools and Materials You’ll Need
Before you start ripping out bricks, you need to gather the right gear. Having everything on hand makes the job much smoother.
Essential Tools
To get the old brick out and put the new one in, you will need some basic masonry tools.
- Masonry chisel: For breaking apart old mortar.
- Hammer: A heavy club hammer works best for striking the chisel.
- Angle grinder: Optional, but great for cutting out stubborn mortar quickly.
- Pointing trowel: A small tool used to pack fresh mortar into tight spaces.
- Wire brush: For scrubbing dust and debris out of the empty hole.
- Safety goggles: To protect your eyes from flying sharp brick shards.
- Dust mask: To keep you from breathing in harmful silica dust.
- Gloves: Heavy-duty work gloves will protect your knuckles from scrapes.
Required Materials
You only need a few affordable supplies to complete this repair.
- Matching replacement bricks: Finding the right color and size is crucial for a seamless look.
- Mortar mix: Pre-mixed masonry cement is usually the easiest choice.
- Water: For mixing the mortar and wetting the bricks.
- Sponge: To wipe away messy mortar smears.
- Jointing tool: To shape the wet mortar so it matches the rest of your wall.
How to Replace Brick on Front of House Step-by-Step
Ready to get to work? Follow these clear steps to safely remove the damaged brick and install a fresh one.
Inspect the Damaged Area
Before you swing a hammer, look closely at the wall. Are there electrical wires or plumbing pipes behind this specific spot? Ensure the damage is isolated to just one or two bricks. If you see massive, zig-zagging cracks across the whole wall, stop and call a structural engineer.
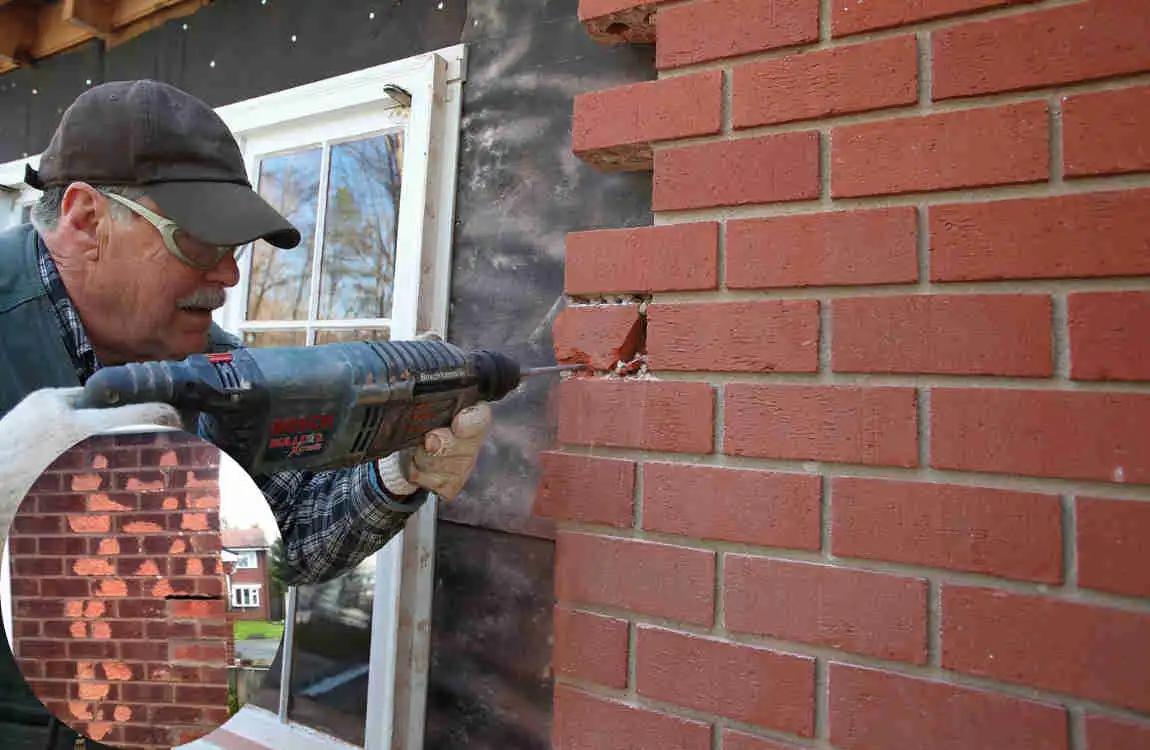
Remove the Old Mortar
Put on your safety goggles, gloves, and dust mask. Take your masonry chisel and hammer, and gently tap the mortar surrounding the broken brick.
Work your way around the edges, breaking the mortar loose piece by piece. If you have an angle grinder, you can carefully cut down the center of the mortar joints to speed up the process. Just be incredibly careful not to nick the good bricks nearby!
Carefully Remove the Damaged Brick
Once the mortar is cleared out, the damaged brick should feel loose. Wiggle it gently with your hands or carefully pry it out with your chisel.
If it is still stuck, use your hammer and chisel to break the damaged brick into smaller chunks. Pull the broken pieces out one by one until the hole is empty.
Clean the Opening
You need a clean surface for the new mortar to stick. Grab your wire brush and scrub the inside of the hole vigorously.
Brush away all the old, dusty mortar and brick crumbs. Finally, take a damp sponge or a spray bottle and wet the inside of the hole. This stops the dry surrounding bricks from sucking all the moisture out of your new mortar too quickly.
Prepare Fresh Mortar
Follow the instructions on your bag of mortar mix. Add water slowly and stir it with your trowel in a bucket.
You are looking for a consistency that resembles thick peanut butter. It should hold its shape on your trowel without sliding off, but it should not be so dry that it crumbles.
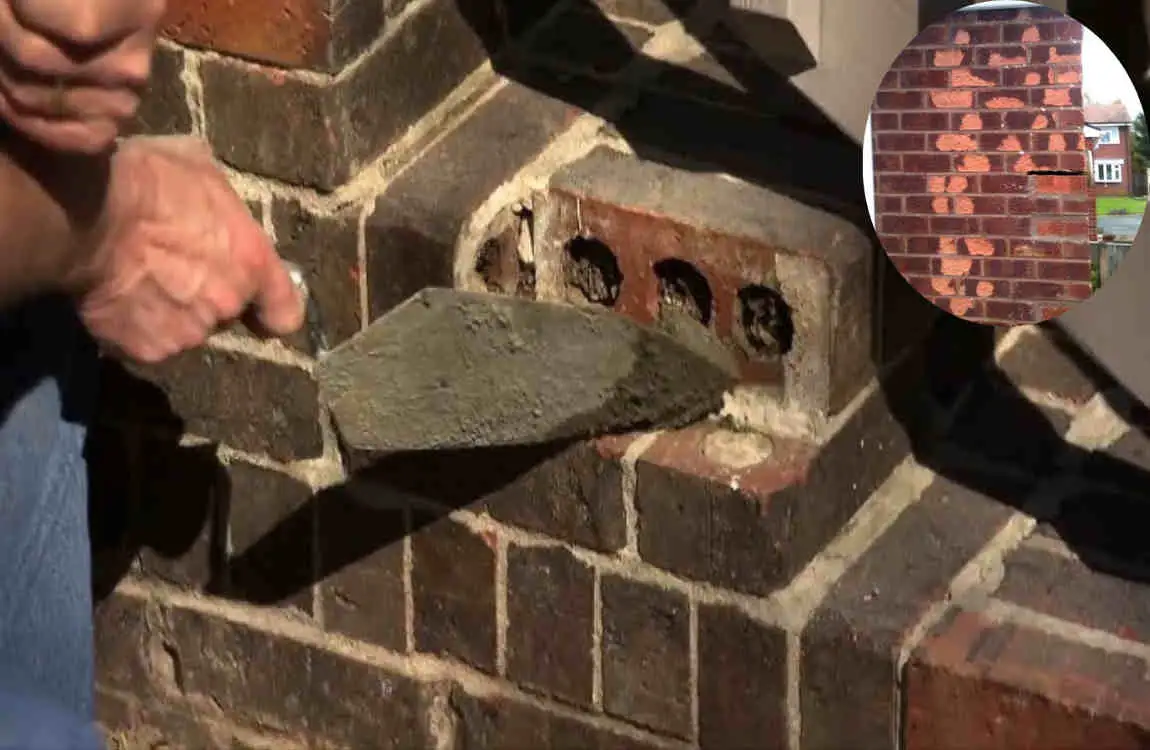
Install the New Brick
Wet your replacement brick slightly with a sponge. Using your pointing trowel, apply a generous layer of mortar to the bottom and sides of the empty hole in the wall.
Next, spread some mortar onto the top and sides of your new brick. Push the new brick firmly into the hole. Wiggle it slightly until it sits flush and even with the other bricks in the wall.
Fill Mortar Joints
Mortar will likely squeeze out the sides when you push the brick in. That is a good thing!
Now, use your pointing trowel to pack extra mortar into any remaining gaps around the brick. Make sure the joints are packed tightly.
Clean Excess Mortar
While the mortar is still wet, scrape off any big globs that fell onto the face of the brick.
Take a damp sponge and gently wipe the brick face clean. Do not scrub too hard, or you will smear gray mortar deep into the brick’s pores, which is very hard to clean later.
Allow Proper Curing Time
Grab your jointing tool and run it along the wet mortar lines to match the indented shape of your existing wall joints.
After that, step back and leave it alone. Mortar needs time to cure properly. Keep it dry and avoid touching it for at least 24 to 48 hours while it hardens.
How to Match Existing House Bricks
One of the hardest parts of figuring out how to replace brick on front of house is making sure the repair is invisible. Here is how you match your materials perfectly.
Brick Size
Grab a tape measure and measure the exact height, width, and depth of your current bricks. Older homes often use “standard” bricks that are completely different sizes than modern “modular” bricks. Getting the size right is your priority.
Brick Color
Brick colors fade over time due to sun and rain. Take a broken piece of your old brick to a local masonry supply yard. Ask them if they have a match. Sometimes, buying reclaimed or salvaged bricks from the era your home was built is the best way to get a perfect color match.
Texture
Is your brick smooth, wire-cut, tumbled, or heavily grooved? The texture affects how shadows fall on the wall. Make sure your replacement brick mimics the physical feel and look of the originals.
Mortar Color Matching
Bright gray new mortar will stick out like a sore thumb against aged mortar. You can buy mortar dyes and pigments to tint your fresh mix. It is highly recommended to mix a small test batch, let it dry, and compare it to your wall before doing the actual repair.
Common Mistakes to Avoid
Even eager DIYers can make errors. Avoid these common pitfalls to ensure your wall stays strong.
Using the Wrong Mortar
Modern cement mortar is very hard. If you have a historic home built before 1920, you likely have soft lime-based mortar. Using modern, hard mortar on old, soft bricks will cause the bricks to crack when the house shifts. Always match the mortar type to your home’s age.
Removing Too Many Bricks
Never remove more than one or two bricks at a time in a vertical line. If you pull out too many bricks at once, you risk compromising the structural support of the wall above it, which could lead to a collapse.
Ignoring Moisture Problems
If a brick crumbled because a broken gutter was dumping water on it, replacing the brick will not solve the issue. Always fix the root cause of the moisture problem before repairing the masonry.
Skipping Safety Equipment
Masonry work creates silica dust, which is incredibly harmful to your lungs. Chipping bricks also sends razor-sharp shards flying at your eyes. Never skip your safety goggles and dust mask.
Poor Mortar Finishing
If you forget to smooth out the mortar with a jointing tool, water will sit on the little ledges of rough mortar. This practically guarantees water damage in the future. Always smooth your joints to shed water effectively.
DIY vs Hiring a Professional
Should you do it yourself or call in the experts? This table breaks down the differences to help you decide.
DIY Replacement Professional Repair
Lower cost Expert workmanship
Good for small repairs Best for structural damage
Requires tools Saves time
Learning experience Long-lasting results
If you only have one or two chipped bricks near the ground, DIY is a fantastic, budget-friendly option. However, if you are dealing with massive cracks near the roofline, save yourself the stress and hire a licensed mason.
Cost to Replace Front House Bricks
Budgeting for luxury home repairs is crucial. Here is what you can expect to spend on this project.
DIY Costs
If you do it yourself, the costs are incredibly low. A bag of mortar costs around $10 to $20. Individual bricks usually cost less than $2 each. If you need to buy basic tools like a trowel and chisel, expect to spend around $50 to $75 in total.
Professional Repair Costs
Hiring a professional mason will cost significantly more due to skilled labor rates. For minor repairs (replacing 5 to 10 bricks), professionals usually charge a minimum call-out fee ranging from $300 to $600.
Factors That Affect Pricing
Several elements can make the job more expensive, whether you do it yourself or hire a pro:
- Number of bricks: More damage equals more time and materials.
- Labor: Hourly rates for masons vary wildly depending on your city.
- Brick availability: Rare, historical, or custom-colored bricks cost more to source.
- Wall accessibility: Fixing a brick on a second-story chimney requires scaffolding, which drives up the price.
- Mortar matching: Custom-tinting mortar takes extra time and specialized dyes.
Maintenance Tips After Brick Replacement
Once your beautiful new bricks are installed, keep them looking great with these simple maintenance habits.
Inspect Mortar Annually
Take a walk around your house every spring. Look closely at the mortar joints. If you see tiny hairline cracks starting to form, take note of them so you can address them before they widen.
Clean Bricks Gently
Never use a high-pressure power washer on your front bricks! It will blast the protective face right off the brick and destroy the mortar. Instead, clean your bricks gently using a garden hose and a soft bristle brush.
Seal Only When Necessary
Most bricks need to “breathe” to let trapped moisture escape. Sealing them can sometimes trap water inside, causing them to rot. Only apply a breathable masonry silane-siloxane sealer if you live in a highly damp climate and a professional recommends it.
Fix Water Drainage Issues
Make sure your gutters are clean and pointing away from the house. Ensure the soil around your foundation slopes downward, directing rainwater away from your lower brick layers.
Repair Small Cracks Early
Do not wait for a brick to completely shatter. If you see a tiny crack or a bit of missing mortar, fill it immediately with masonry caulk or a little fresh mortar to stop water from getting inside.
Benefits of Replacing Damaged Front Bricks
Taking the time to fix your home’s exterior offers some fantastic rewards.
- Improves curb appeal: Fresh, unbroken bricks make your home look well-maintained, clean, and inviting.
- Prevents water damage: Sealing up holes stops rain from invading your wall cavities, preventing mold and rotting wood.
- Restores structural integrity: Solid bricks and strong mortar ensure your walls can properly support the weight of your home.
- Increases home value: Buyers notice exterior damage immediately. Fixing it helps you maintain top market value for your property.
- Extends brick lifespan: By fixing one bad brick, you stop water from seeping into the surrounding good bricks, protecting the whole wall.
Frequently Asked Questions (FAQ)
How do I replace brick on the front of my house?
Remove the damaged brick, clean the opening, apply fresh mortar, install a matching brick, and finish the joints.
Can I replace a single brick without damaging nearby bricks?
Yes. With proper tools and careful mortar removal, individual bricks can be replaced safely without harming the surrounding wall.
How much does it cost to replace front house bricks?
Costs vary based on the number of bricks, materials, and labor. DIY repairs are generally less expensive than hiring a mason, usually costing under $100 for small fixes, while pros may charge $300 or more.
How long does brick replacement take?
Replacing one brick typically takes 30–60 minutes of active work, while the mortar usually needs 24–48 hours to fully cure and harden.
Should I hire a professional for brick replacement?
For cosmetic or minor repairs, DIY may be suitable. For structural cracks, large damaged areas, or load-bearing walls, hiring a professional is highly recommended.
How can I match new bricks with old ones?
Match the size, color, texture, and mortar color as closely as possible. Bringing a broken piece to a masonry yard or looking for reclaimed bricks is often a good option for older homes.