If the brick on the front of your house is cracked, loose, faded, or damaged, replacing it can make a big difference. It can improve your home’s appearance, protect it from water damage, and help prevent bigger issues later.
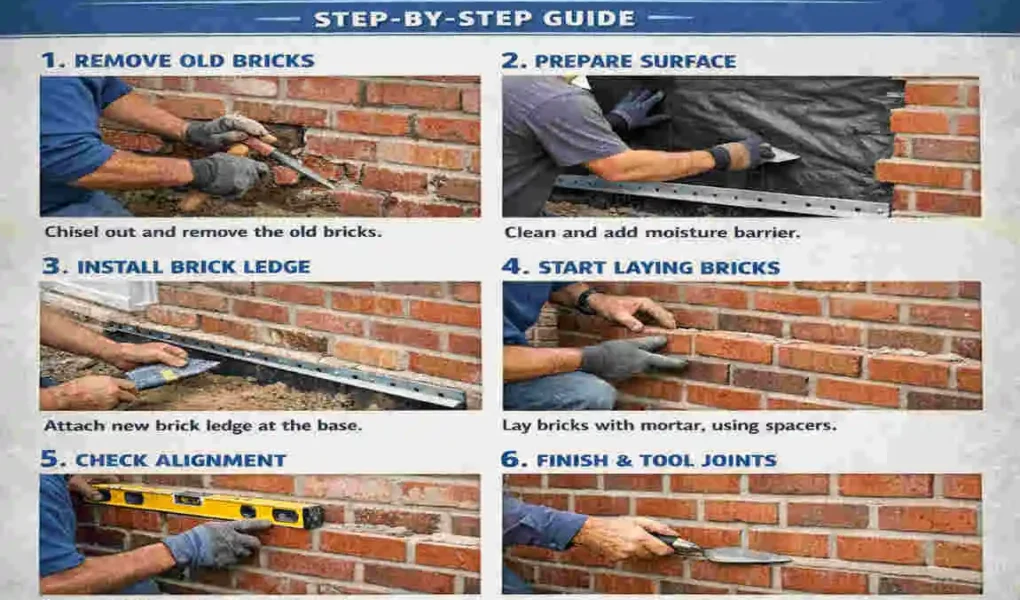
| Step | What to Do | Key Details |
|---|---|---|
| Preparation | Inspect the brick wall | Check for cracked, loose, damaged, or deteriorated bricks and mortar. |
| Gather Tools | Prepare masonry tools | Use a brick hammer, chisel, trowel, level, bucket, gloves, safety glasses, and dust protection. |
| Choose Bricks | Find matching replacement bricks | Match the existing bricks for size, color, texture, and finish. |
| Protect the Area | Prepare the work zone | Cover nearby windows, doors, plants, and other surfaces from dust and debris. |
| Remove Mortar | Carefully loosen the damaged brick | Remove mortar around the brick with a masonry chisel without damaging surrounding bricks. |
| Remove Brick | Take out the damaged brick | Break the brick into manageable pieces if necessary and remove all debris from the opening. |
| Clean Opening | Prepare the cavity | Brush away loose mortar and dust so the new brick can fit properly. |
Understanding how to replace brick on the front of the house starts with good preparation. You need the right tools, matching materials, and a careful process so the repair blends in with the rest of the wall. When done well, the new brick should look natural and hold up over time.
Why Replace Brick on the Front of a House?
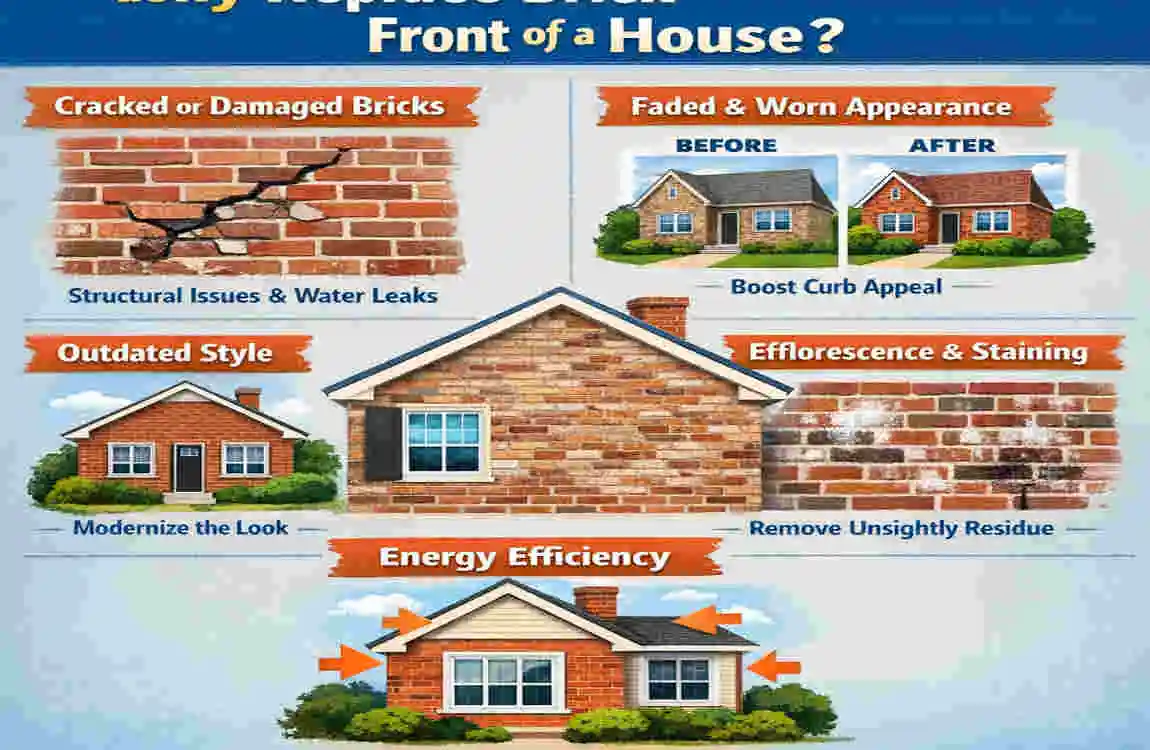
There are many reasons homeowners choose to replace front brick home. Sometimes the damage is small, but in other cases, it points to a bigger problem.
What You Need Before Starting
Tools
You will need a few basic masonry tools to do the job properly. A brick hammer and chisel help remove damaged bricks. A mortar trowel, level, and jointing tool help set and finish the replacement. Also have a bucket and mixing equipment ready.
Safety gear matters too. Wear safety glasses, gloves, and dust protection before you begin.
Materials
You will need replacement bricks that match the existing wall as closely as possible. You will also need matching mortar, home clean, and any masonry repair materials needed for surface prep or minor touch-ups.
How to Choose Matching Replacement Bricks
Matching the new brick to the old one is one of the most important parts of the repair. Match the size, color, texture, and finish as closely as you can.
Older homes can be harder to match because their bricks may be handmade or reclaimed. Modern bricks often look too uniform next to older masonry. That is why it helps to compare samples in natural daylight instead of relying on indoor light.
Do not ignore the mortar color. Even if the brick matches well, a very different mortar shade can repair stand out.
Inspect the Existing Brick Wall
Check the Condition
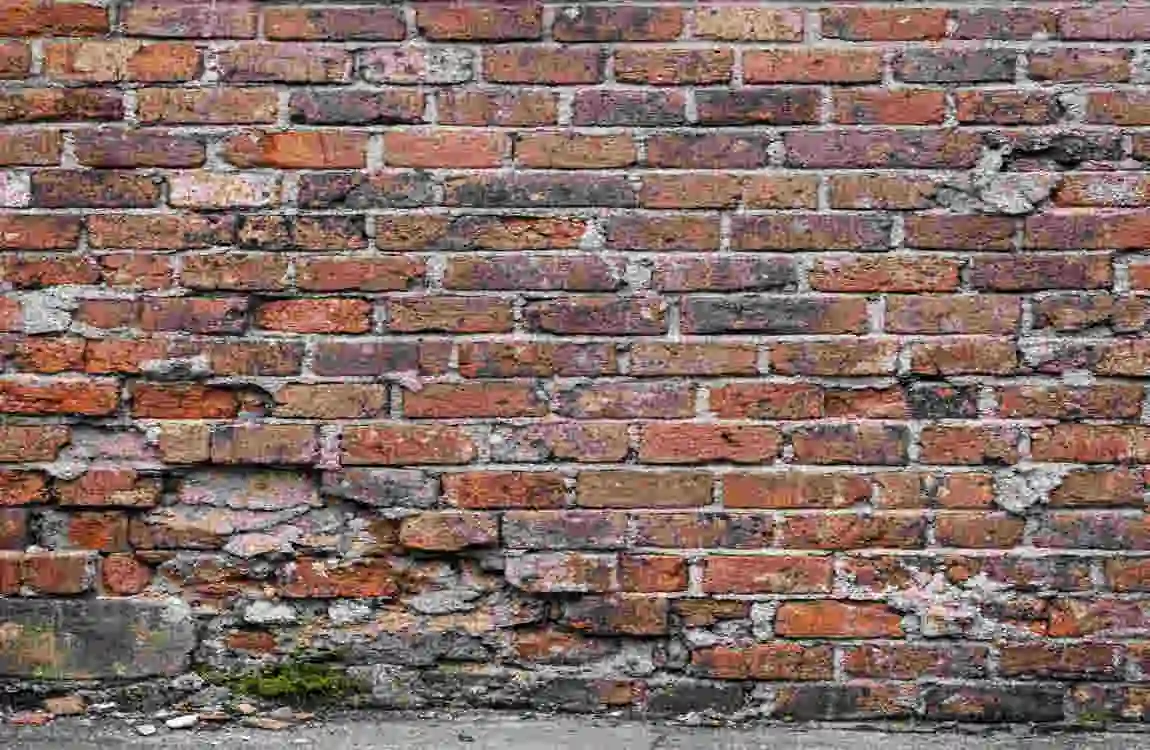
Before removing anything, examine the damaged area closely. Check for cracked, loose, or spalled bricks. Also inspect the mortar joints around the damage.
Decide whether the issue is only cosmetic or may point to a larger structural concern. If several bricks are damaged or the wall shows signs of movement, you may need professional help.
When to Call a Professional
Call a professional if the damage covers a large section, if cracks run deep through the wall, or if the wall looks unstable or leaning. Also get expert advice if you suspect moisture problems or foundation movement. If the brickwork supports part of the structure, do not guess.
Prepare the Work Area
Set up your work area before removing any brick. Protect nearby doors, windows, plants, and surfaces from dust and falling pieces. Keep children and pets away from the area.
Also check that the repair will not affect hidden utilities or structural parts of the home. Wearing the right safety gear and working in a clean, controlled space will make the job much easier.
How to Remove Damaged Bricks
Start by carefully removing the mortar around the damaged brick. Work slowly so you do not disturb the surrounding masonry. Once the joints are loosened, remove the brick piece by piece if needed.
After you remove the brick, clean the opening well. The new brick needs a solid, even space to sit properly. Be patient here, because damaging the surrounding bricks can turn a small repair into a larger one.
How to Prepare the Replacement Brick
Before installing the new brick home, test-fit it in the opening. Check that it matches the space and sits at the right depth. If trimming is needed, do it only with proper masonry tools.
You may also need to lightly dampen the brick or surrounding area, depending on the mortar instructions. Make sure the replacement brick is placed in the correct direction so the face and texture match the wall.
How to Mix and Apply Mortar
Choose the Right Mortar
Mortar should work well with the existing brick, not just be strong. Using mortar that is too hard can cause problems, especially on older walls. In historic homes, the wrong mortar can damage the masonry over time.
If you are not sure which mortar to use, get advice before starting.
Apply the Mortar
Mix the mortar according to the package instructions. Then apply an even bed of mortar in the opening. Apply mortar to the sides of the replacement brick as needed, but don’t overdo it.
Too much mortar can make cleanup harder and can leave the repair looking messy.
Installing the New Brick
Carefully place the new brick into the opening. Press it into position until it lines up with the surrounding bricks. Use a level to check both the horizontal and vertical alignment.
Try to keep the mortar joints even and consistent. Once the brick is set, remove excess mortar before it hardens. This creates a cleaner, more professional finish.
Finishing the Mortar Joints
Match the Existing Joint Style
Look at the joints around the repair and match the same home style as closely as possible. Use a jointing tool when the mortar reaches the right stage of firmness.
Clean the brick face carefully, but do not scrub too hard. Fresh mortar can be damaged easily if you rush this step.
Allow the Repair to Cure
Fresh mortar needs time to cure properly. Protect the repair from heavy rain, freezing weather, and direct stress during this period. Follow the curing instructions for the mortar you used.
Good curing helps the repair become stronger and last longer. If you clean, paint, or pressure wash too soon, you may weaken the finished work.
Common Mistakes to Avoid
Here are a few problems that can repair stand out or fail early:
- Choosing a brick that looks too different
- Using mortar that does not match the old wall
- Removing too much surrounding masonry
- Ignoring signs of water damage
- Making mortar joints that do not blend in
- Cleaning fresh mortar too aggressively
- Treating structural damage as a simple cosmetic repair
How Much Does It Cost to Replace Brick on the Front of a House?
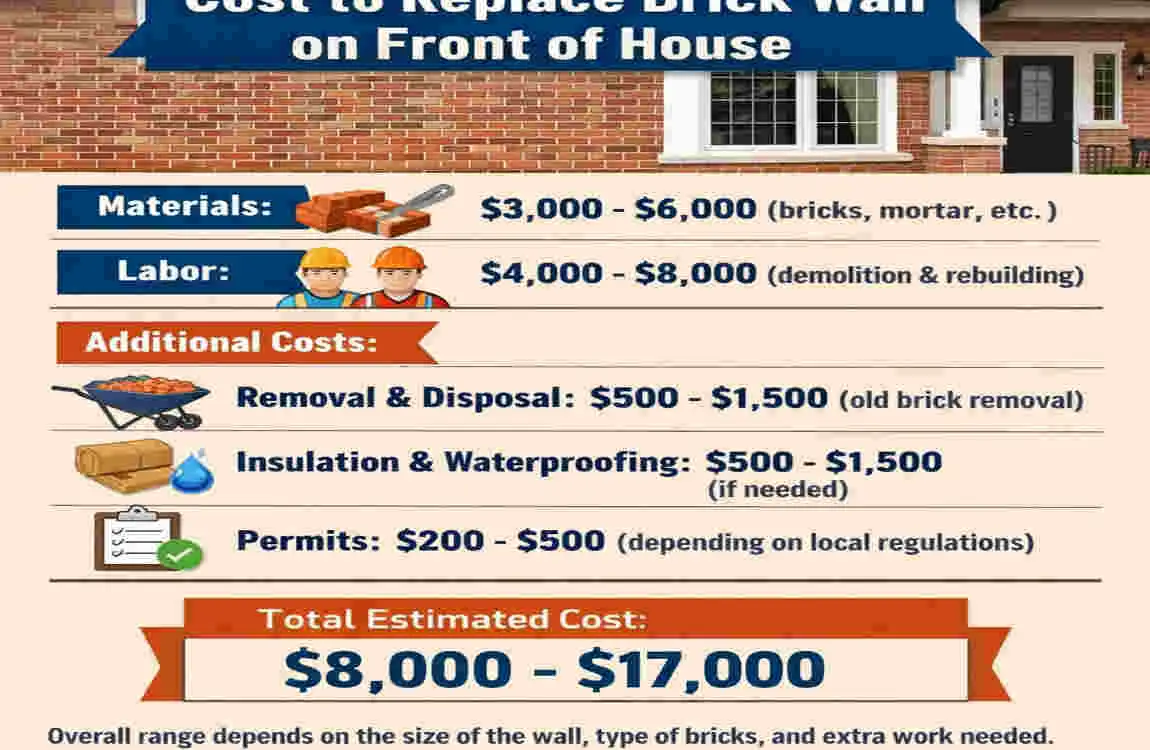
The cost depends on the repair home size, the type of brick, and whether labor is needed. Small repairs may only need a few materials, while larger projects can require more time and equipment.
Cost Factor: What It Can Affect
Brick and mortar Material quality and matching difficulty
Labor Time spent removing and replacing brick
Access Whether the work area is easy to reach
Damage level Small patch repair versus larger restoration
Special equipment Scaffolding or masonry tools if needed
A simple brick replacement usually costs less than rebuilding home a wall. But if the damage is widespread, the total cost can rise quickly.
Brick Replacement vs. Rebuilding the Wall
Replacing a few bricks makes sense when the damage is limited, and the wall is still solid. It is usually faster, cheaper, and less disruptive.
Rebuilding may be better if large areas are damaged, if the wall is leaning, or if the structure has serious moisture or foundation problems. In those cases, replacing individual bricks may only hide the real issue temporarily.
How to Maintain the Repaired Brickwork
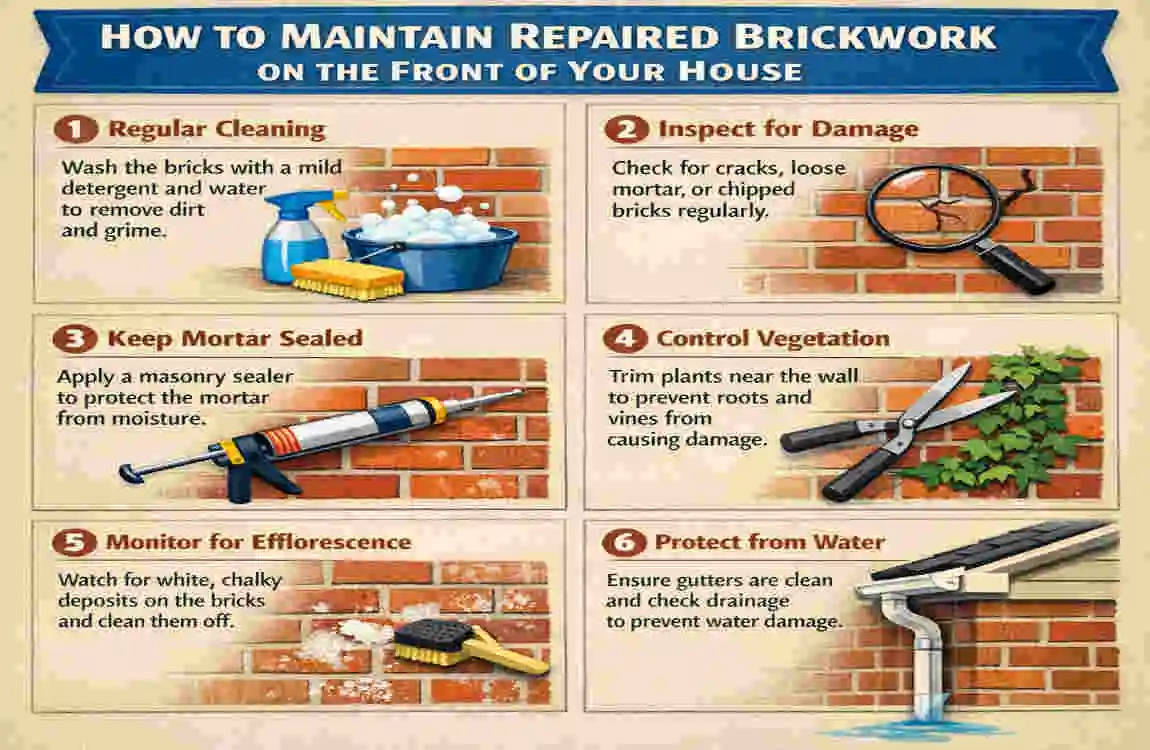
After the repair is complete, monitor the area. Check the mortar joints from time to time and look for new cracks or loose spots. Make sure gutters and downspouts are working so water does not run down the wall.
Avoid harsh cleaning methods, since they can wear down the mortar. Addressing leaks and minor damage quickly can help the repair last much longer.
FAQ
Can I replace a single brick on the front of my house?
Yes, if the damage is limited to one brick and the surrounding wall is stable, replacing a single brick is often practical.
How do I match new brick to an old house?
Match the size, color, texture, age, and mortar as closely as possible. Comparing samples in daylight helps a lot.
What type of mortar should I use for brick replacement?
Use mortar that is compatible with the existing masonry. Older brickwork may need special guidance, especially if it is historic.
How long does brick replacement take?
It depends on the number of bricks, the wall’s condition, and how easy the area is to access. A small repair may be done fairly quickly, while larger work takes longer.
Is replacing brick cheaper than rebuilding a wall?
Yes, usually. Replacing a few bricks is generally much cheaper than rebuilding a whole section of wall.