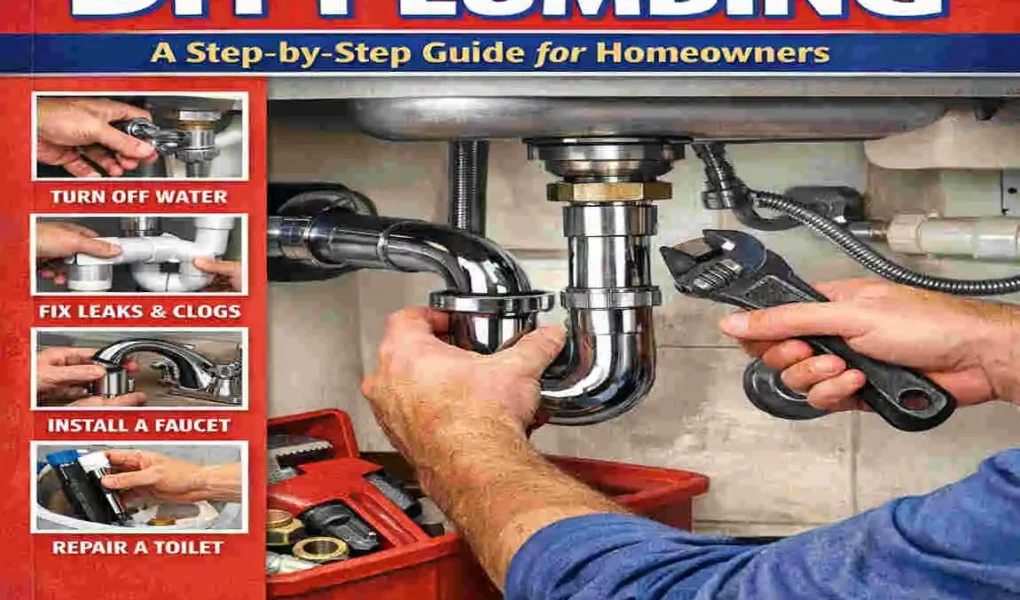
You walk into the kitchen late at night and hear a drip under the sink. Or you notice the toilet keeps running long after everyone has gone to bed. Maybe the shower drain is filling up with water around your feet, and now you are standing there wondering, can I do plumbing in my own house, or is this the moment to call a plumber?
Plumbing problems can feel intimidating because water damage moves fast. A small leak can lead to damaged cabinets, stained walls, mould, or expensive repairs if you ignore it. On top of that, hiring a plumber in 2026 can be costly.
The good news is simple: yes, you can handle many plumbing tasks in your own house if you start with the right jobs, use the right tools, and follow safe steps. In fact, recent homeowner surveys suggest that around 60% of homeowners try minor plumbing repairs themselves. That makes sense. Many basic fixes do not require years of training. They require patience, preparation, and a clear process.
| Issue | Steps Overview | Tools Needed |
|---|---|---|
| Leaky Faucet | Turn off water. 2. Disassemble handle. 3. Replace washer/cartridge. 4. Reassemble and test. | Wrench, screwdriver, washers |
| Clogged Drain | Plunge vigorously. 2. Use baking soda/vinegar mix, flush with hot water. 3. Snake if needed. | Plunger, snake, baking soda |
| Running Toilet | Remove tank lid. 2. Adjust fill valve or replace flapper. 3. Test flush. | Screwdriver, replacement parts |
| Showerhead Swap | Unscrew old head. 2. Clean/ tape threads. 3. Install new one, tighten. | Wrench, plumber’s tape |
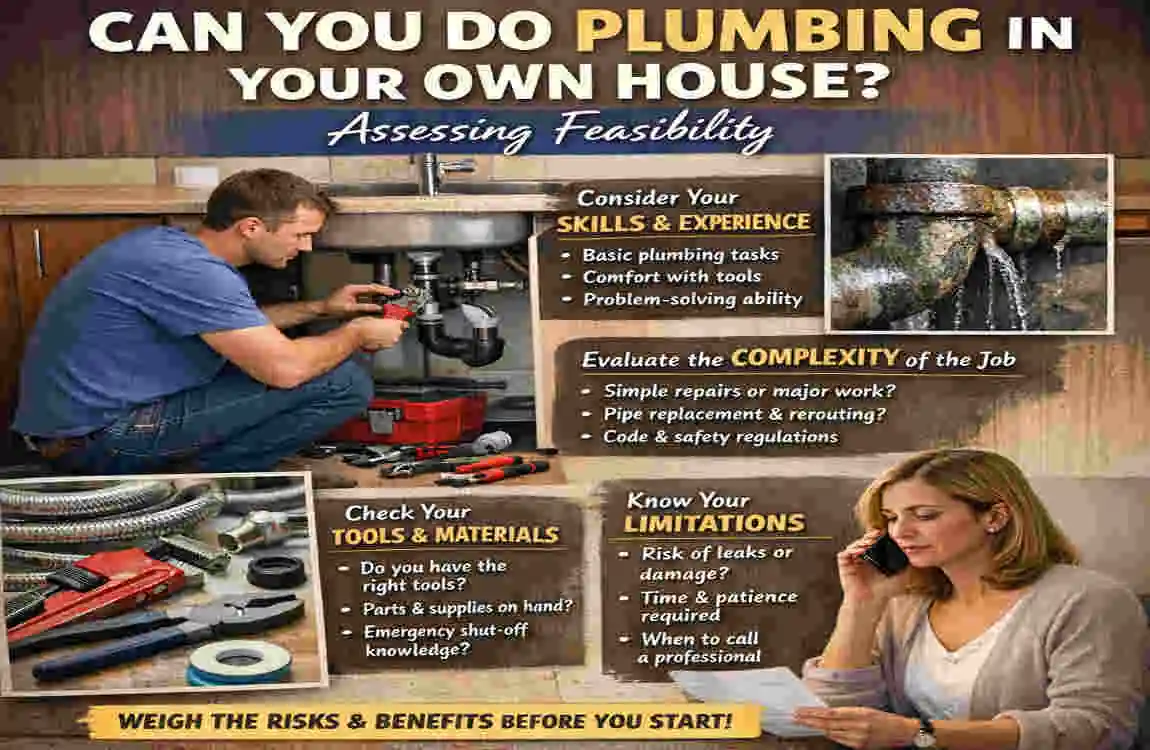
Can You Do Plumbing in Your Own House? Assessing Feasibility
The Short Answer
Yes, in many cases, can I do plumbing in my own house is a question with a clear answer: yes, but only for the right type of work.
You can usually handle simple plumbing jobs like fixing a leaky faucet, unclogging a sink, changing a showerhead, replacing a toilet flapper, or stopping a minor leak under the sink. These are common homeowner repairs. They are practical, learnable, and often much cheaper to do yourself.
But that does not mean every plumbing issue is a DIY job.
Once you get into main water lines, sewer lines, gas-connected water heaters, major pipe rerouting, hidden leaks in walls, or code-heavy installations, the risk goes up fast. That is where experience matters. A mistake in those areas can lead to flooding, structural damage, mold, health hazards, or failed inspections.
Why Homeowners Choose DIY Plumbing
The biggest reason is money.
If you fix a faucet yourself for $12 in parts instead of paying $180 for a visit, the savings are real. In many cases, DIY plumbing at home can cut repair costs by 50% to 70%. You also save time because you do not have to wait for an appointment for every small issue.
There is also a confidence factor.
Once you fix one drain clog or one running toilet, your whole view of home maintenance changes. You stop feeling helpless. You start understanding how your home works. That confidence carries over into other repairs too.
The Risks You Should Take Seriously
DIY is not just about saving money. It is also about knowing what can go wrong.
Water damage is the biggest danger. A loose fitting or poorly installed seal may not fail right away. It may drip slowly for weeks before you notice it. That kind of slow leak can do serious damage behind cabinets or under floors.
There is also the legal side.
Rules for doing plumbing in your own house vary by location. In many parts of the US, homeowners can perform certain plumbing work in their primary residence. However, some jobs still require permits or inspections.
A Simple Self-Assessment Checklist
Before you begin, ask yourself these questions:
- Do I know how to shut off the water supply quickly?
- Can I identify the exact source of the problem?
- Do I have the basic tools and enough time to repair slowly?
- Am I working on a simple fixture, not a hidden pipe or main line?
- If something goes wrong, do I know when to stop and call a professional?
If you answered yes to most of these, you are probably ready for beginner-level home plumbing repairs.
Essential DIY Plumbing Tools at a Glance
Essential DIY Plumbing ToolsPurposeApprox. Cost
Adjustable wrench Tightening and loosening fittings $15
Plunger Unclogging sinks and toilets $10
Pipe cutter Cutting PVC or small pipe sections $20
Plumber’s tape Sealing threaded connections $5
Channel-lock pliers Gripping nuts and larger fittings $18
Drain snake Breaking up drain clogs $25
Bucket Catching water under pipes $8
Flashlight or headlamp Seeing under sinks and in dark spaces $12
The table above shows something important: you do not need a large investment to get started. A basic toolkit can handle a surprising number of beginner plumbing jobs.
Essential Tools and Materials for DIY Plumbing Projects
Build a Starter Kit, Not a Workshop
If you are just getting started with doing plumbing in your own house, do not overbuy.
A beginner does not need every specialty tool on day one. You need a small, reliable set of basics. Focus on tools you will use more than once. An adjustable wrench, plunger, pliers, plumber’s tape, screwdriver set, utility knife, bucket, flashlight, and drain snake will cover a lot of ground.
That alone is enough to deal with many common household issues.
Safety Gear Comes First
This is the part homeowners often skip.
Wear rubber gloves when handling drains, toilet parts, or dirty water. Use safety goggles when working under sinks or when splashing is possible. Keep a flashlight nearby so you can clearly see leaks, fittings, and shutoff valves. If you are working near old, dusty spaces, a basic mask can also help.
Safety gear feels boring until it saves you from injury.
Basic Materials Worth Keeping at Home
Besides tools, keep a few low-cost materials ready:
- Plumber’s tape
- Replacement washers and O-rings
- A universal toilet flapper
- PVC primer and cement
- Silicone sealant
- A spare supply line for sink or toilet connections
These small items are inexpensive, but they can save you a trip to the store in the middle of a repair.
How Much Should You Budget?
A solid beginner plumbing kit often costs under $100 if you buy smart. If you already own general tools like screwdrivers, a utility knife, and a flashlight, your cost may be even lower.
That makes DIY far more practical than many homeowners expect.
Safety First: Preparing for Home Plumbing Repairs
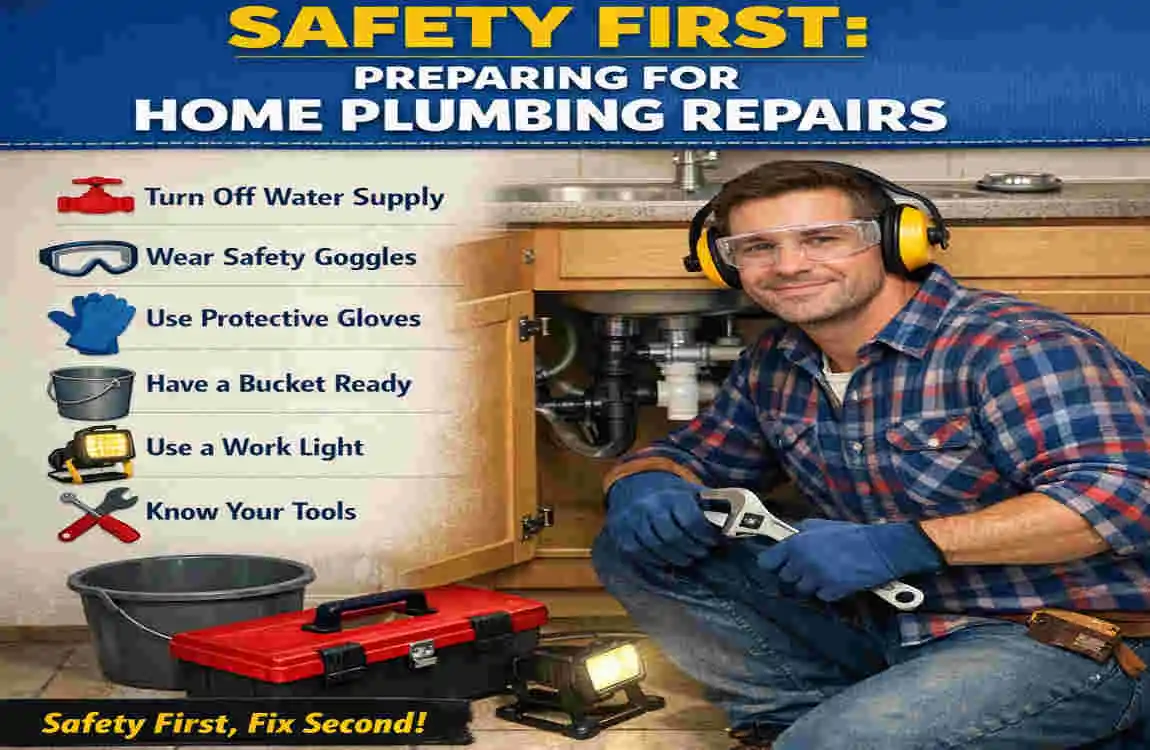
Find the Main Water Shutoff
Before you touch a single pipe, know where the main shutoff valve is.
In homes with a slab foundation, the shutoff is often near the front exterior wall, close to where the water line enters the house. In homes with a crawlspace or basement, it is often inside near the water meter or where the main line comes through the wall.
Do not assume you will find it later during a leak.
Find it now. Test it now. Make sure everyone in the house knows where it is.
Shut Off the Local Valve Too
For sink, toilet, and faucet jobs, you can often use the local shutoff valve under or behind the fixture. Turn it clockwise until it stops. Then open the fixture to confirm the water flow has stopped.
Always test before you disassemble anything.
Check for Hazards
Water and electricity don’t mix.
Look for nearby outlets, power strips, appliances, or exposed wiring. If the leak is close to anything electrical, shut off power to that area if you can do so safely. Also check for signs of mold, rotted wood, or swollen cabinets. Those signs can point to a leak that has been there longer than you thought.
Prepare for Small Emergencies
Keep a towel, a bucket, a sponge, and a phone nearby. Save the number of a trusted plumber before you start. That sounds obvious, but it helps when things do not go as planned.
A common beginner mistake is skipping the shutoff test because “it should be fine.” Then one loose line sprays water across the room.
You do not want that lesson the hard way.
Top 10 DIY Plumbing Projects Homeowners Can Tackle
Fix a Leaky Faucet
Time: 30 to 60 minutes
DIY Cost: $5 to $25
Typical Pro Cost: $120 to $250
A leaky faucet is one of the best first repairs for beginners. It is common, low risk, and often caused by a worn washer, cartridge, or O-ring.
Start by shutting off the water under the sink. Turn on the faucet to release pressure, and place a towel in the sink to prevent small parts from going down the drain.
Next, remove the decorative cap (if present), then unscrew the handle. Once the handle is off, you can access the internal parts. Depending on the faucet type, you may find a compression washer, ceramic disc, ball assembly, or cartridge.
Take the old part with you to the hardware store if you are unsure what to buy. Matching the part exactly saves time and frustration.
Now install the new washer or cartridge. Clean any mineral buildup while the faucet is apart. Reassemble everything in the same order. Do not overtighten. Turn the water back on slowly and test for leaks.
Compression faucets usually rely on washers. Cartridge faucets use a replacement cartridge. If your faucet is newer, it is likely a cartridge-type faucet. If it has separate hot and cold handles and feels older, it may be compression.
If the leak continues after you replace the part, the valve seat or faucet body may be damaged. That is still manageable in some cases, but it may also indicate that replacing the entire faucet makes more sense.
This simple fix answers the question, “Can I do plumbing in my own house?” with a strong yes. It is a practical way to learn how fixtures come apart and go back together.
Unclog a Sink or Drain
Time: 20 to 45 minutes
DIY Cost: $3 to $25
Typical Pro Cost: $100 to $220
Clogged drains are annoying, but they are also one of the most common DIY plumbing projects.
Start with the easiest method first. Remove visible debris from the drain opening. In bathroom sinks, that often means hair and soap buildup. In kitchen sinks, it may be grease and food scraps.
Next, use a plunger. Add a little water to the sink if needed so the plunger can form a seal. Cover the overflow opening with a cloth if the sink has one. Then plunge firmly for 20 to 30 seconds.
If that does not work, try a natural solution. Pour baking soda down the drain, then add vinegar. Let it sit for 10 to 15 minutes, then flush with hot water. This can help break up light buildup, though it will not solve every clog.
If the drain is still slow, move to a hand drain snake. Feed it gently into the drain and rotate as you push. When you feel resistance, work the tool carefully until the blockage loosens. Pull it back out slowly and clean off the debris.
For sinks with a trap underneath, place a bucket below the pipe and remove the trap if necessary. Many clogs collect there.
Avoid harsh chemical drain cleaners whenever possible. They can damage pipes, create fumes, and make later repairs harder because you may end up handling water contaminated with chemicals.
To prevent new clogs, flush bathroom drains with hot water regularly and use drain screens to catch hair and food particles. This is one of the easiest DIY plumbing wins at home, and once you do it, you will probably never fear a slow drain the same way again.
install a New Toilet
Time: 2 to 4 hours
DIY Cost: $150 to $300 including toilet
Typical Pro Cost: $350 to $600
Replacing a toilet sounds harder than it is, but it does require careful lifting and proper sealing.
Start by shutting off the water supply behind the toilet. Flush to empty the tank, then use a sponge or towel to remove any remaining water from the tank and bowl. Disconnect the supply line and remove the bolts holding the toilet to the floor.
Rock the toilet gently and lift it off. Toilets are heavy, so get help if needed.
Now scrape away the old wax ring and inspect the flange on the floor. If it is cracked or badly damaged, stop and fix that first. Place the new wax ring or wax-free seal as directed.
Lower the new toilet straight down over the flange bolts. Try to line it up in one smooth motion. Press gently to seat the seal, then tighten the bolts evenly. Do not crank them down too hard, or you can crack the toilet base.
Attach the tank if it comes separate, connect the new supply line, and turn the water on slowly. Let the tank fill, then flush several times while checking for leaks at the base and the connection points.
A standard toilet replacement is one of the most satisfying ways to do plumbing in your own house. The savings can be significant, and the result feels like a real upgrade.
Repair a Running Toilet
Time: 20 to 40 minutes
DIY Cost: $8 to $30
Typical Pro Cost: $90 to $180
A running toilet wastes water all day long, and the fix is often very simple.
Lift the tank lid and look inside. Most of the time, the problem is the flapper, the fill valve, or the chain.
First, flush the toilet and watch what happens. If the flapper does not seal properly, water will continue to leak from the tank into the bowl. If the chain is too tight or tangled, the flapper may not drop fully. Adjust or replace it if needed.
If the tank keeps overfilling, the fill valve may be set too high or may be failing. Lower the float or replace the valve. Universal replacement kits are common and inexpensive.
After replacing the faulty part, turn the water back on and test a few flushes. Listen closely. A quiet tank after refilling usually means the fix worked.
This is one of the easiest beginner repairs and a great place to start if you want a low-stress win.
Fix a Leaky Pipe Under the Sink
Time: 30 to 90 minutes
DIY Cost: $10 to $40
Typical Pro Cost: $120 to $260
Leaks under the sink are often easier to repair than people think because most of the parts are visible and easy to reach.
Place a bucket under the leak first. Dry the area so you can clearly see where the water is coming from. Check the P-trap, slip nuts, supply lines, and shutoff valves.
If the leak is coming from a loose slip nut, try tightening it by hand first, then give it a small extra turn with pliers. If the washer inside the joint is worn, replace it.
If the leak is from a cracked PVC trap or drain section, remove the damaged piece and replace it with a matching part. If the leak is from a supply line, replace the line rather than patching it.
PEX and PVC are common in modern homes. PVC drain parts are usually fitted with compression-style nuts or cemented joints. PEX water supply lines often use crimp or push-fit fittings. Beginners should only handle simple visible sections they can access safely.
Once repaired, run water for several minutes and wipe everything with a dry paper towel. Even a tiny damp spot tells you the leak is still there.
Clear a Clogged Shower Drain
Time: 15 to 30 minutes
DIY Cost: $5 to $20
Typical Pro Cost: $90 to $180
Shower drain clogs usually come from hair, soap film, and product buildup.
Remove the drain cover, then use a plastic hair-removal tool or a small drain snake to remove debris. It is not glamorous, but it works. After that, flush the drain with hot water.
If the buildup is light, you can use an enzyme-based drain cleaner. These are gentler than harsh chemical cleaners and better for routine maintenance.
To avoid repeat clogs, use a drain guard and clean it regularly. This small habit can save you a lot of trouble.
Replace a Showerhead or Faucet Aerator
Time: 10 to 20 minutes
DIY Cost: $8 to $40
Typical Pro Cost: $70 to $150
This is one of the simplest upgrades you can make.
For a showerhead, unscrew the old head by turning it counterclockwise. Clean the threads, wrap them with plumber’s tape, and screw on the new showerhead hand-tight. Then turn on the water and test.
For a faucet aerator, unscrew the tip, clean out sediment, or replace it entirely. A clogged aerator often causes uneven or weak flow.
This project is quick, low cost, and often improves water pressure and efficiency right away.
install a Garbage Disposal
Time: 1 to 2 hours
DIY Cost: $90 to $250
Typical Pro Cost: $250 to $500
A garbage disposal is manageable for many homeowners. Still, this one comes with an important warning: respect the electrical side of the job.
Turn off power at the breaker before you begin. If you are not comfortable with wiring, have that part done by a licensed professional and handle only the mounting and plumbing connections yourself.
Remove the old drain assembly if needed. Install the mounting ring and gasket according to the manufacturer’s instructions. Lift the disposal into place and lock it onto the mount. Then connect the discharge tube and dishwasher inlet if applicable.
Before testing, check every connection carefully. Restore power only when everything is secure and dry. Run water first, then turn the unit on briefly.
This project is more advanced than a faucet repair, but still realistic for handy homeowners who work slowly.
Winterize Outdoor Faucets
Time: 15 to 30 minutes
DIY Cost: $0 to $20
Typical Pro Cost: $80 to $150
If you live in a cold climate, winterizing outdoor faucets can prevent burst pipes.
Disconnect hoses first. Then shut off the interior supply valve to the outdoor faucet if your system has one. Open the outside spigot to drain out trapped water.
You can also add an insulated faucet cover for extra protection. This small seasonal task can prevent a very expensive spring repair.
Basic Water Heater Flush
Time: 45 minutes to 1.5 hours
DIY Cost: $0 to $15
Typical Pro Cost: $120 to $250
Sediment builds up inside water heaters over time. That buildup reduces efficiency and can shorten the unit’s life.
Turn off the power for electric heaters or set gas heaters to pilot Mode. Shut off the cold water supply. Connect a garden hose to the drain valve and run it to a safe drain area.
Open the valve carefully and let the tank drain. You may need to open a nearby hot water tap to help air move through the system. Once drained, briefly turn the cold water back on to flush out remaining sediment.
Close the drain valve, remove the hose, refill the tank, and restore power or gas only after the tank is full again.
If the drain valve is stuck, the heater is old, or you see signs of corrosion, stop and call a professional.
Common DIY Plumbing Mistakes and How to Avoid Them
Even simple repairs can go wrong if you rush.
Here are seven common mistakes homeowners make:
- Skipping the water shutoff test
- Over-tightening fittings and cracking parts
- Using the wrong replacement part
- Forgetting plumber’s tape on threaded connections
- Ignoring small leaks after reassembly
- Using harsh chemicals instead of mechanical drain cleaning
- Starting work without checking local codes or permit rules
The fix is simple: slow down.
Read the steps first. Take a photo before you disassemble anything. Keep old parts for matching. Test every repair carefully before you clean up. If water pressure suddenly drops throughout the house, if stains keep returning, or if you notice sewage smells, treat those as red flags rather than “later” problems.
A good DIYer is not the one who never makes mistakes.
A good DIYer is the one who knows when to stop before a mistake gets expensive.
When to Call a Professional Plumber
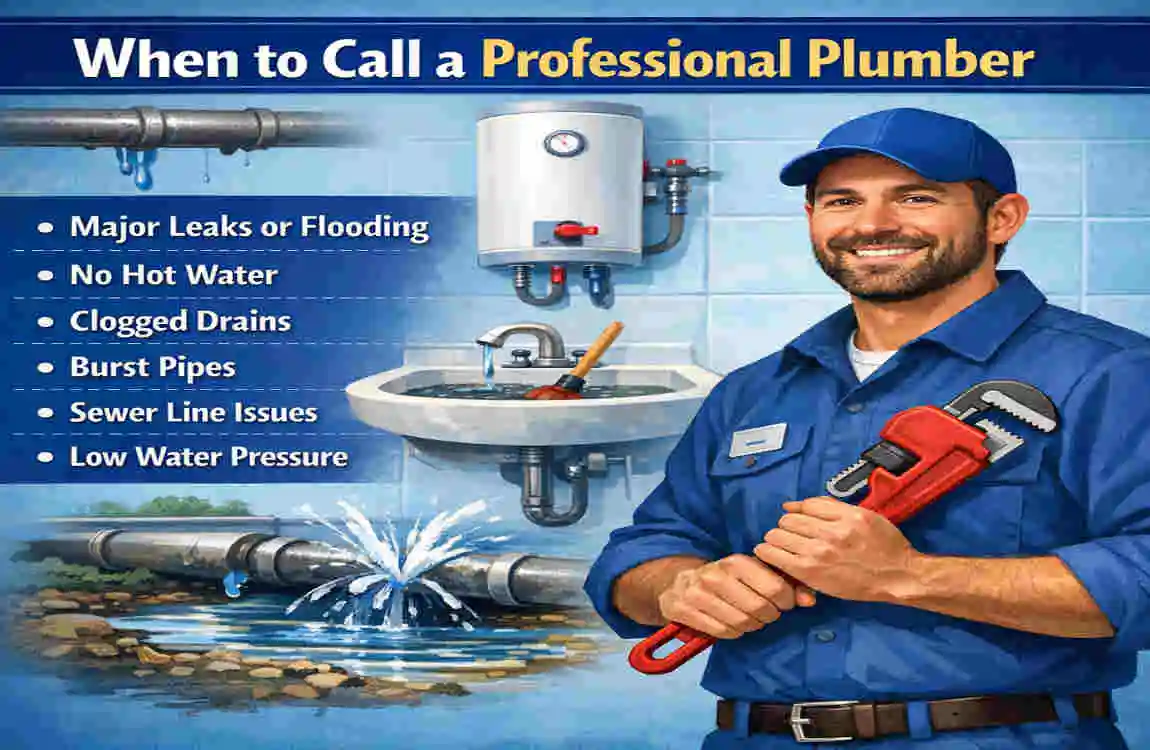
Some jobs should not stay on your DIY list.
Call a plumber if you have sewage backup, burst pipes inside walls, no hot water with a gas unit, repeated drain clogs in multiple fixtures, foundation moisture, major ceiling leaks, or any plumbing issue involving permits, line replacement, or hidden damage.
When choosing a plumber, ask about experience, licensing where required, warranty on work, and clear pricing before the job begins. Read reviews, ask neighbors, and avoid anyone who gives vague estimates.
If you feel unsure, that is not weakness.
That is good judgment.
Maintenance Tips for Long-Term Plumbing Success
The best plumbing repair is the one you never need.
Check under sinks monthly for moisture, corrosion, or swelling. Run water in little-used bathrooms to prevent traps from drying out. Clean shower and sink drain covers regularly. Look at toilet bases for movement or dampness. Flush your water heater once a year if the manufacturer recommends it.
If you live in a hard-water area, mineral buildup can wear out fixtures more quickly. In that case, cleaning aerators and showerheads is even more important, and a water treatment solution may help in the long run.
You can also make smart eco-upgrades over time, such as low-flow showerheads, efficient toilets, and faucet aerators. These upgrades lower water use and reduce strain on your system.
Small habits protect your plumbing far better than emergency fixes.
FAQs
Can I do plumbing in my own house without a license?
In many places, homeowners can do certain plumbing work in their own primary residence without a license. However, permit and inspection rules vary by city, state, municipality, and housing authority. Always check local requirements before starting larger jobs.
What if I mess up a DIY plumbing repair?
Shut off the water immediately. Dry the area, assess the problem, and do not keep guessing if the issue is unclear. For minor issues, replacing a seal or refitting a connection may resolve them. For bigger issues, call a plumber before water damage gets worse.
Is DIY plumbing cheaper than hiring a plumber?
Yes, for simple repairs, it is usually much cheaper. A faucet washer, toilet flapper, or drain-cleaning tool costs far less than a service call. But if a failed repair causes damage, the total cost can rise quickly, so skill and caution matter.
What plumbing jobs are best for beginners?
Good beginner jobs include fixing a leaky faucet, unclogging drains, replacing a showerhead, repairing a running toilet, and changing a faucet aerator. These projects are lower risk and usually require only basic tools.
When should I not do plumbing myself?
Avoid DIY work on sewer lines, hidden leaks inside walls, gas water heaters if you are unfamiliar with them, major repiping, and any job that requires permits or advanced diagnosis. Those situations call for professional help.
How do I know if a leak is serious?
A leak is more serious if it keeps recurring, stains walls or ceilings, causes low pressure, creates mouldy smells, or occurs near electrical systems. Those signs often mean the issue goes beyond a simple fixture repair.
Is doing plumbing in your own house worth learning?
Yes. Even a few basic skills can save you money and reduce stress. More importantly, you become faster at spotting problems early, which helps protect your home over time.
I can also turn this into a fully optimized blog post with meta title, meta description, image suggestions, and FAQ schema-ready formatting.