Learning how to paint a wood house properly can save you money, protect your home, and make your siding look fresh again. A good paint job does more than improve appearance. It also helps shield wood from rain, sun, humidity, and everyday wear and tear.
If you have an older home or fading siding, painting can make a big difference. It can prevent small problems from turning into costly repairs and boost curb appeal fast.
Why Painting a Wood House Matters
Protects Wood From Weather Damage
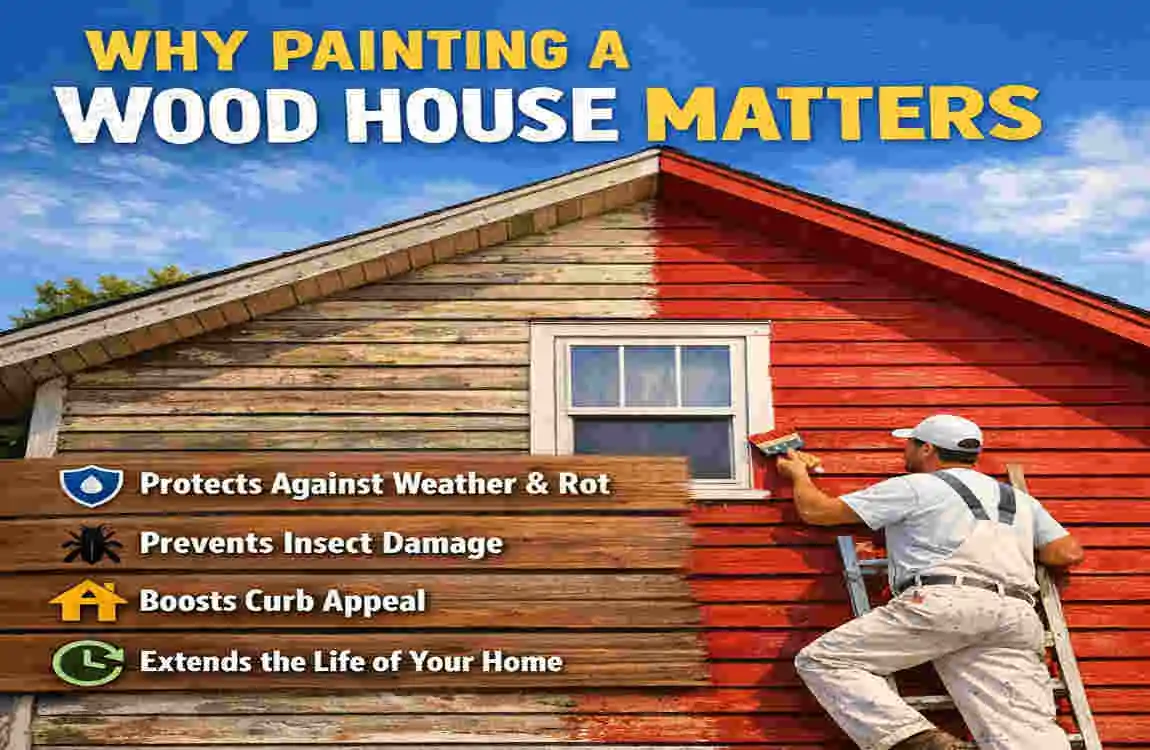
Wood is strong, but it does not like constant exposure to the elements. Rain, UV rays, humidity, mold, and mildew can slowly break it down. Over time, unprotected siding may swell, crack, peel, or rot.
A quality paint job acts like a barrier. It helps block moisture and reduces damage from sun exposure. That is why regular wood siding maintenance matters so much.
Improves Home Appearance
Fresh paint can make an older home look clean, cared for, and newer. Even if the structure is sound, faded or peeling paint can make the house look neglected.
A new color can also help your home stand out in a good way. That is one of the biggest benefits of house painting. It gives the exterior a finished look and makes a strong first impression.
Increases Property Value
Exterior painting often offers a strong return on investment. Buyers usually notice a home’s exterior before they step inside. If the siding looks clean and maintained, the home feels more appealing.
Good exterior wood house painting can help your property look move-in ready. That can support a better sale price and reduce concerns during a showing.
Prevents Expensive Repairs
When paint starts peeling, wood becomes more exposed. That can lead to cracking, water damage, and rot. Small issues can grow quickly if they are ignored.
Painting on time helps you avoid costly repairs later. In many cases, regular painting is much cheaper than replacing damaged siding.
Best Time of Year to Paint a Wood House
Ideal Weather Conditions
The best weather for painting a house is mild, dry, and steady. You want temperatures that are neither too hot nor too cold. Low humidity is also important because it helps paint dry properly.
Dry days are best for exterior painting. Moisture can interfere with the finish and compromise adhesion.
Why Spring and Fall Work Best
Spring and fall often offer the most balanced weather. The air is usually cooler, and the sun is less harsh. That helps paint dry more evenly.
These seasons are often the best time to paint wood siding because they offer better working conditions and a smoother finish.
Weather Conditions to Avoid
Avoid painting in direct, hot sunlight if possible. Also skip rainy days, windy conditions, and extreme heat or cold. These conditions can cause streaks, cracking, or poor bonding.
If the surface feels damp or the forecast is unstable, wait. A little patience can save you from having to repaint later.
Tools and Materials You’ll Need
Essential Painting Tools
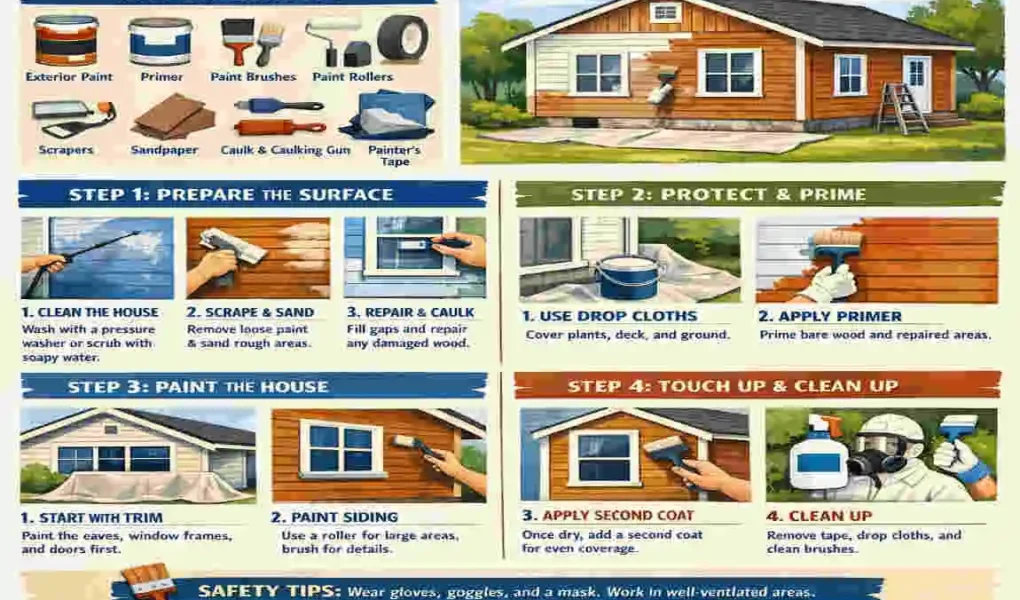
To do the job well, gather your supplies before you begin. You will likely need:
- Paint brushes
- Rollers
- Paint sprayer
- Scrapers
- Sandpaper
- Drop cloths
- Painter’s tape
- Ladders
The right tools make the work easier and help you get a smoother result. If you are comparing tools, a paint sprayer vs roller guide can help you choose the best method for your home.
Safety Equipment
Exterior work can be messy and sometimes risky. Wear gloves, safety goggles, and a dust mask. If you are sanding or scraping old paint, protection is even more important.
Safety is a simple step, but it should never be skipped.
Choosing the Right Paint
For most homes, exterior-grade acrylic latex paint is the best choice. It handles weather changes well, dries fairly fast, and stays flexible as wood moves.
Oil-based paint can still work in some cases, but latex is often easier to use and clean up. Finish also matters. A satin or semi-gloss finish is common for exterior trim because it is easier to clean.
If you are deciding on products, a best exterior paint for wood homes guide can help you compare options.
Primer Requirements
Primer helps paint stick better and cover more evenly. It is especially important on bare wood, in repaired areas, or when changing from a dark color to a lighter one.
Use a primer made for exterior wood surfaces. It provides a better base for the topcoat and improves long-term results.
How to Prepare a Wood House for Painting
Inspect the Exterior Thoroughly
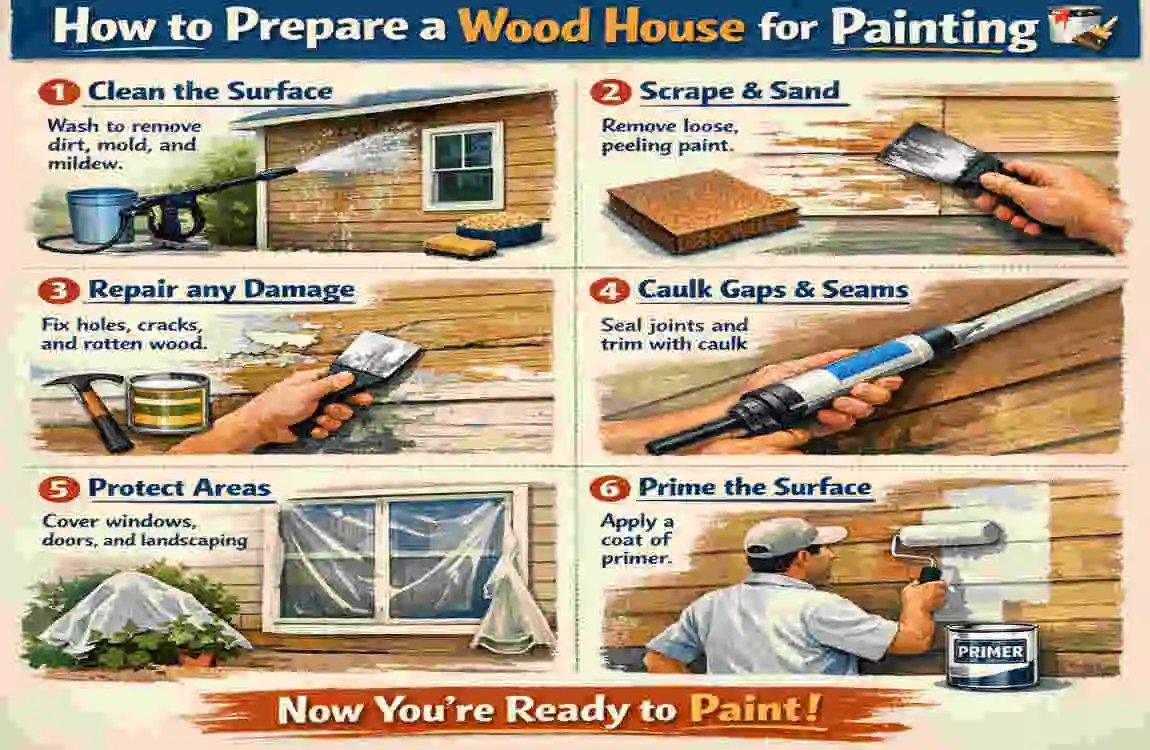
Before you paint, walk around the house and inspect the siding closely. Check for rotting wood, cracks, peeling paint, mildew, and soft spots.
This part is a big piece of exterior paint preparation. If you miss damage now, the paint job will not last as long.
Clean the Surface Properly
Dirt, dust, and mildew can keep paint from sticking. You can pressure-wash the house carefully, or wash it by hand if the surface is delicate.
If you pressure wash, use enough force to clean but not so much that you damage the wood. Let the siding dry fully before moving on. This step is essential when preparing wood siding for paint.
Scrape Off Loose Paint
Use a scraper to remove any peeling or loose paint. Work gently so you do not gouge the wood underneath.
This is a basic but important step in sanding wood siding before painting, creating a smooth base.
Sand the Surface
Sanding helps smooth rough areas and improves the new paint’s grip. Focus on edges, patched spots, and areas where old paint was removed.
A clean, lightly sanded surface gives you a better final look. It also helps the paint spread more evenly.
Repair Damaged Wood
Fill small cracks and holes with exterior wood filler. Replace boards that are badly rotted or split. Paint cannot fix structural damage, so repairs should happen first.
If you skip this step, the new finish may fail early.
Caulk Gaps and Seams
Use exterior caulk around joints, seams, trim, and other small openings. This helps block moisture and gives the paint a cleaner appearance.
Sealing these spaces is one of the smartest wood house care tips before painting.
Protect Nearby Areas
Cover windows, plants, fixtures, and anything else you do not want painted. Use drop cloths and painter’s tape to protect trim and edges.
This keeps the job cleaner and saves time during cleanup.
Step-by-Step Guide on How to Paint a Wood House
Apply Primer
Primer is often needed on bare wood, repaired patches, and stained areas. Apply it evenly with a brush, roller, or sprayer depending on the surface.
Let it dry for the full time listed on the can. Rushing this step can affect the topcoat. If you want how to paint a wood house step by step, primer is where the process should begin.
Start With Trim and Edges
Paint the trim, corners, and edges first. These smaller areas are easier to handle with a brush, and they help define the shape of the house.
Starting here also makes it easier to keep the main siding neat later. Brush carefully and follow the wood’s grain when possible.
Paint the Main Siding
Work from top to bottom so drips do not ruin finished sections below. Paint in small sections so the edge stays wet while you work. That helps prevent lap marks.
This is the heart of painting wood siding correctly. Keep your strokes even and avoid going back over paint that is already drying.
Use Proper Painting Techniques
Brush Painting
Brushes are best for trim, corners, and detailed areas. They give you more control and are useful for touching up tricky spots. They take more time, but they are precise.
Roller Painting
Rollers cover large flat areas quickly. They work well on textured siding and can help spread paint evenly.
Spray Painting
A sprayer is fast and great for large surfaces. It can create a smooth finish, but it requires careful masking and good technique. Overspray can be a problem if you are not careful.
For many homeowners, the best method is often a mix of brush, roller, and sprayer. That gives you both speed and control in an exterior wood painting guide approach.
Apply a Second Coat
Most wood houses need two coats for full coverage and long-lasting protection. The first coat seals the surface, while the second coat improves color depth and durability.
Wait the proper drying time before applying the second coat. Read the label and follow the product instructions closely.
Inspect and Touch Up
Once the second coat is dry, look over the whole house. Check for thin spots, missed corners, or drips. Touch up any problem areas right away.
This final review helps you finish the project cleanly and gives the siding a polished look.
Pro Tips
- Do not overload your brush or roller
- Paint in the shade when possible
- Follow the drying time on the paint can
- Work steadily to keep the finish even
Common Mistakes to Avoid When Painting a Wood House
Skipping Surface Preparation
This is one of the biggest house painting mistakes. If the surface is dirty, rough, or damaged, the paint will not last as long.
Painting Over Wet Wood
Wet wood traps moisture under the paint. That can cause bubbling, peeling, and early failure. Always let the siding dry fully first.
Choosing Cheap Paint
Low-quality paint may save money upfront, but it usually wears out faster and covers poorly. Better paint often lasts longer and looks better.
Ignoring Weather Conditions
Bad weather can ruin a fresh coat. High humidity, strong wind, or extreme temperatures can all create wood house paint problems.
Applying Thick Coats
Thick layers may drip, crack, or dry unevenly. Thin, even coats work much better and give a smoother finish.
How Long Does Exterior Wood Paint Last?
Average Lifespan of Exterior Paint
In many cases, exterior wood paint lasts 5 to 10 years. Some jobs last longer, especially when the prep work is strong and the paint quality is high.
Factors That Affect Longevity
Climate, sun exposure, surface prep, and paint type all affect how long the finish lasts. Houses in harsh weather may need repainting sooner.
Signs It’s Time to Repaint
Watch for fading, cracking, peeling, and exposed wood. These are clear signs that it is time to repaint before damage spreads.
DIY vs Hiring Professional Painters
Benefits of DIY Painting
DIY can save money and give you a sense of accomplishment. If your home is small and in decent condition, it may be a manageable project.
Challenges of DIY Projects
Painting a house takes time, effort, and a fair amount of skill. It can also involve ladders, scraping, sanding, and working at height.
When to Hire Professionals
A pro may be the better choice for multi-story homes, heavy repairs, or tight deadlines. Professional painters can also handle difficult surfaces more efficiently.
Average Cost Comparison
DIY usually costs less in materials but more in personal time. Professionals charge more for labor, but they bring skill, speed, and equipment. If you are comparing options, a guide on how much exterior house painting costs can help you plan.
Maintenance Tips After Painting a Wood House
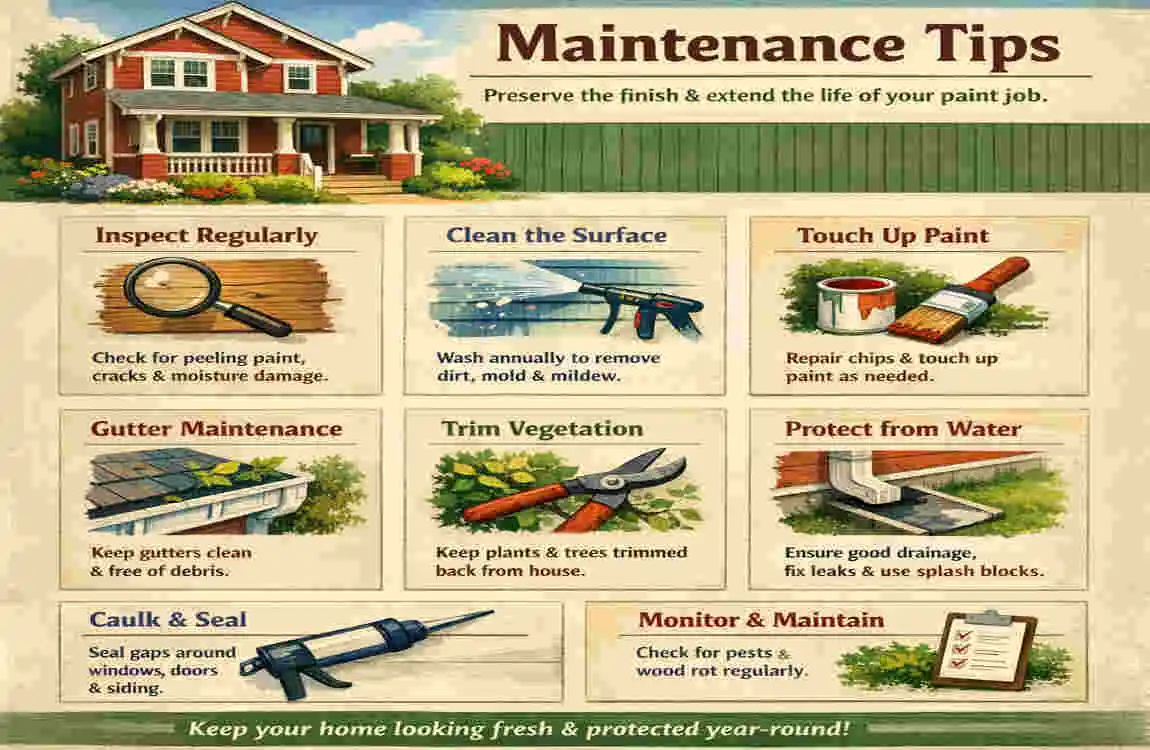
Wash Exterior Annually
A light wash once a year helps remove dirt and mildew. This supports exterior paint maintenance and keeps the finish looking fresh.
Inspect for Damage Regularly
Check for peeling, cracks, or chipped spots before they grow. Small fixes are much easier than full repairs later.
Touch Up Small Areas Quickly
If you notice damage, fix it fast. A small touch-up can prevent larger repainting work later.
Keep Gutters Clean
Overflowing gutters can send water down the siding, causing damage. Clean gutters help protect your paint and wood.
Trim Trees and Bushes
Plants that sit too close to the dream house can trap moisture. Trim them back so air can move freely around the siding.
Frequently Asked Questions
How do you prepare a wood house for painting?
Start by inspecting, cleaning, scraping loose paint, sanding rough areas, repairing damage, and caulking gaps. Good prep is the key to a lasting finish.
What is the best paint for a wood house?
Most homeowners do well with exterior acrylic latex paint. It is flexible, durable, and works well on wood siding.
Should you pressure wash before painting?
Yes, usually. Pressure washing can remove dirt and mildew, but use care to avoid damaging the wood. Let the siding dry completely before painting.
How many coats of paint does a wood house need?
Most wood houses need two coats for good coverage and protection. In some cases, primer plus two finish coats may be the best choice.
Can you paint over old exterior paint?
Yes, you can paint over old paint if it is still sound. You must scrape loose areas, sand rough spots, and clean the surface first.
How long should wood dry before painting?
Wood should feel fully dry before you paint it. If the siding was washed or exposed to rain, allow it to dry thoroughly based on the weather and humidity.