Plumbing is one of the most critical components of any home, yet it’s often hidden behind walls and under floors. Whether you’re building a new home or remodeling, there’s a crucial phase in the plumbing process known as rough-in plumbing. This phase lays the foundation for your entire plumbing system, ensuring everything works seamlessly once the finishing touches are applied.
What is Rough-In Plumbing?
Defining Rough-In Plumbing
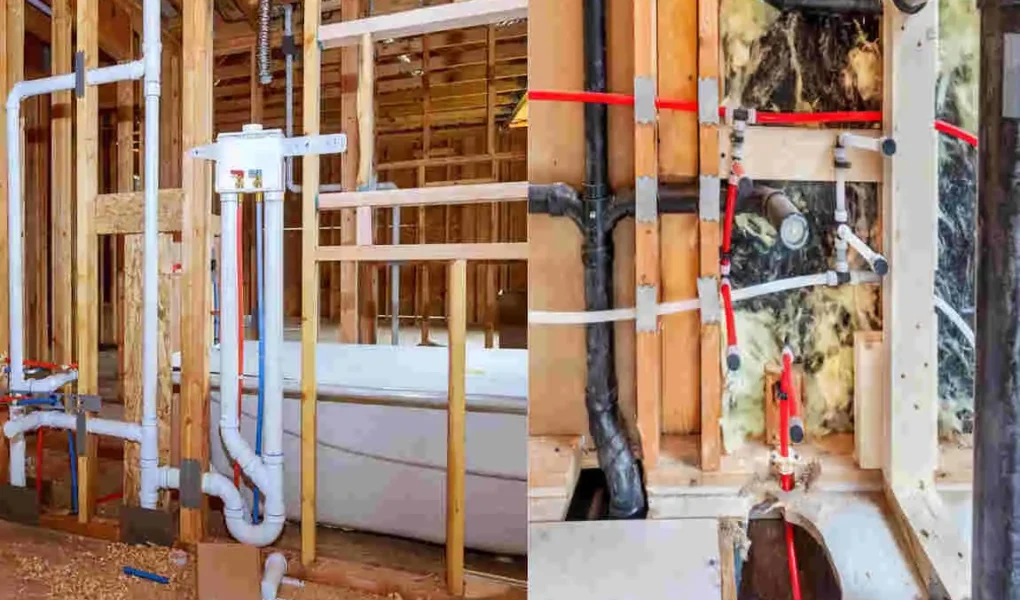
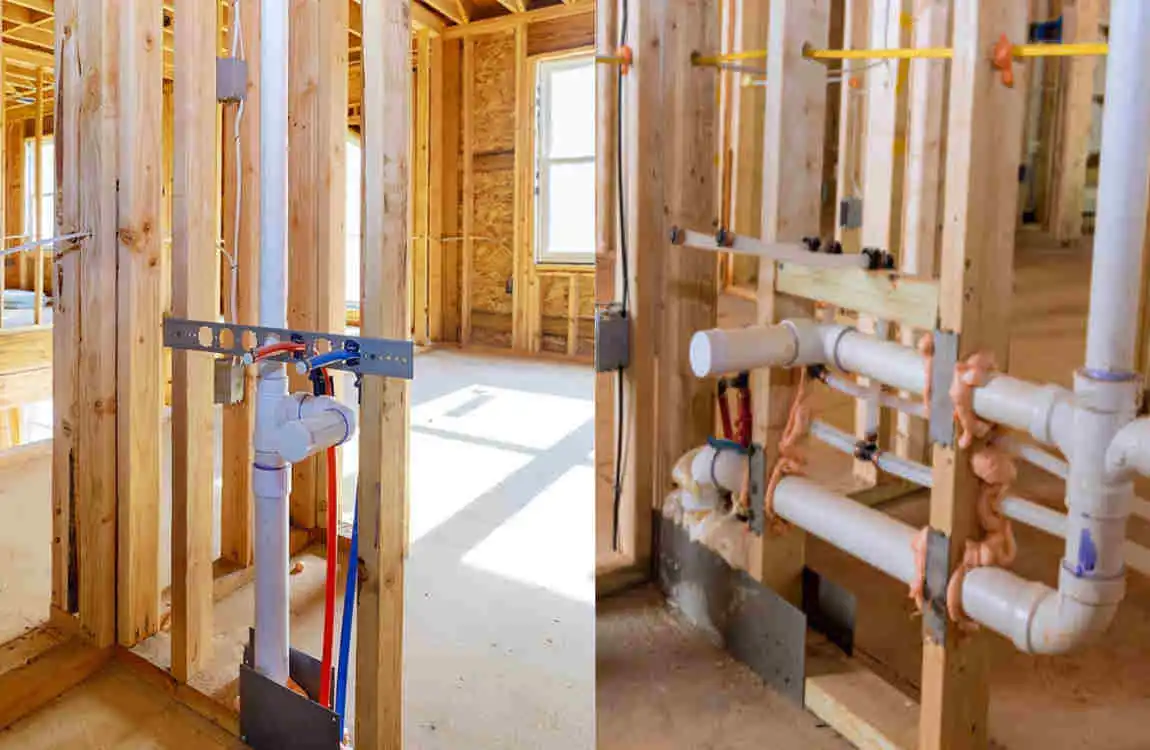
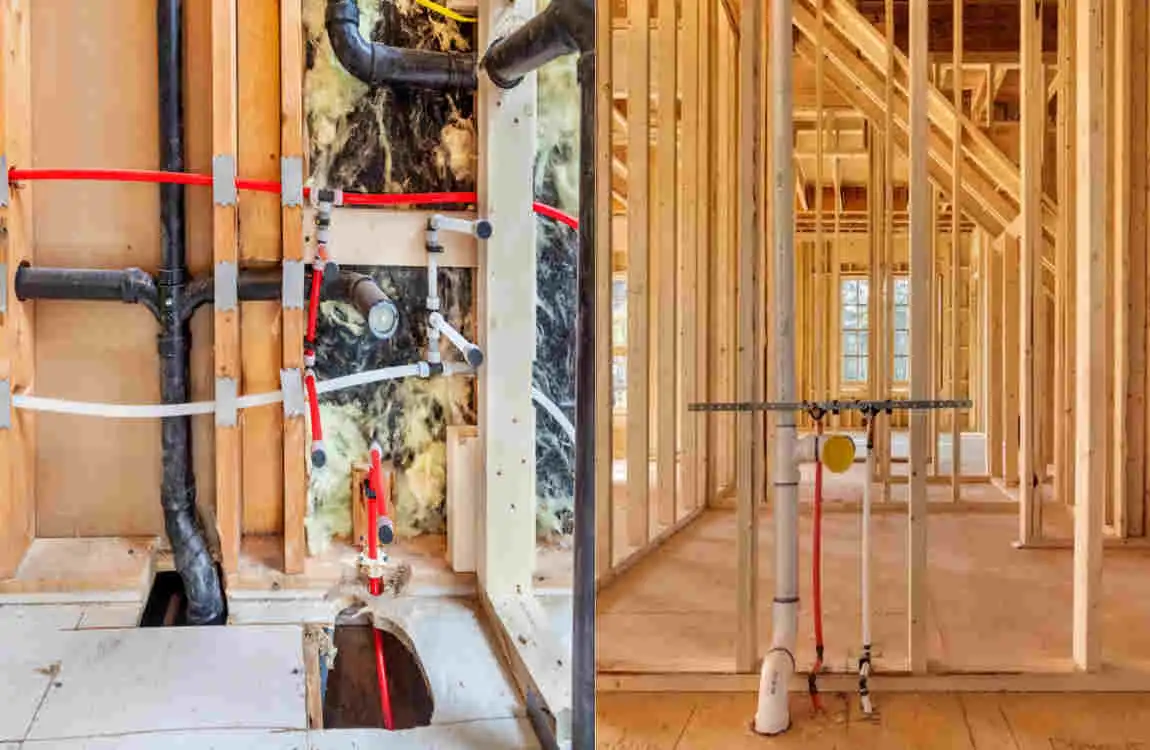
Rough-in plumbing is the initial stage of plumbing installation in which pipes, drains, and vent lines are laid out and installed, but the fixtures—like faucets, toilets, and sinks—aren’t yet connected. This happens before walls, floors, and ceilings are completely finished, making it easier to access and Install pipes.
Think of it as the skeletal structure of your plumbing system. It’s the hidden groundwork that ensures your water flows properly, waste is disposed of efficiently, and your plumbing complies with local building codes.
Rough-In vs. Finish Plumbing
To better understand rough-in plumbing, it’s helpful to compare it to finish plumbing. Here’s a simple breakdown:
Aspect Rough-In Plumbing Finish Plumbing
Stage Early stage (before walls are finished) Final stage (after walls and floors are done)
Work Involved Installing pipes, drains, and vent systems, and installing fixtures like sinks, faucets, and toilets.
Visibility: Hidden behind walls and under floors. Visible to the homeowner.
Why Rough-In Plumbing is Important
Doing rough-in plumbing properly is crucial because it ensures:
- Proper water flow: Pipes must be positioned appropriately to avoid leaks or blockages.
- Code compliance: Local building codes often require strict plumbing layouts.
- Cost savings: Mistakes during the rough-in phase can lead to costly repairs later.
By mastering rough-in plumbing, you lay the foundation for an efficient and long-lasting plumbing system in your home.
Essential Tools and Materials Needed for Rough-In Plumbing
Before starting, it’s essential to gather the right tools and materials. Having the proper equipment ensures a smoother process and minimizes mistakes.
Tools You’ll Need
Here’s a list of tools you’ll need for rough-in plumbing:
- Pipe Wrenches: For gripping and turning pipes.
- Pipe Cutters: To cut pipes cleanly and accurately.
- Levels: To ensure pipes are installed at the correct slope.
- Tape Measure: For precise measurements.
- Thread Seal Tape (Teflon Tape): To prevent leaks in threaded connections.
- Drill and Bits: For creating holes in walls or floors for pipes.
Materials to Have on Hand
During rough-in plumbing, you’ll work with various pipe materials and fittings. Common materials include:
- PVC Pipes: Lightweight and cost-effective for drains and vents.
- PEX Pipes: Flexible and easy to work with for water supply lines.
- Copper Pipes: Durable but more expensive; commonly used for water supply.
- Fittings: Connectors, elbows, and tees for joining pipes.
- Valves: For controlling water flow.
Safety Gear
Don’t forget safety! Wear:
- Safety Glasses: To protect your eyes from debris.
- Gloves: To avoid cuts and burns.
- Hearing Protection: If using loud power tools.
Step-by-Step Guide: How to Do Rough-In Home Plumbing
Now that you understand the basics, let’s dive into the step-by-step process of rough-in plumbing.
plan Your Plumbing Layout
Good planning is the backbone of any successful plumbing job. Start by reviewing your blueprints or creating a detailed sketch of your plumbing system.
- Identify Key Areas: Mark the locations of water supply lines, drains, and vents.
- Follow Local Codes: Plumbing codes vary by region, so ensure your layout complies with local regulations.
- Double-Check Measurements: Small errors in planning can lead to big problems later.
Measure and Cut Pipes Accurately
Accurate measurements are essential for a leak-free plumbing system. Here’s how to do it:
- Measure Pipe Runs: Use a tape measure to determine the exact length of each pipe section.
- Cut Pipes Cleanly: Use a pipe cutter or saw for clean cuts. Rough edges can lead to poor connections.
- Test Fit: Before securing pipes, test fit them to ensure proper alignment.
Assemble and Position Pipes
With your pipes cut, it’s time to assemble and position them.
- Attach Fittings: Use elbows, tees, and couplings to join pipes.
- Secure Pipes: Use clamps or brackets to keep pipes in place.
- Maintain Slope: Drain pipes should slope downward at 1/4 inch per foot to ensure proper drainage.
Install Water Supply Lines
Hot and cold water supply lines are essential for your plumbing system.
- Position Lines: Run cold water lines on the right and hot water lines on the left.
- Connect to Main Supply: Carefully connect your supply lines to the primary water source.
Rough-In Drain and Vent Pipes
Drain and vent pipes are critical for removing waste and preventing sewer gas buildup.
- Install Drain Pipes: Connect the drain pipes to fixtures and slope them downward to ensure proper flow.
- Add Vent Pipes: Vent pipes allow air to escape, ensuring smooth drainage.
Pressure Testing and Leak Checking
Before sealing walls or floors, test your plumbing system for leaks.
- Use a Pressure Gauge: Attach a pressure gauge to test water pressure.
- Check for Leaks: Inspect all connections for drips or moisture.
- Fix Issues: Tighten connections or replace faulty parts as needed.
Common Mistakes to Avoid When Roughing-In Plumbing
Even seasoned pros can make mistakes. Here are common errors to watch out for:
- Improper Slope: Drain pipes must slope correctly to prevent blockages.
- Ignoring Codes: Skipping local code requirements can lead to fines and repairs.
- Rushing the Job: Take your time to ensure accuracy.
Building Code Compliance and Permits
Why Codes Matter
Local plumbing codes ensure your system is safe, efficient, and up to standard.
Obtaining Permits
Always check if a permit is required before starting. Permits help avoid legal issues down the line.
Professional Tips to Rough-In Plumbing Like a Pro
- Label Pipes: Mark hot, cold, and drain lines to avoid confusion.
- Invest in Quality Materials: Spending more on high-quality pipes and fittings pays off in the long run.
- Practice Patience: Plumbing requires precision —don’t rush!
FAQs
Q: What tools are essential for rough-in plumbing?
A: Pipe wrenches, cutters, levels, and thread seal tape are must-haves.
Q: How long does rough-in plumbing usually take?
A: It depends on the project’s size, but typically 1-3 days.
Q: Can homeowners do rough-in plumbing themselves?
A: Yes, with the right tools and knowledge, though consulting a pro is always a good idea.
Q: What are the signs of a bad rough-in job?
A: Leaks, poor water pressure, or improperly sloped drain lines.