

Keeping your bathroom in tip-top shape is essential for a comfortable and hygienic home. One often overlooked aspect is the toilet seat. Over time, toilet seats can become worn, cracked, or simply outdated. Replacing an old toilet seat can instantly improve the look and feel of your bathroom.
Understanding Toilet Seats with Hidden Bolts

What are Hidden Bolts in Toilet Seats?
Hidden bolts are fasteners used to secure a toilet seat to the toilet bowl. Unlike traditional visible bolts, these are concealed beneath plastic covers or plugs, giving the toilet a sleek and modern appearance.
Difference Between Visible and Hidden Bolt Systems
Visible bolt systems use exposed nuts and bolts to attach the seat, while hidden bolt systems keep the fasteners out of sight. Hidden bolts create a cleaner look and are less prone to tampering, making them a popular choice in many modern toilets.
Common Types of Toilet Seats with Hidden Bolts
- Quick-release seats: These seats feature hidden bolts that make removal and reinstallation for cleaning easy.
- Soft-close seats: Featuring hidden bolts, these seats close slowly and quietly, preventing slamming.
- Elongated seats: Designed for comfort, these seats often use hidden bolts for a streamlined appearance.
Advantages of Hidden Bolt Designs
- Clean look: Hidden bolts create a more aesthetically pleasing toilet design.
- Tamper-resistant: The concealed fasteners make it harder for children or others to loosen the seat.
- Easier cleaning: With no exposed bolts, cleaning around the seat becomes more straightforward and more effective.
Tools and Materials Needed to Replace a Toilet Seat with Hidden Bolts
Before you start, gather the following tools and materials:
- Flathead screwdriver: Used to pry off bolt covers and loosen screws.
- Adjustable wrench: Helps with removing and tightening nuts on the hidden bolts.
- Cleaning supplies: Have disinfectant, rags, and a toilet bowl cleaner ready for before and after the replacement.
- New toilet seat: Choose a seat compatible with hidden bolts and suitable for your toilet model.
Recommended Replacement Toilet Seat Types
When selecting a new seat, consider these options:
- Quick-release seats: Ideal for easy cleaning and maintenance.
- Soft-close seats: Perfect for quiet operation and preventing seat damage.
- Adjustable seats: These seats can be customized to fit various toilet shapes and sizes.
Safety Tips and Preparation Checklist
- Turn off the water supply: If necessary, shut off the water to avoid any potential leaks.
- Clear the surrounding area: Remove any obstacles or items that might get in the way.
- Wear gloves: Protect your hands from germs and potential sharp edges.
- Read the instructions: Familiarize yourself with the manufacturer’s guidelines for your specific toilet seat model.
Step-by-Step Guide: How to Change a Toilet Seat with Hidden Bolts

Preparation
Before you begin, take a moment to prepare your workspace:
- Turn off the water supply: If your toilet has a water shut-off valve, turn it clockwise to stop the water flow.
- Clear the surrounding area: Remove any items that might obstruct your work or get damaged.
- Gather your tools: Have all the necessary tools and the new toilet seat within reach.
- Remove the old toilet seat: If it’s still attached, carefully lift it off the toilet bowl.
Locate and Access the Hidden Bolts
Now, let’s find those hidden bolts:
- Look for bolt covers or plugs: These are usually small plastic pieces near the back of the seat, often color-matched to the seat itself.
- Use a flathead screwdriver: Gently pry off the bolt covers, taking care not to scratch the porcelain.
- Be patient with stuck or rusty bolts: If the bolts are difficult to access, apply some penetrating oil and let it sit for a few minutes before attempting to remove the covers.
Loosen and Remove the Old Toilet Seat
With the hidden bolts exposed, it’s time to remove the old seat:
- Unscrew the hidden bolts: Use an adjustable wrench to loosen the nuts on the bolts, turning them counterclockwise.
- Remove seat hinges and washers: Once the bolts are loose, lift the seat off and set it aside. Don’t forget to remove any rubber washers or nuts attached to the bolts.
- Deal with stripped bolts: If the bolts are damaged, you may need to use pliers or a bolt extractor to remove them. Be gentle to avoid cracking the toilet bowl.
Clean and Inspect the Toilet Bowl Rim
Before installing the new seat, take a moment to clean and inspect the toilet bowl rim:
- Remove grime and debris: Use a toilet bowl cleaner and a brush to scrub the rim and surrounding area.
- Check for damage or leaks: Inspect the rim for any cracks or signs of water leakage. If you find any issues, consider calling a professional plumber before proceeding.
Installing the New Toilet Seat with Hidden Bolts
Now, let’s get that new seat in place:
- Align the seat properly: Position the new seat on the toilet bowl, ensuring the hinges align with the bolt holes.
- Secure the hidden bolts: Insert the bolts through the hinges and into the holes in the toilet bowl. Tighten the nuts by hand, then use an adjustable wrench to snug them up. Be careful not to over-tighten, as this could crack the porcelain.
- Confirm the bolts are hidden: Once the seat is secure, make sure the bolt covers or plugs are correctly in place, concealing the fasteners.
Final Checks and Adjustments
Before you call it a day, perform these final checks:
- Test the seat stability: Sit on the new seat and gently rock back and forth to ensure it’s firmly attached and doesn’t wobble.
- Clean up your tools and work area: Wipe down any surfaces you may have touched during the replacement process, and put away your tools.
- Maintain the new seat: To keep your new toilet seat in top condition, regularly clean it with a mild disinfectant and avoid using harsh chemicals or abrasive cleaners.
Tips and Tricks for Changing Toilet Seats with Hidden Bolts
Here are some handy tips to make your toilet seat replacement even easier:
- Deal with worn or corroded bolts: If the old bolts are rusted or damaged, apply penetrating oil and let it sit for a while before attempting to remove them. In some cases, you may need to replace the bolts entirely.
- Please select the correct replacement seat: Measure your toilet bowl and choose one that matches its shape and size. Many manufacturers offer compatibility charts to help you find the perfect fit.
- Use lubricant or rust remover: Applying a bit of lubricant to the bolts before tightening them can make future removals smoother. If you encounter rusty bolts, use a rust remover to break down the corrosion.
- Choose the best cleaning products: For regular maintenance, use a mild toilet bowl cleaner and a soft cloth or sponge. Avoid harsh chemicals or abrasive cleaners that could damage the seat’s finish.
Common Mistakes to Avoid
When replacing a toilet seat with hidden bolts, be sure to avoid these common pitfalls:
- Using the wrong size tools: Using tools that are too large or too small can damage the bolts or the toilet bowl. Always use the appropriate size wrench or screwdriver.
- Over-tightening the bolts: Tightening the bolts too much can cause the seat to crack or the toilet bowl to fracture. Tighten the bolts until they’re snug, but don’t force them beyond that point.
- Not cleaning properly before installation: Failing to clean the toilet bowl rim before installing the new seat can lead to an uneven or unstable fit. Always take the time to clean the area thoroughly first.
- Ignoring manufacturer instructions: Each toilet seat model may have specific installation requirements. Always read and follow the manufacturer’s guidelines to ensure a proper fit and long-lasting performance.
When to Call a Professional for Toilet Seat Replacement
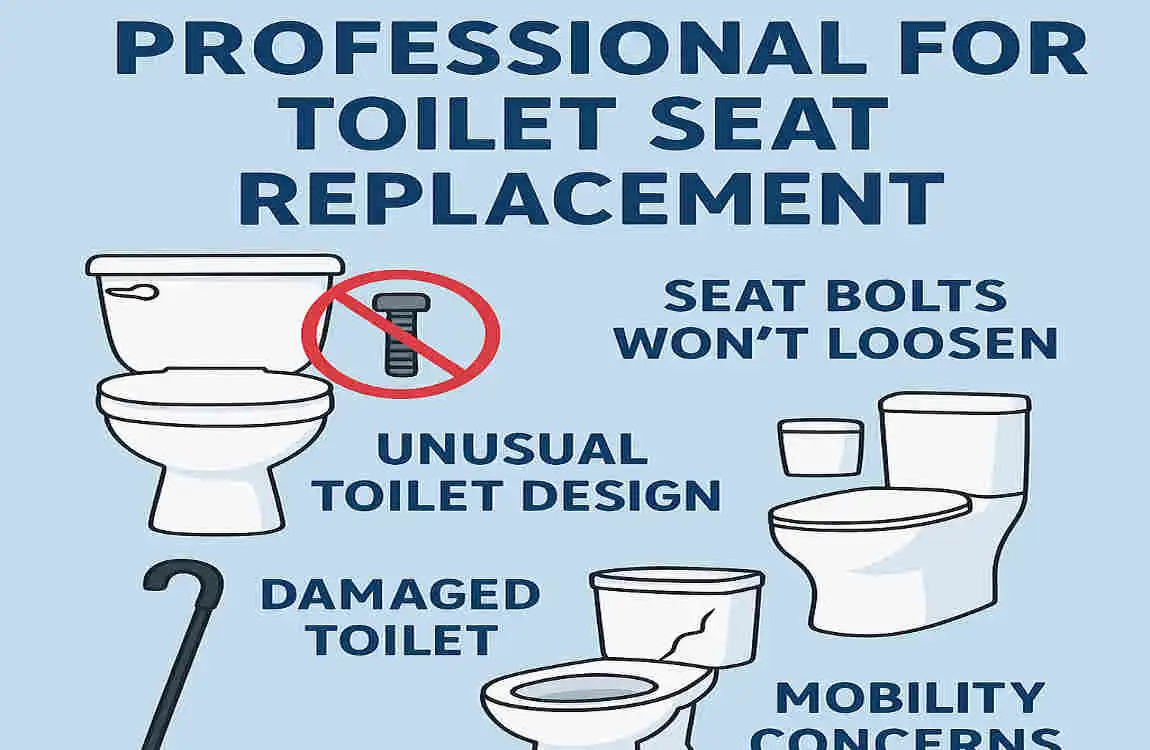
While replacing a toilet seat with hidden bolts is a task many homeowners can handle, there are situations where calling a professional plumber is the best course of action:
- Signs that DIY replacement may not be safe or effective: If you encounter severely rusted or broken bolts, or if the toilet bowl itself is damaged, it’s best to let a professional handle the replacement.
- Cost considerations: While DIY replacement is often more cost-effective, if you’re not confident in your abilities or if you don’t have the necessary tools, hiring a plumber might be a better investment in the long run.
- Finding reliable plumbers: To find a trustworthy plumber for toilet seat repairs, ask for recommendations from friends or family, read online reviews, and check for proper licensing and insurance.
Frequently Asked Questions (FAQs)
Can I replace a toilet seat with hidden bolts myself?
Yes, with the right tools and a bit of patience, most homeowners can successfully replace a toilet seat with hidden bolts. Just follow the step-by-step guide in this article, and you’ll be well on your way to a new, secure toilet seat.
What if the hidden bolts are rusted or broken?
If the hidden bolts are rusted or broken, you may need to apply penetrating oil or rust remover to loosen them. In some cases, you might need to replace the bolts entirely. If you’re unsure about how to proceed, consider calling a professional plumber for assistance.
How long does it typically take to change a toilet seat with hidden bolts?
The entire process of replacing a toilet seat with hidden bolts usually takes about 30 minutes to an hour, depending on your level of experience and the condition of the old seat and bolts. With practice, you can become even quicker at this task.
Are all toilet seats compatible with hidden bolts?
No, not all toilet seats are compatible with hidden bolts. When selecting a new seat, make sure to choose one designed for hidden-bolt installation. Many manufacturers offer compatibility charts to help you find the right seat for your toilet model.
How do I maintain a toilet seat with hidden bolts to prevent damage?
To keep your toilet seat with hidden bolts in top condition, follow these maintenance tips:
- Regular cleaning: Wipe down the seat with a mild disinfectant and a soft cloth or sponge at least once a week.
- Avoid harsh chemicals: Avoid abrasive cleaners or strong chemicals that could damage the seat’s finish.
- Check for loose bolts: Periodically check the hidden bolts to ensure they’re still secure. If you notice any wobbling or movement, tighten the bolts as needed.
- Replace worn parts: If the seat or hinges show signs of wear or damage, consider replacing them to prevent further issues.


