Isometric drawings offer a unique way to visualise architectural designs in three dimensions, giving your designs depth and clarity. Whether you’re an architect, designer, or simply someone who loves sketching, learning how to make an isometric drawing of a house can be an incredibly rewarding skill. In this tutorial, we’ll break down the process into simple steps, so even beginners can follow along and create impressive designs.
Isometric drawings allow you to do just that! They provide a unique perspective that gives your sketches a 3D appearance while still being easy to draw and understand.
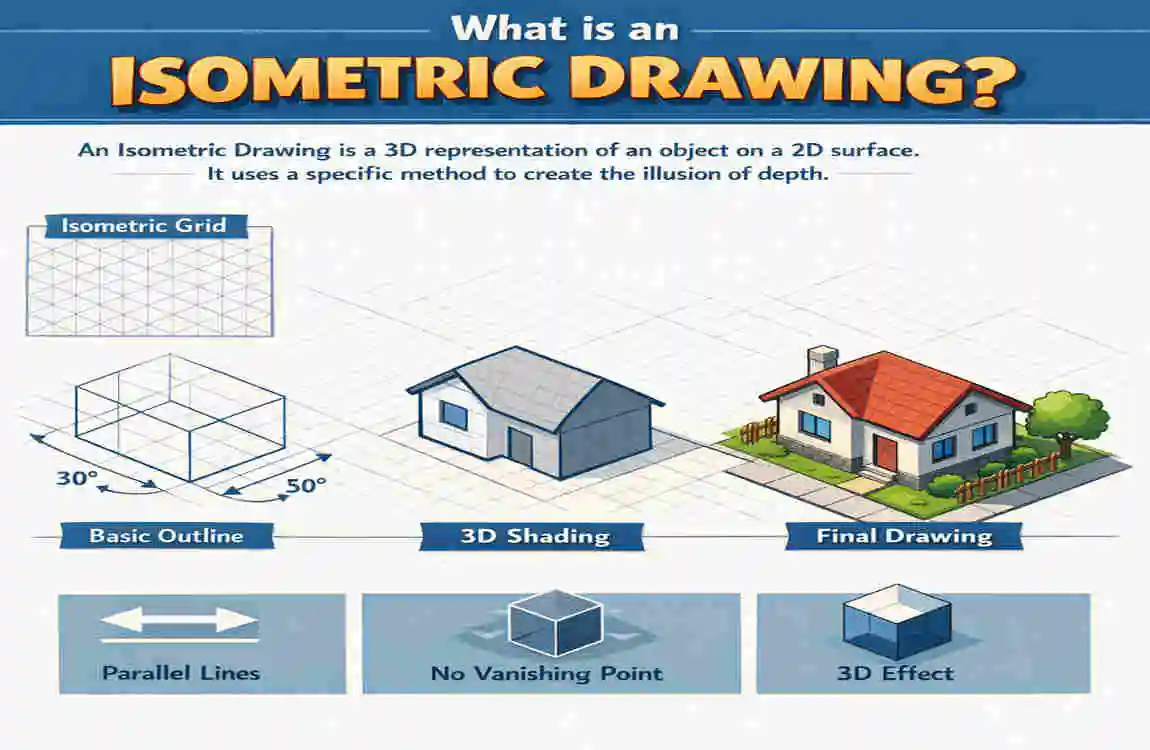
What is an Isometric Drawing?
Before we jump into drawing, let’s understand what an isometric drawing actually is and why it’s so house special.
Definition
An isometric drawing is a type of 3D drawing that represents objects with equal angles (typically 30 degrees) along three axes: X, Y, and Z. This creates a visually accurate representation without distortion.
Key Features of Isometric Drawings
- Equal Scaling on All Axes: No matter which direction you draw, the proportions remain consistent.
- 30-Degree Angle Rule: Lines are drawn at a 30-degree angle to create the illusion of depth.
- No Perspective Distortion: Unlike traditional perspective drawings, objects don’t appear smaller as they get farther away.
Benefits of Isometric Drawings
- Easy Visualisation: They make it simple to understand the structure and layout of a design.
- Universal Application: These drawings are used in architecture, engineering, game design, and more.
- Precision and Clarity: They emphasise accuracy, making them perfect for technical applications.
Relation to House Design
In-house design, isometric drawings are particularly useful because they allow you to visualise how walls, roofs, windows, and doors interact in 3D space. Ready to try it out? Let’s gather the tools you’ll need.
Tools and Materials You’ll Need
Before you start drawing, it’s important to have the right tools on hand. Here’s what you’ll need:
Essential Tools
- Graph Paper or Isometric Grid Paper: These provide a pre-drawn grid that makes it easier to maintain proper angles and proportions.
- Pencils and Erasers: Use a sharp pencil for clean lines and an eraser for quick corrections.
- Ruler: Essential for drawing straight, precise lines.
- Compass (Optional): Useful for drawing circles or arcs in your design.
Digital Tools
If you prefer digital drawing, here are some software options you can explore:
- AutoCAD: Ideal for professional-grade isometric drawings.
- Adobe Illustrator: Great for creating detailed and artistic designs.
- SketchUp: Perfect for 3D modelling.
- Inkscape: A free tool for beginners interested in digital drawing.
Additional Materials
- Colour Pencils or Markers: Use these to add shading, textures, or highlights to your design.
- Blending Tools: These can help smooth out shading for a polished look.
Choosing the Right Tools
If you’re a beginner, start with basic tools like graph paper and a pencil. As you gain confidence, you can explore digital tools or experiment with advanced materials.
Step-by-Step Guide: How to Make an Isometric Drawing of a House
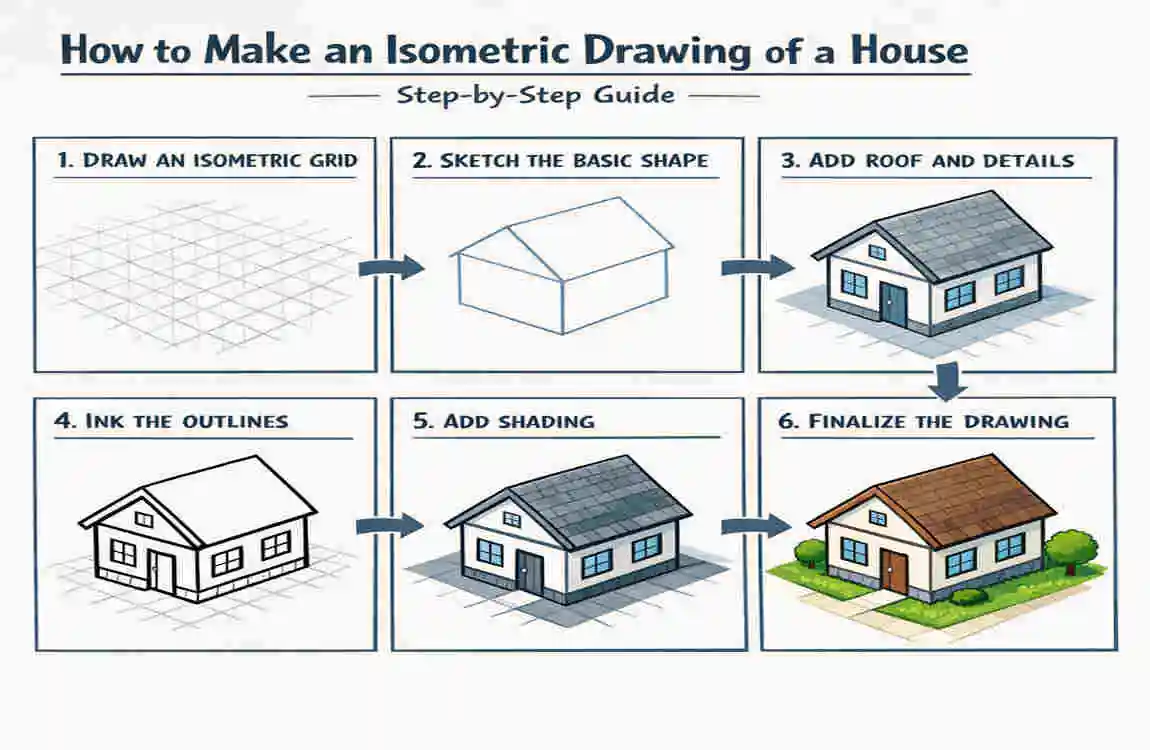
Creating an isometric drawing may seem daunting at first, but breaking it into smaller steps makes it manageable. Follow this guide to create your own isometric house drawing.
Prepare Your Workspace
- Find a comfortable house, well-lit workspace.
- Set up your materials (graph paper, pencils, ruler).
- If using digital tools, open your preferred software and set the canvas to an isometric grid.
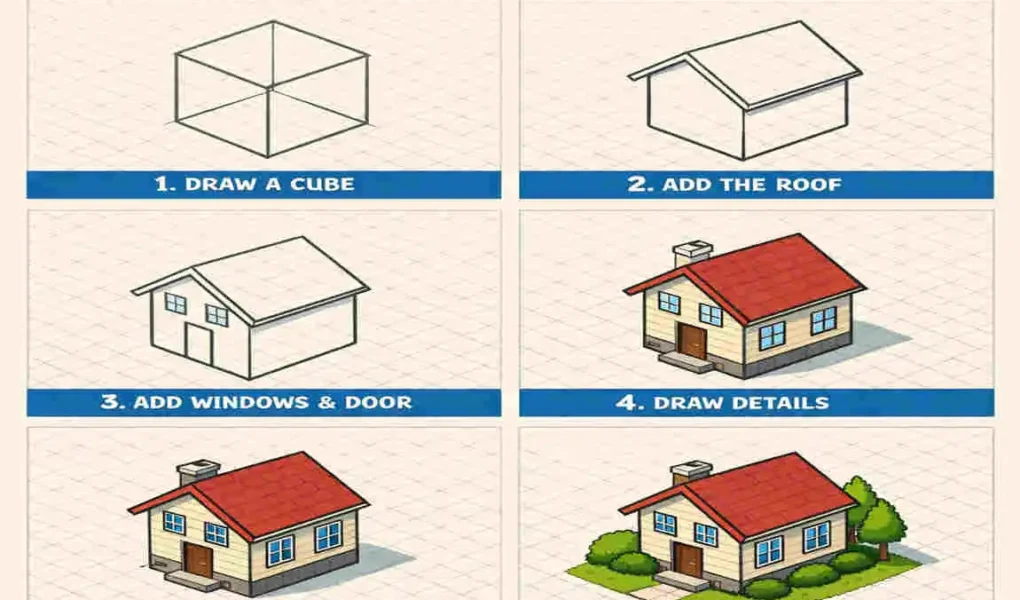
Draw the Base of the House
- Start by drawing a rectangle or square on your isometric grid. This will serve as the foundation.
- Ensure that all sides are proportionate and align with the 30-degree grid lines.
Add Vertical Walls
- From each corner of the base, draw vertical lines to represent the walls.
- Keep these lines equal in height to maintain symmetry.
Construct the Roof
- Decide on a roof style (flat, triangular, or slanted).
- Use the isometric grid to draw the roof accurately, ensuring it connects seamlessly to the walls.
Add Windows, Doors, and Details
- Use small rectangles or squares for windows and doors.
- Position these elements symmetrically for a balanced look.
Shading and Texturing
- Add depth to your drawing by shading the walls and roof.
- Use techniques like hatching or cross-hatching to create textures.
Final Touches
- Erase any unnecessary guidelines for a clean finish.
- Add extra details like trees, pathways, or landscaping to enhance your design.
Common Mistakes and How to Avoid Them
Even experienced artists can make mistakes when creating isometric drawings. Here’s how to avoid common pitfalls:
Mistake Solution
Overcomplicating the Design : Start simple and gradually add details.
Incorrect Angles : Use an isometric grid or ruler to maintain the 30-degree angle rule.
Misaligned Elements Double-check proportions and use a ruler for precision.
Lack of Proportions : Reference real-world dimensions to keep your drawing realistic.
Advanced Tips for Isometric House Drawings
Once you’ve mastered the basics, try these advanced techniques to take your designs to the next level:
Experimenting with Complex Designs
- Add multiple floors or intricate roof designs.
- Try designing unique architectural features, such as balconies or staircases.
Incorporating Colours and Textures
- Use colour pencils or digital tools to add realistic textures to bricks, tiles, or glass.
- Experiment with light and shadow for a dynamic effect.
Using Digital Tools
- Explore advanced features in software such as AutoCAD, including layers and templates.
- Use 3D modelling tools to create highly detailed isometric houses.
Applications of Isometric House Drawings
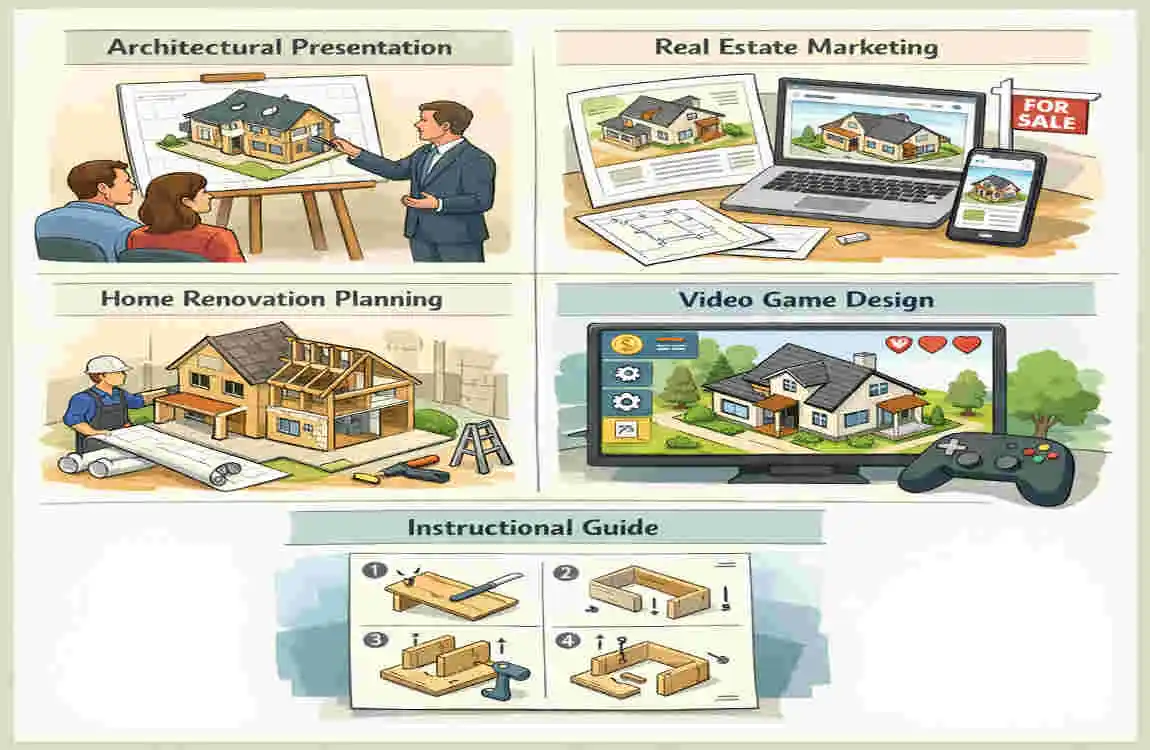
Why should you learn to create isometric house drawings? Here are some practical applications:
- Architectural Design and Planning: Architects use them to visualise structures and layouts.
- Interior Design: Perfect for planning room layouts and furniture arrangements.
- Game Design: Many video games feature isometric environments for a unique visual style.
- DIY Projects: Use isometric drawings to plan home renovations or craft projects.
FAQs
What is the easiest way to start an isometric drawing?
Start with simple shapes like squares or rectangles and build from there.
Can I use free software for isometric house drawings?
Yes, tools like Inkscape and SketchUp offer free versions for beginners.
How long does it take to draw an isometric house?
It depends on the complexity, but a basic drawing can take anywhere from 30 minutes to a few hours.
What are the best tools for beginners?
Graph paper, pencils, and a ruler are the most beginner-friendly tools. For digital drawing, try SketchUp or Inkscape.
| Key Tip | ||
|---|---|---|
| Prepare your workspace | Use isometric grid paper or digital grid | |
| Draw the base of the house | Start with a rectangle or square foundation | |
| Add vertical walls | Extend equal vertical lines from base corners | |
| Construct the roof | Connect walls with triangular/slanted roof | |
| Add windows, doors, and details | Keep proportions and angles consistent | |
| Shade and texture | Use hatching or color for depth and realism | |
| Final touches | Clean lines and add landscaping or extra details |