Have you ever wondered whether the pipes hidden inside your walls and beneath your floors are quietly leaking without you knowing? That worry is more common than you might think, and it’s exactly why plumbers use a simple but powerful method to check. So, what is a static test for home plumbing? In short, it’s a pressure test that checks whether your plumbing system can hold water without losing any, which helps reveal leaks you can’t see with your own eyes.
Hidden leaks are sneaky. They can drip behind drywall, seep under a concrete slab, or trickle through underground lines for months. By the time you notice stains, mold, or a shocking water bill, the damage may already be done. A static test steps in before things get that far.
Think of it as a health check-up for your pipes. Instead of waiting for a problem to become obvious and expensive, you catch it early while repairs are still small and affordable. That kind of prevention can save you thousands of dollars and a whole lot of stress.
What Is a Static Test for Home Plumbing?
Let’s start by breaking down the basics, so you feel confident about what this test actually involves.
Definition of a Static Plumbing Test
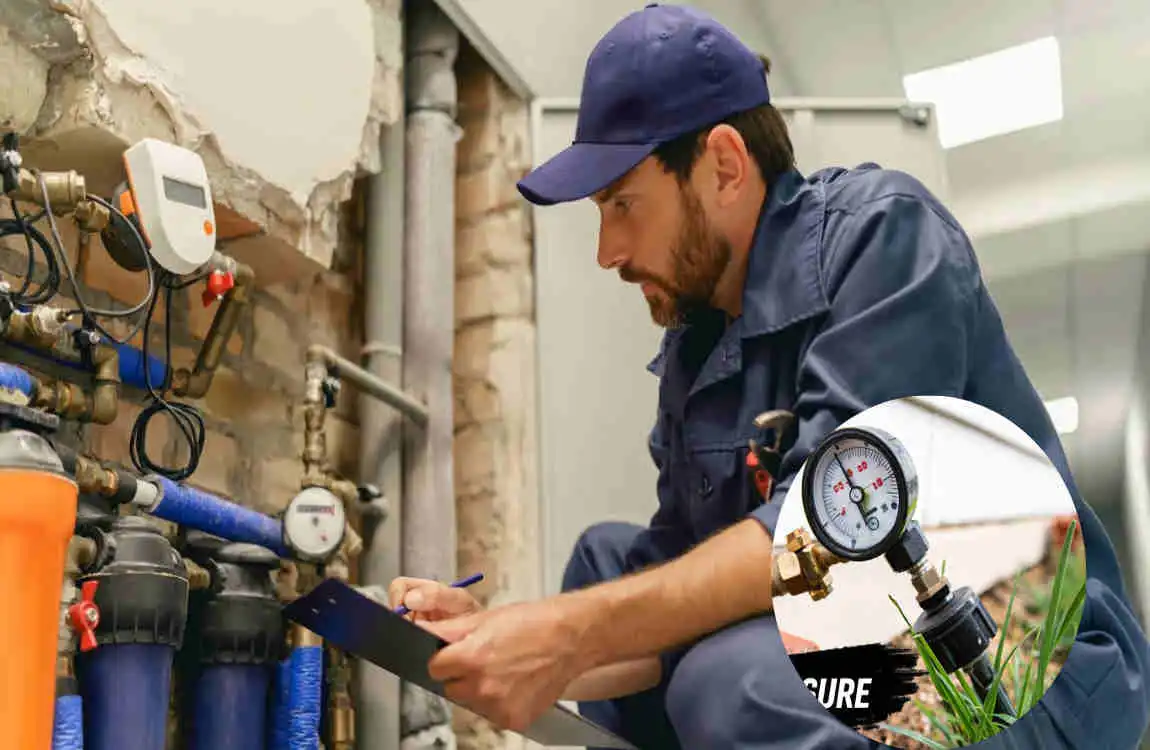
A static plumbing test is a method plumbers use to check the health of your home’s water and drain lines. The idea is simple: they seal off the system, fill it or pressurize it, and then watch to see if the pressure holds steady.
The main purpose is to spot leaks. If your pipes are sound, the pressure stays the same. If there’s a crack, a loose joint, or a broken line somewhere, the pressure slowly drops. That drop tells the plumber something is wrong, even if the leak is completely out of sight.
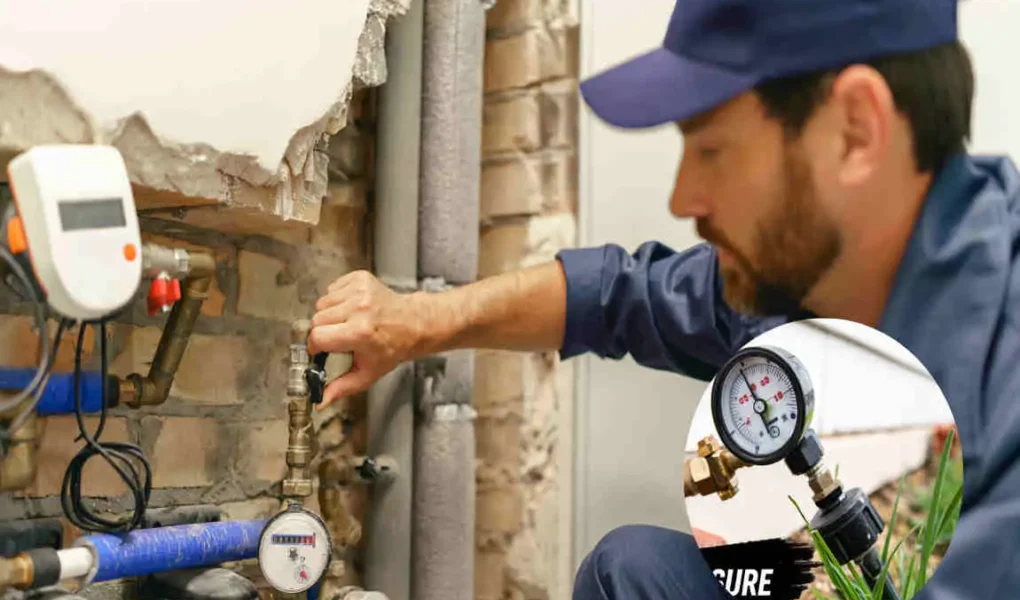
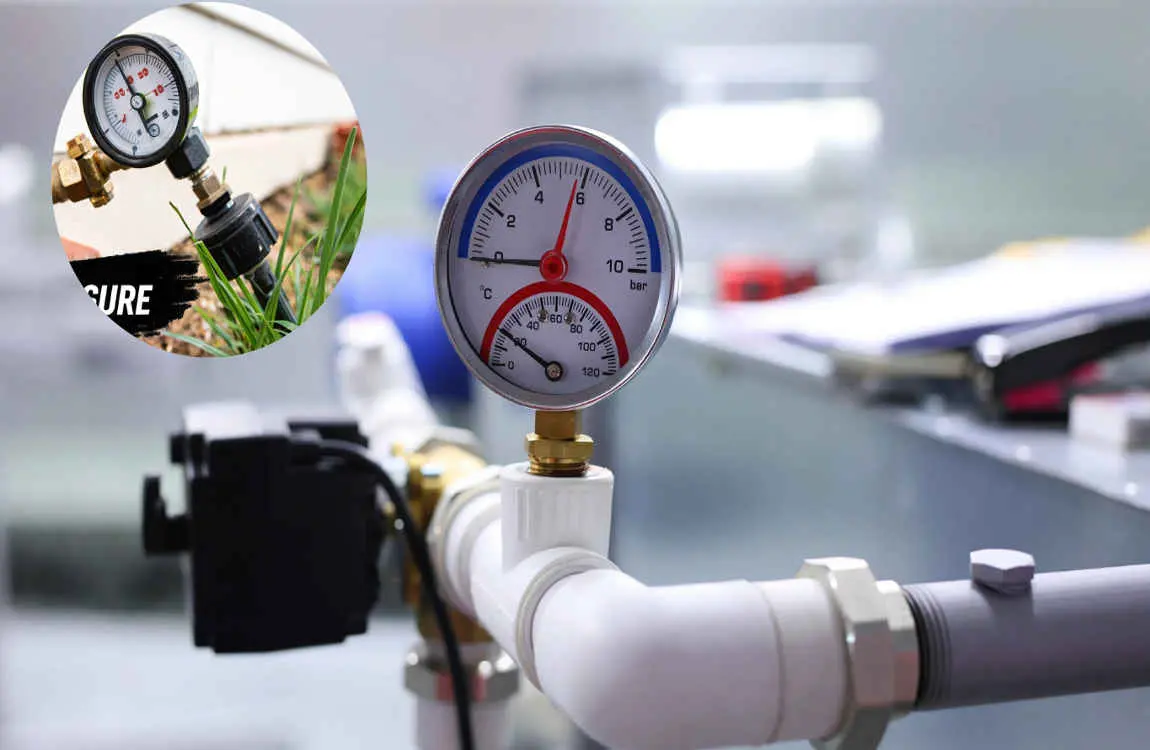
Pressure is measured using a gauge attached to the system. The plumber records the starting number and then keeps an eye on it over a set period. A stable reading means good news. A falling reading means it’s time to investigate further.
Why It Is Called a “Static” Test
You might be curious about the word “static.” It simply means “not moving.” During this test, no water flows through the pipes. Everything sits still.
Because nothing is moving, the pressure inside the system should stay constant. This is the key to the whole method. When water isn’t rushing through the lines, any change in pressure can only mean one thing: something is escaping through a leak.
This still, quiet condition makes the test incredibly reliable at detecting hidden leaks. Without the distraction of flowing water, even tiny problems reveal themselves through gradual pressure loss.
How Does a Static Plumbing Test Work?
Now that you understand the concept, let’s look at how a plumber actually carries out the test from start to finish.
Step-by-Step Testing Process
The process is straightforward, but each step matters. Here’s how it typically unfolds:
- Shut off the water supply. The plumber closes the main valve so no fresh water enters the system during the test.
- Seal and pressurize the plumbing. Using plugs and a pump, they close off openings and either fill the lines with water or add air pressure.
- Monitor the pressure readings. With everything sealed, the plumber watches the gauge closely, often for 15 minutes to an hour or more.
- Identify any pressure loss. If the number holds firm, your pipes pass. If it drops, that signals a leak somewhere in the system.
By following these steps carefully, the plumber gets a clear picture of whether your plumbing is tight and secure or quietly losing water.
Equipment Used
A static test doesn’t require fancy gadgets, but it does rely on a few essential tools. Here’s what a plumber typically brings:
- Pressure gauge – This reads the pressure inside the system so the plumber can track any changes.
- Test pump – This device adds pressure to the lines, either with water or air.
- Pipe plugs – These seal off drains and openings so the system stays closed.
- Isolation valves – These let the plumber separate one section of plumbing from another to pinpoint problem areas.
Together, these tools create a sealed, controlled environment where even a small leak becomes easy to spot.
Why Is a Static Plumbing Test Important?
You might be asking yourself why this test deserves your attention. Let’s explore the real benefits that make it so valuable for homeowners like you.
Detects Hidden Leaks
The biggest advantage is catching leaks you’d never find on your own. Pipes tucked inside walls, under floors, or below your foundation stay out of sight. A static test brings these hidden troublemakers into the open before they cause serious harm.
Prevents Water Damage
Water is patient, and it’s destructive. A slow leak can rot wood, ruin insulation, and weaken your home’s structure over time. By catching leaks early, this test helps you stop water damage before it spreads.
Saves Money on Repairs
Small leaks are cheap to fix. Big ones are not. When you find a problem early through testing, you avoid the huge bills that come with major water damage, mold removal, and structural repairs. A little prevention now saves a lot later.
Protects Your Foundation
Leaks beneath your slab are especially dangerous. Water pooling under your foundation can cause shifting, cracking, and settling. A static test helps you protect your foundation by revealing underground leaks before they undermine your home.
Improves Plumbing Reliability
Finally, this test gives your entire system a clean bill of health. Knowing your pipes hold pressure means fewer surprises, more consistent water flow, and a plumbing setup you can trust day after day.
What Problems Can a Static Test Detect?
A static test does more than just say “yes” or “no” to leaks. It can point toward several specific issues within your plumbing. Let’s look at the most common ones.
Underground Pipe Leaks
Pipes buried in the ground are impossible to inspect by eye. A pressure drop during the test often signals a leak in these hidden underground lines, giving you an early warning.
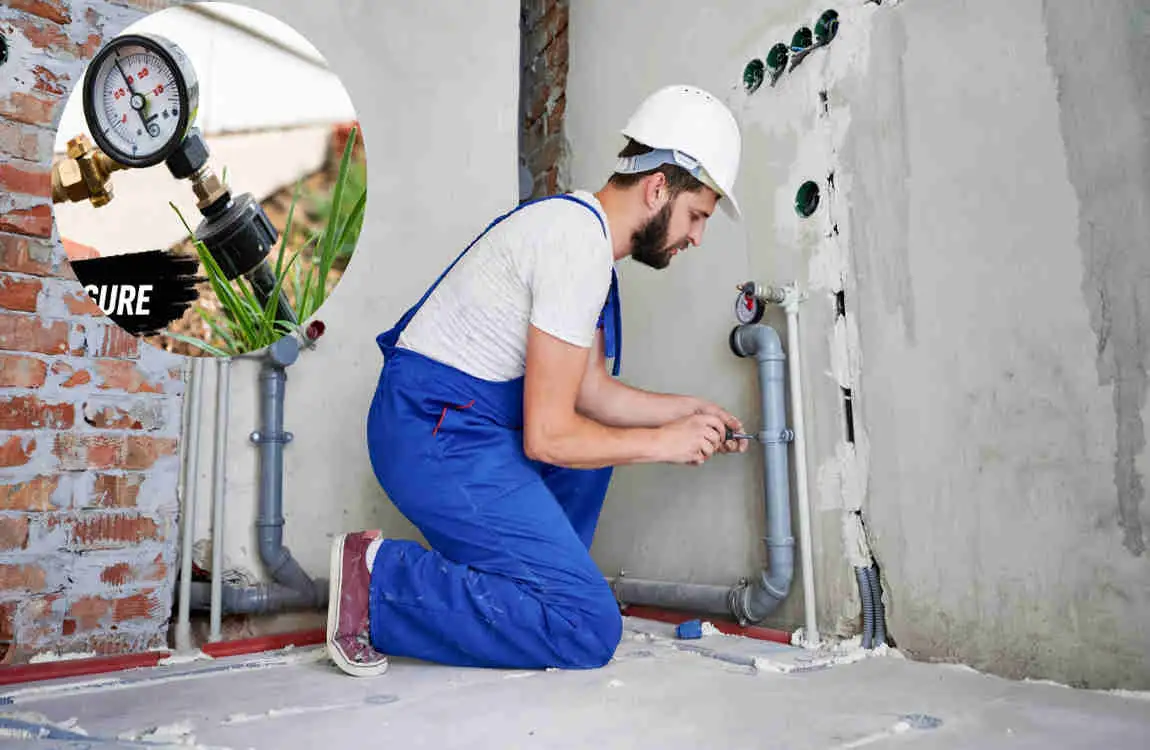
Wall Pipe Leaks
Pipes running through your walls are just as tricky. When they leak, you might not notice until stains appear. The static test catches these before they soak your drywall and framing.
Loose Plumbing Connections
Over time, joints and fittings can loosen. Even a slightly loose connection lets water escape. The test reveals these weak points so you can tighten or replace them.
Damaged Water Lines
Cracks, corrosion, and wear can damage your water lines. If pressure keeps dropping, it may mean a line is compromised and needs attention.
Faulty Valves
Valves control the flow of water throughout your home. When they fail or leak, the whole system suffers. A static test can help identify a faulty valve that’s letting pressure slip away.
When Should You Perform a Static Plumbing Test?
Timing matters. There are certain moments when running this test makes especially good sense. Let’s go through them.
Before Buying a Home
If you’re purchasing a property, you want to know exactly what you’re getting. A static test during inspection reveals hidden plumbing problems, so you don’t inherit costly surprises after moving in.
After Major Plumbing Repairs
Whenever a plumber replaces pipes or does major work, a static test confirms everything is sealed correctly. It’s the perfect way to double-check that the repair holds.
During Home Renovations
Remodeling often disturbs existing plumbing. Testing during a renovation ensures your updated system is leak-free before you close up the walls again.
If Water Bills Suddenly Increase
A mysterious jump in your water bill often points to a hidden leak. A static test helps you find the source instead of paying for water you never use.
When Low Water Pressure Appears
If your faucets suddenly feel weak, a leak might be stealing your pressure. Testing can uncover the problem and get your water flowing strong again.
Signs Your Home May Need a Static Plumbing Test
Sometimes your home drops hints that something isn’t right. Pay attention to these warning signs, and consider scheduling a test if you spot any of them:
- Wet spots on floors that appear for no clear reason
- Mold or mildew growing in unexpected places
- Water stains on ceilings or walls
- Unexplained high water bills that keep climbing
- Low water pressure throughout the house
- Running water sounds inside walls when no taps are open
If you notice one or more of these, don’t wait. These clues often mean water is escaping somewhere you can’t see, and a static test can confirm it.
Benefits of a Static Plumbing Test
Let’s summarize the key advantages in a quick, easy-to-scan table. This way, you can see at a glance why this test is worth it.
Benefit Why It Matters
Leak Detection Finds hidden leaks early
Lower Repair Costs Prevents expensive damage
Water Conservation Reduces water waste
Better Home Value Confirms plumbing condition
Peace of Mind Ensures system integrity
As you can see, the benefits stack up nicely. From saving money to protecting your property’s value, a static test delivers real, lasting value for a modest investment.
How Long Does a Static Plumbing Test Take?
One of the first things people ask is how much time this test will eat up. The good news is that it’s usually quick.
Typical Testing Time
Most static tests take anywhere from 30 minutes to a couple of hours. The plumber needs enough time to seal the system, build pressure, and monitor the gauge long enough to catch any slow leaks.
Factors That Affect Duration
Several things can make the test longer or shorter:
- Home size – Bigger homes with more plumbing take more time.
- Plumbing layout – Complex or older systems may require extra care.
- Leak severity – If a leak shows up, the plumber may spend additional time locating it.
In most cases, though, you can expect the test to wrap up within an afternoon, making it easy to fit into your schedule.
How Much Does a Static Plumbing Test Cost?
Cost is always a big concern, so let’s talk numbers. Prices vary, but knowing the general range helps you plan.
Average Cost Range
Most homeowners pay somewhere between $150 and $500 for a static plumbing test. The exact figure depends on your specific situation and location. If the plumber needs to locate a leak after the test, that service may add to the total.
Factors Affecting Price
Here’s what influences the final cost:
- Property size – Larger homes cost more to test.
- Location – Prices differ by region and local labor rates.
- Plumbing complexity – Intricate systems require more work.
- Additional leak detection services – Pinpointing a discovered leak often costs extra.
While it’s an expense, remember that catching a leak early can save you far more than the price of the test. Think of it as a smart investment in your home.
Can You Perform a Static Plumbing Test Yourself?
You might be wondering if this is a job you can tackle on your own. The answer is: it depends. Let’s break it down.
DIY Testing
For handy homeowners, some basic pressure checks are possible. You can attach a simple pressure gauge to an outdoor spigot to get a rough sense of your system’s pressure.
However, keep safety considerations in mind. Over-pressurizing your pipes can cause damage, and improper sealing can give you false results. If you’re not confident, it’s better to leave it to the pros.
When to Hire a Professional
There are clear moments when calling an expert makes the most sense:
- Complex plumbing systems that need specialized knowledge
- Suspected hidden leaks that require accurate detection
- Real estate inspections where reliable results matter for a sale
A professional brings the right tools, experience, and know-how to test your system safely and accurately. For anything beyond a basic check, hiring a plumber is usually the smart move.
Tips to Keep Your Plumbing System in Good Condition
Beyond testing, a little regular care goes a long way toward keeping your pipes healthy. Try these simple habits:
- Inspect for leaks regularly by checking under sinks and around fixtures.
- Monitor water pressure and note any sudden changes.
- Replace aging pipes before they fail and cause damage.
- Fix dripping faucets promptly to avoid bigger problems.
- Schedule routine plumbing inspections to catch issues early.
Stick to these habits, and you’ll extend the life of your plumbing while avoiding many common headaches. Prevention truly is the best strategy.
Common Mistakes Homeowners Make
Even well-meaning homeowners slip up sometimes. Watch out for these frequent mistakes so you don’t fall into the same traps:
- Ignoring small leaks and assuming they’ll go away on their own
- Delaying plumbing inspections until a minor issue becomes a major one
- Assuming high water bills are normal instead of investigating the cause
- Using incorrect pressure levels during testing, which can damage pipes or produce false readings
By steering clear of these errors, you’ll keep your plumbing in far better shape. When in doubt, ask a professional for guidance rather than guessing.
Frequently Asked Questions (FAQ)
What is a static test for home plumbing?
A static plumbing test checks whether your home’s plumbing system can hold water pressure without losing it, helping detect hidden leaks before they cause damage.
How accurate is a static plumbing test?
It is highly effective for identifying pressure loss that may indicate leaks or damaged pipes, making it one of the most reliable ways to check your system.
How often should a home plumbing system be tested?
A static test is recommended before buying a home, after major plumbing work, or whenever leak-related issues are suspected.
Can a static plumbing test find underground leaks?
Yes. A drop in pressure during the test can indicate underground or concealed pipe leaks that you’d never spot otherwise.
Does a static plumbing test damage pipes?
No. When performed correctly using proper pressure levels, the test is completely safe for residential plumbing systems.
Is a static plumbing test worth the cost?
Yes. Detecting hidden leaks early can prevent costly water damage, reduce repair expenses, and protect your home’s plumbing system for years to come.
| Aspect | Details |
|---|---|
| What Is a Static Test? | A plumbing test that checks whether pipes can hold water or air pressure without leaking. |
| Main Purpose | Detects hidden leaks before they cause water damage or costly repairs. |
| How It Works | The plumbing system is sealed and pressurized. If the pressure drops, it usually indicates a leak. |
| When It’s Used | During new construction, renovations, plumbing repairs, or before purchasing a home. |
| Key Benefits | Prevents water damage, saves money on future repairs, improves plumbing reliability, and ensures code compliance. |
| Signs You May Need One | Unexplained high water bills, damp walls, low water pressure, or suspected hidden leaks. |
| Who Performs the Test? | Licensed plumbers or building inspectors using specialized pressure-testing equipment. |
| Test Duration | Typically takes 30 minutes to 2 hours, depending on the size of the plumbing system. |
| Potential Issues Found | Pipe leaks, faulty fittings, cracked pipes, loose connections, and damaged valves. |
| Why It Matters | A successful static test confirms your plumbing system is leak-free, helping protect your home from expensive water damage and extending the lifespan of your plumbing. |