Installing shower plumbing means setting up the water supply, drain system, and shower valve so your shower works safely and smoothly. If you are planning a bathroom project, learning how to install house plumbing for a shower can help you understand the work before you begin.
Good plumbing is important because it affects water pressure, temperature control, and leak prevention. When the pipes are installed the right way, your shower lasts longer and causes fewer problems later. It also helps you avoid costly repairs after the walls are closed.
If you take your time, measure carefully, and test everything before finishing the wall, the job becomes much easier. Let’s go step by step simply.
Understanding Shower Plumbing Basics
How a Shower Plumbing System Works
A shower plumbing system has a few main parts that work together.
- Water supply lines bring hot and cold water to the shower.
- The drain system carries used water away.
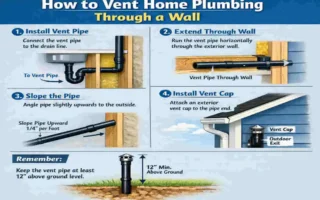
- The vent pipe helps water flow out properly.
- Mixing valve blends hot and cold water to control the shower temperature.
When these parts are installed correctly, the shower runs smoothly and safely.
Parts Needed for Shower Plumbing
You will usually need these parts:
- Hot water pipe
- Cold water pipe
- Shower valve
- Shower head
- Drain assembly
- P-trap
- Pipe fittings
Each part has a simple job. The pipes bring water in, and the drain system takes water out.
Tools and Materials You’ll Need
Essential Tools
Before you start, gather the right tools. This makes the work faster and cleaner.
- Pipe cutter
- Adjustable wrench
- Measuring tape
- Level
- Drill
- Torch for copper pipes
Materials
You also need the right plumbing materials.
- PVC or PEX pipe
- Pipe connectors
- Shower valve
- Drain kit
- Waterproof sealant
- Pipe straps
If you prepare everything first, you will not have to stop halfway through the job.
How to Install House Plumbing for Shower
Plan the Plumbing Layout
Start by deciding where the shower valve, shower head, and drain will go. Measure carefully so the pipes line up with the wall and floor space. A clear layout helps you avoid mistakes later.
Turn Off the Main Water Supply
Before touching any pipes, turn off the main water supply. Open a faucet to release leftover water in the lines. This keeps the work area safe and dry.
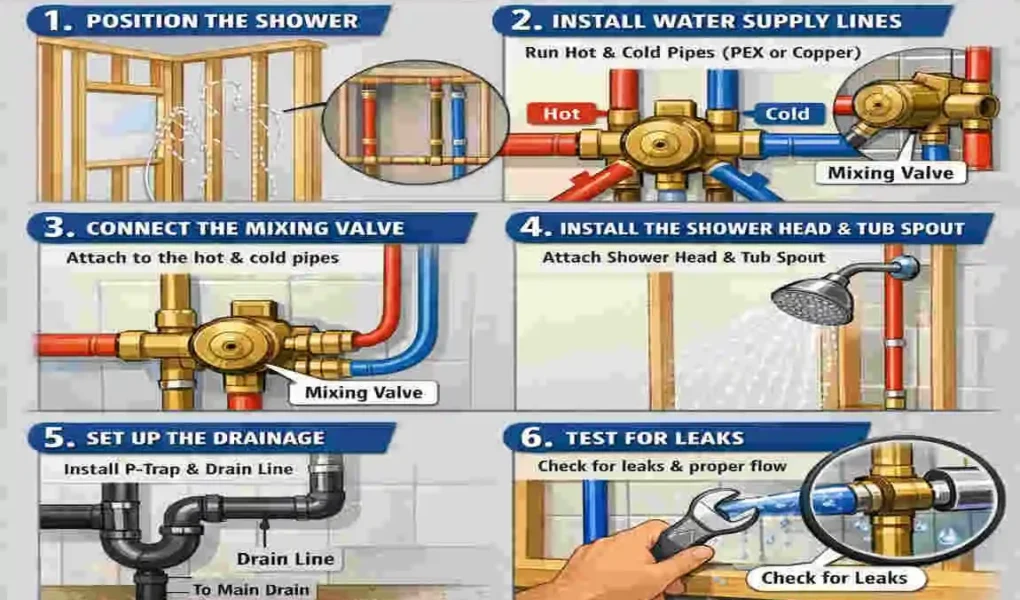
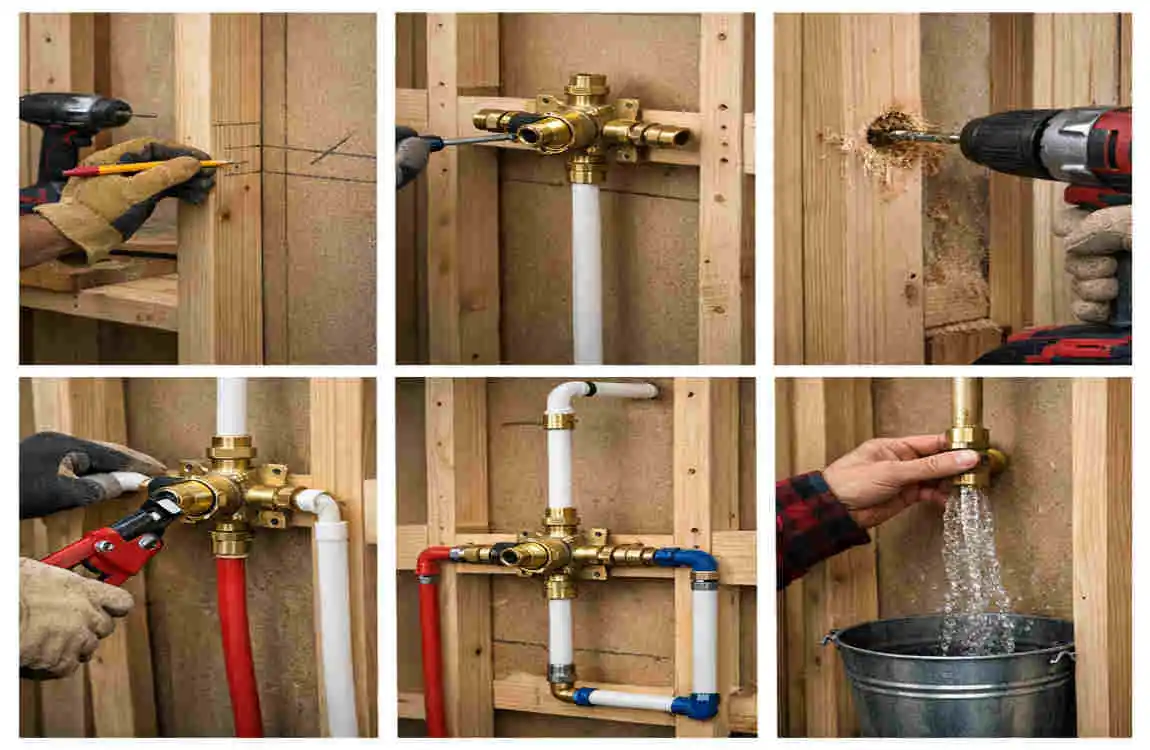
Install Hot and Cold Water Supply Lines
Run the hot and cold water lines to the shower area. Keep them straight, secure, and properly spaced. Make sure each line goes to the correct side of the valve.
Install the Shower Mixing Valve
Mount the shower valve inside the wall where it is easy to reach from the front. This valve controls the water temperature, so place it at a comfortable height. Check the valve direction carefully before fixing it in place.
Connect the Shower Head Pipe
Install the pipe that goes from the valve up to the shower head. This is often called the shower arm pipe. Make sure it is firmly attached and level so the shower head sits properly.
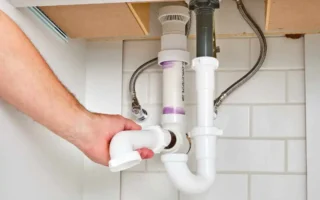
Install the Shower Drain and P-Trap
Next, install the drain assembly on the shower floor or base. Below that, connect the P-trap, which stops sewer smells from coming back into the bathroom. This part is very important for clean and safe drainage.
Connect the Drain to the Main Waste Line
Attach the shower drain line to the main waste line. Make sure the pipe slope is correct so water flows out easily. If the slope is wrong, water may sit in the pipe and cause problems.
Secure the Pipes
Use pipe straps or supports to hold the pipes in place. Loose pipes can move, leak, or make noise. A secure setup gives you better long-term results.
Test for Water Leaks
Turn the water back on and check every connection. Look closely for drips around the valve, pipes, and drain. Testing now is much easier than fixing leaks after the wall is closed.
Finish the Wall and Install Fixtures
Once everything works well, close the wall with drywall, tile backer, or another wall finish. After that, install the shower head, trim, and any final fixtures. At this point, your shower is ready for use.
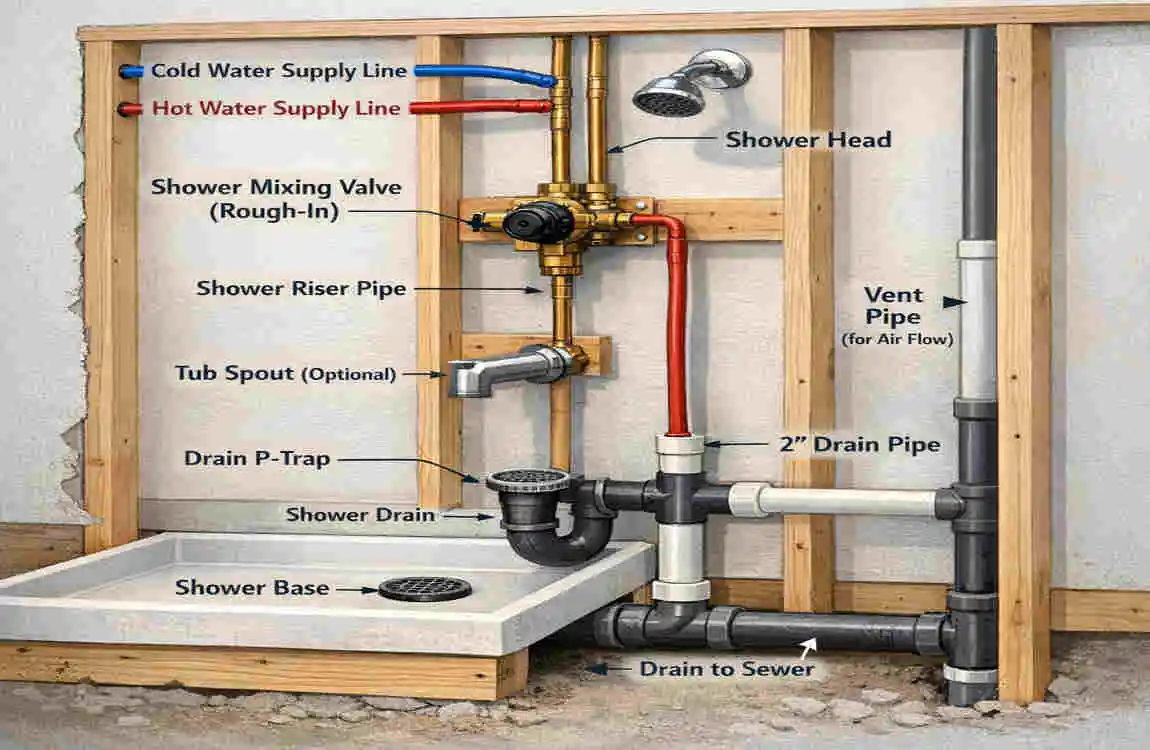
Typical Shower Plumbing Layout
ComponentPurpose
Hot Water Line Supplies hot water
Cold Water Line Supplies cold water
Mixing Valve Controls water temperature
Shower Arm Connects showerhead
Drain Removes wastewater
P-Trap Prevents sewer gases
Vent Pipe Maintains proper drainage
This layout helps you understand how each part supports the shower system.
Common Mistakes to Avoid
A few simple mistakes can cause big problems later.
- Incorrect pipe slope
- Loose pipe connections
- Installing the valve backward
- Forgetting waterproof seals
- Ignoring local plumbing codes
- Not pressure-testing the system
If you avoid these errors, your shower plumbing will be much more reliable.
Safety Tips
Safety should always come first during any plumbing project.
- Shut off the water before starting.
- Wear safety glasses and gloves.
- Measure pipes carefully.
- Follow manufacturer instructions.
- Check local building codes.
- Test the system before closing walls.
These steps help protect both you and your home.
DIY vs Hiring a Professional
DIY Installation
Pros
- Saves money
- Gives you useful hands-on experience
Cons
- Needs basic plumbing knowledge
- Small mistakes can lead to leaks
Professional Installation
Pros
- Usually code-compliant
- Faster and cleaner work
- Often includes labor warranty
Cons
- Costs more upfront
If your project is simple and you feel confident, DIY may work well. If the job is complex, hiring a plumber is often the safer choice.
Maintenance Tips After Installation
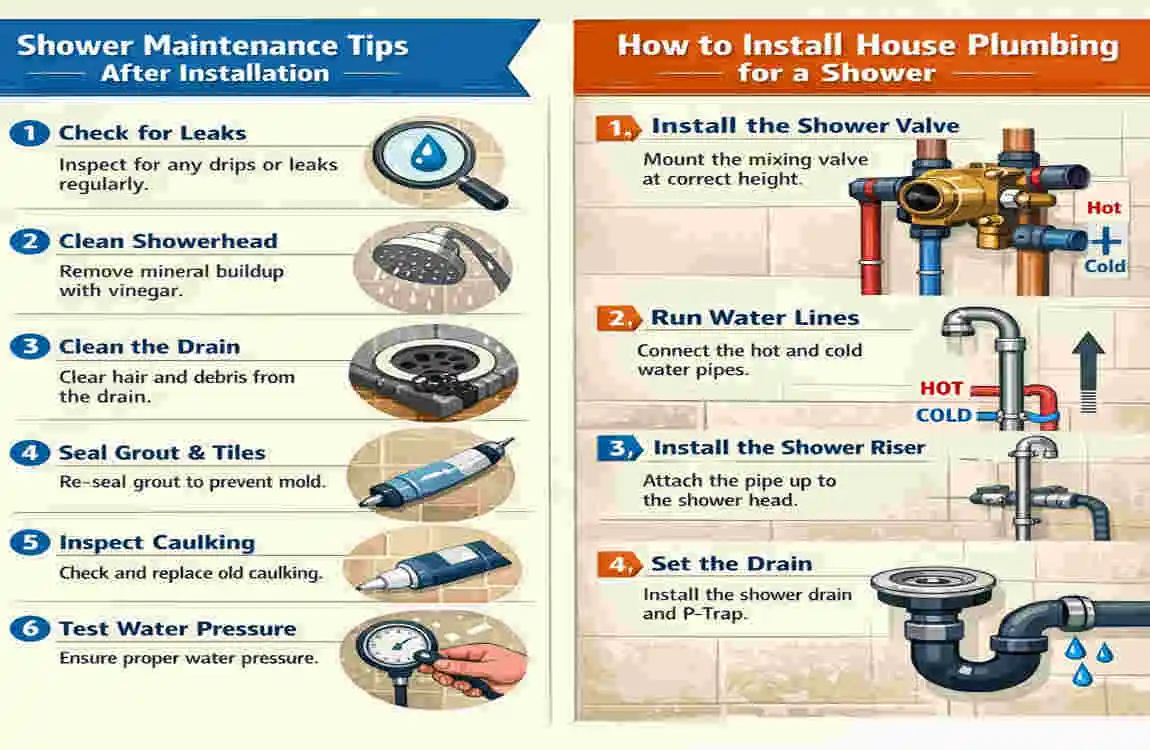
A shower plumbing system needs regular care to stay in good shape.
- Inspect pipes for leaks regularly.
- Clean the shower drain monthly.
- Replace worn seals promptly.
- Check water pressure.
- Flush mineral buildup from the showerhead.
Small maintenance steps can help your shower last for many years.
Frequently Asked Questions
How do you install house plumbing for a shower?
You install the hot and cold water lines, mount the mixing valve, connect the showerhead pipe, install the drain and P-trap, secure all connections, and test for leaks before closing the wall.
What type of pipe is best for shower plumbing?
PEX is a popular choice because it is flexible, affordable, and easy to install. Copper is durable but needs soldering. PVC is often used for drain lines.
Can I install shower plumbing myself?
Yes, if you have basic plumbing skills, the right tools, and follow local plumbing codes. For more complex work, a licensed plumber is a better option.
How long does shower plumbing installation take?
A simple installation usually takes 4–8 hours. A larger remodel may take one to two days.
Should I test the plumbing before closing the wall?
Yes. Always pressure-test the water lines and check the drain for leaks before finishing the wall. This helps you avoid expensive repairs later.
| Step | What to Do | Key Tip |
|---|---|---|
| Plan the Layout | Mark the shower location and plumbing route. | Check local building codes before starting. |
| Shut Off Water | Turn off the home’s main water supply. | Open a faucet to drain remaining water. |
| Install Drain Pipe | Connect the shower drain to the home’s waste line. | Ensure the drain has the proper slope for drainage. |
| Run Water Supply Lines | Install hot and cold water pipes to the shower valve. | Use PEX, copper, or CPVC pipes as required. |
| Install Shower Valve | Secure the mixing valve between the supply lines. | Mount it at a comfortable height (about 48 inches). |
| 6Connect Shower Head Pipe | Attach the vertical pipe from the valve to the shower arm. | Make sure connections are leak-free. |
| Pressure Test | Turn the water back on and check for leaks. | Tighten fittings if any leaks appear. |
| Finish Installation | Install wall panels, trim kit, shower head, and handle. | Seal around fixtures with waterproof silicone. |